How to create an IPSEC VPN connection
The following HowTo describes how to configure an IPSEC VPN connection in the OpenStack Portal. Please note the Disclaimer and that security settings may vary from firewall to firewall and may change over time.
In order for the IPSEC VPN connection to work, it is important that the configuration on both sides is the same. The following description refers to the IPSEC VPN configuration in OpenStack. To do this, perform the following steps:
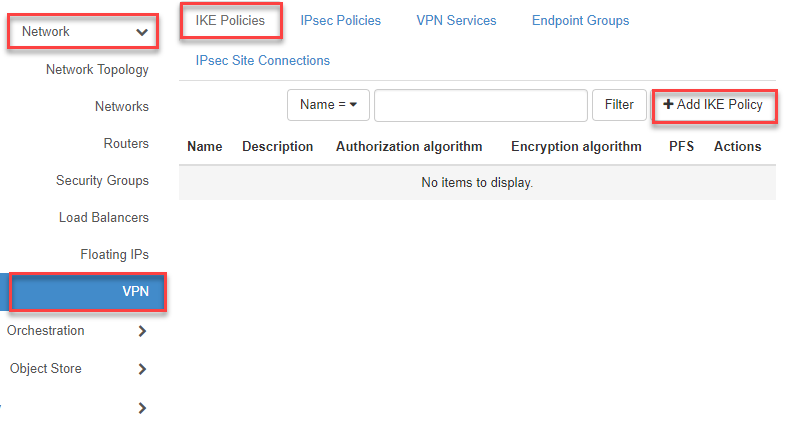
- Click on “Network Topology” in the navigation bar on the left
- Then click the “+Add IKE Policy” button at the top right
1.) Create IKE policy (Phase 1)
- Now enter the missing information in the input mask and click on “Add”
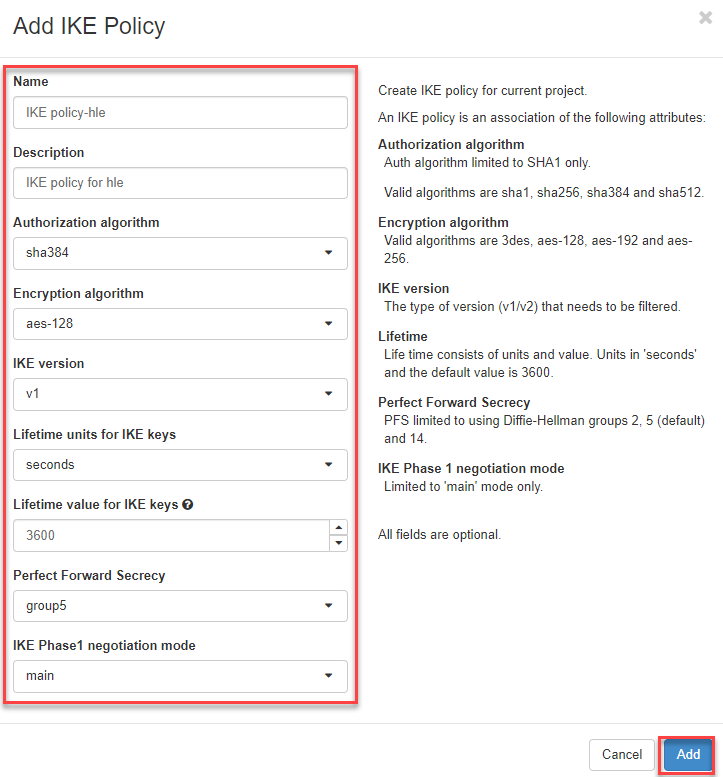
The IKE policy is then listed.

2.) Create IPsec policy (Phase 2)
- Now switch to the register “IPsec Policies” and click on the button “+Add IPsec Policy” in the upper right corner

- Now enter the information.
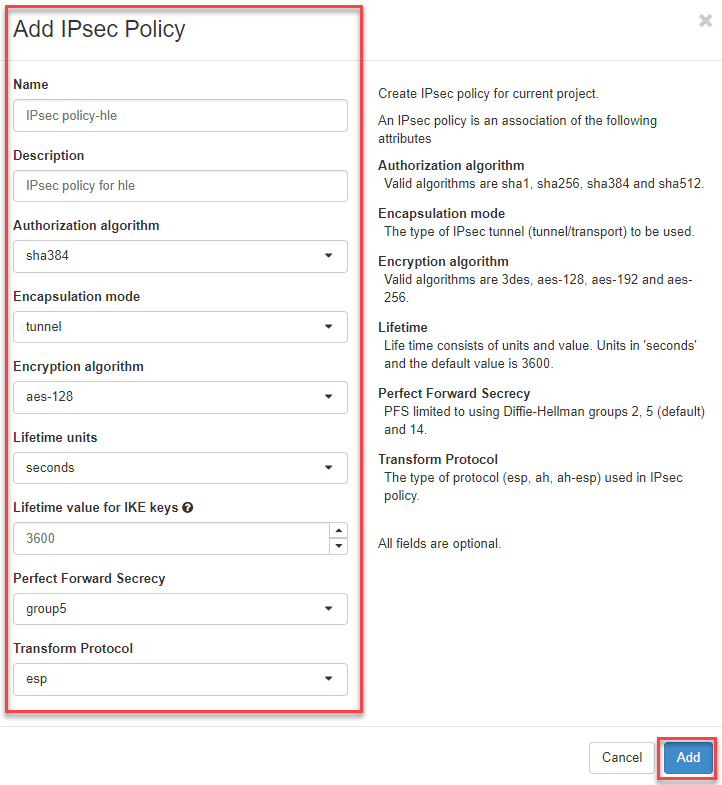
Note
Currently only the Transform Protocol “esp” and “ah” are supported.
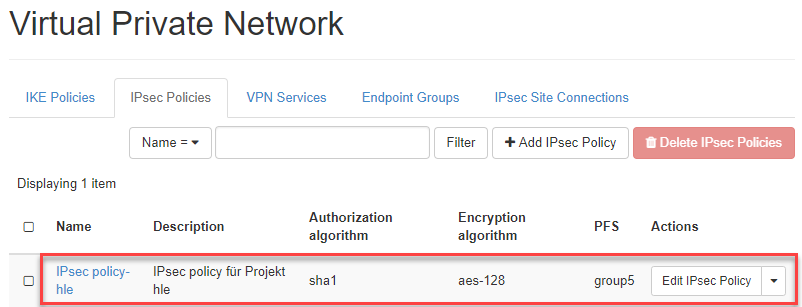
Then the IPsec policy is listed.
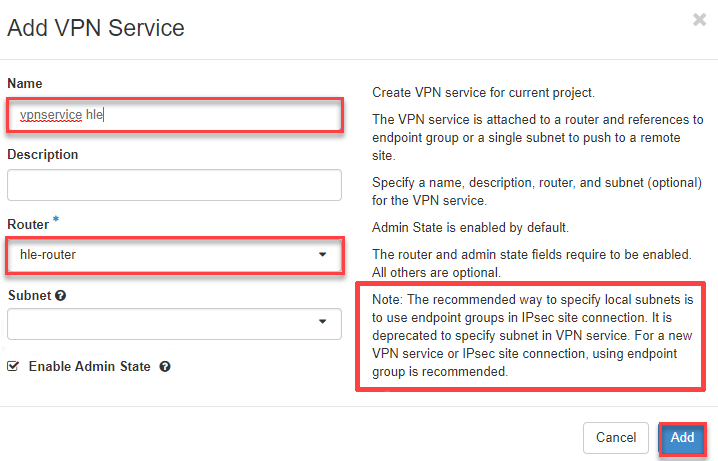
3.) Add VPN Service Here you enter the network information from the Openstack side (router and subnet).
Warning
By default, a maximum of one VPN service per virtual router is supported! However, multiple Ipsec Site Connections per virtual router are allowed as long as they use the same VPN Service.
- Now switch to the tab “VPN Service”, click on the button “+Add VPN Service” in the upper right corner
- Now enter the information and click on “Add”
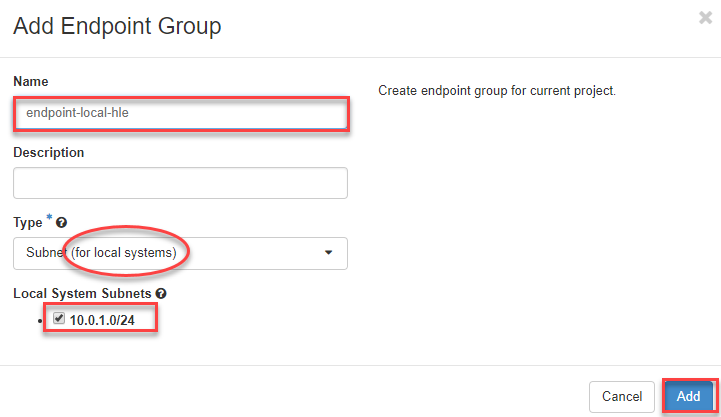
4.) Add Endpoint Groups
Enter the network information A) of OpenStack (Subnet for local systems) and B) of the “VPN remote” (CIDR and External System CIDRs).
- A) Add local Endpoint Group - Now switch to the tab “Endpoint Groups “, click on the button “+Add Endpoint Group “ in the upper right corner to create the Endpoint Group from A) OpenStack (Subnet for local systems).
- Now enter a name for the local endpoint
- Then select “Subnet (for local systems)” as type
- and use with the local subnet
- click connect to “Add”
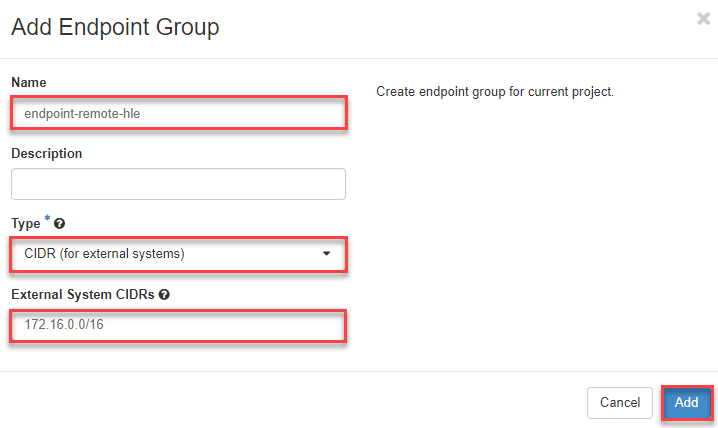
- B) Add remote Endpoint Group - Now switch to the tab “Endpoint Groups”, click on the button “+Add Endpoint Group” in the upper right corner to create the Endpoint Group of **B) VPN Remote.
- Now enter a name for the remote endpoint
- Then select “CIDR (for external Systems)” as type
- and enter the network of the remote station
- click connect to “Add”
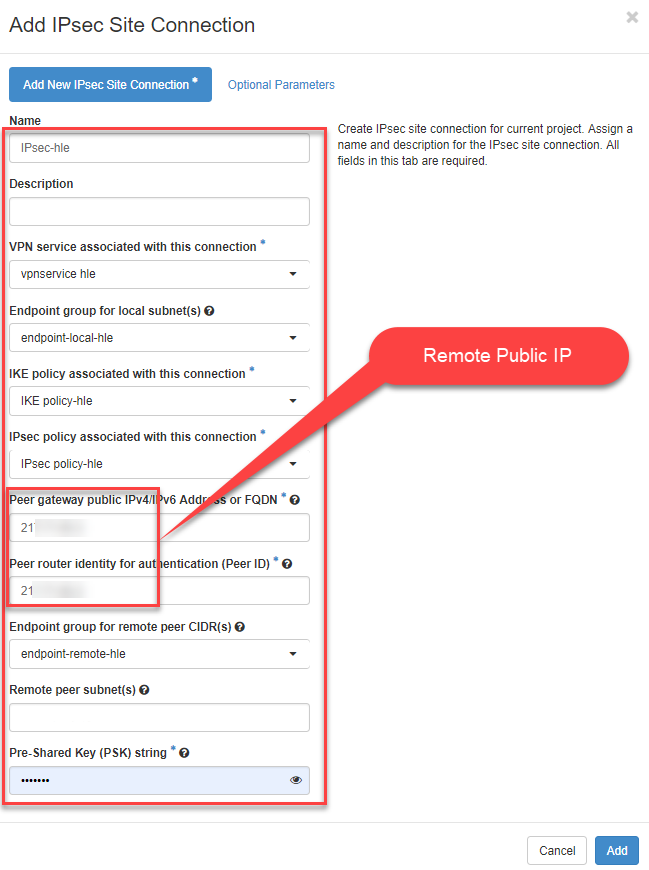
5.) Add IPsec Site-to-Site Connection Here come the final settings for the IPsec Site-to-Site connection.
Warning
By default, a maximum of one VPN service per virtual router is supported! However, multiple Ipsec Site Connections per virtual router are allowed as long as they use the same VPN Service.
- Now switch to the register “IPsec Site-to-Site Connections “, click on the button “+Add IPsec Site-to-Site Connection “ in the upper right corner
- Now enter the information or select the previously set parameter from the dropdown menus.
- click on “Add” afterwards
Then, if everything is configured correctly, the IPSEC VPN connection created is listed with the status “Activ” (IPSEC Tunnel comes up).

Note
If the settings are wrong, the status remains on pending until the negotiation (phase 1 and 2) matches the remote side. In this case, delete the Site Connection and recreate it with the correct parameters.