Setup virtual Datacenter
Table of Contents
This chapter describes the necessary steps to create a virtual router (VR) and private network and to make the most important firewall settings. It also describes how to deploy your first virtual server (VM) in the created network.
Setup Network Topology
Create Router (VR)
To access the Internet from a virtual server, a VR is always required, which establishes the connection between the private and public network.
To do this, perform the following steps:
- Click on Network => Network Topology in the navigation bar on the left
- Then click on the button +Create Router in the upper right corner
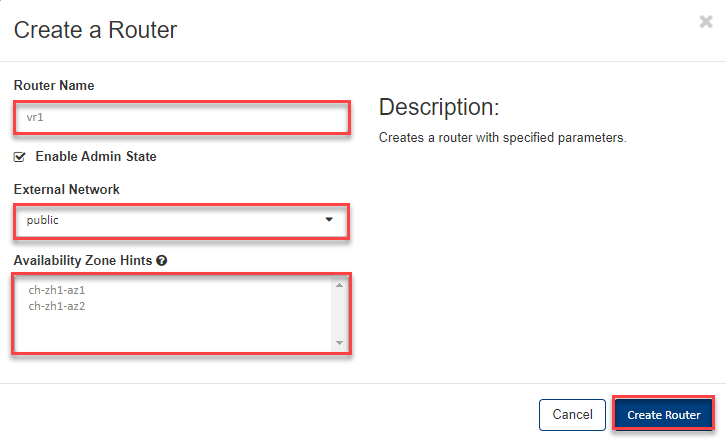
- In the input mask, enter a
- Router Name and
- select the external network “public”, then
- don’t select any Availability Zone and click OK
Tip
By default, Virtual Routers (VR) are always deployed highly available, with a master and slave. If you do NOT select an Availibility ZONE, the master is deployed e.g. in AZ1 and the slave in AZ2. If required, you can also select a specific AZ, in which the master and slave are then deployed.
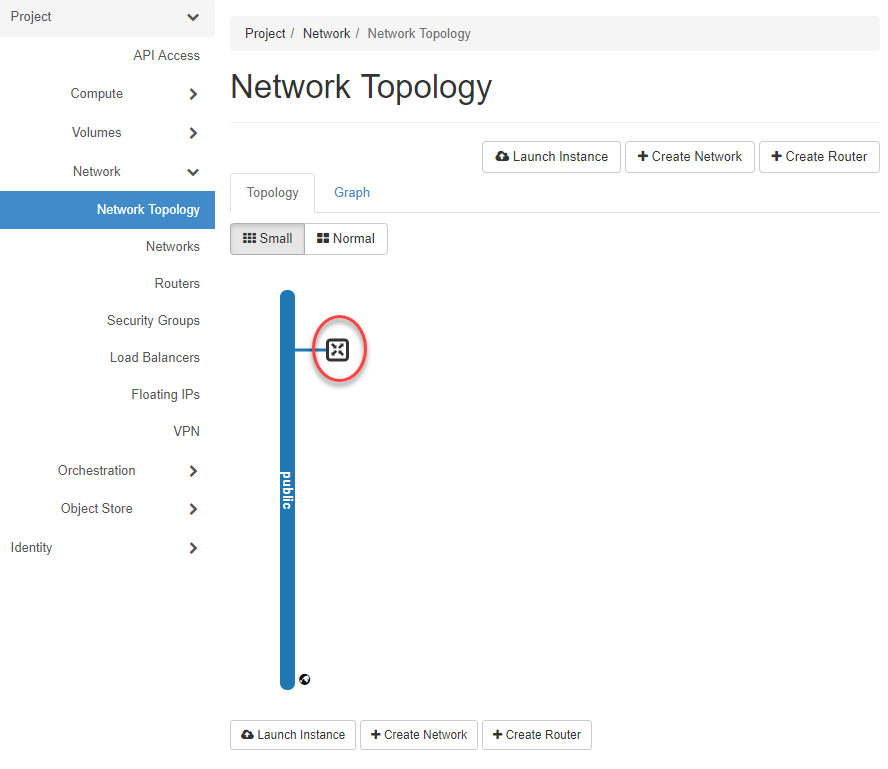
If you now click on “Network Topology” in the navigation after the VR has been created, you will see the following picture:
Create Network (Private / Public)
Next we create a private network (Private /24), in which we deploy the VM’s later.
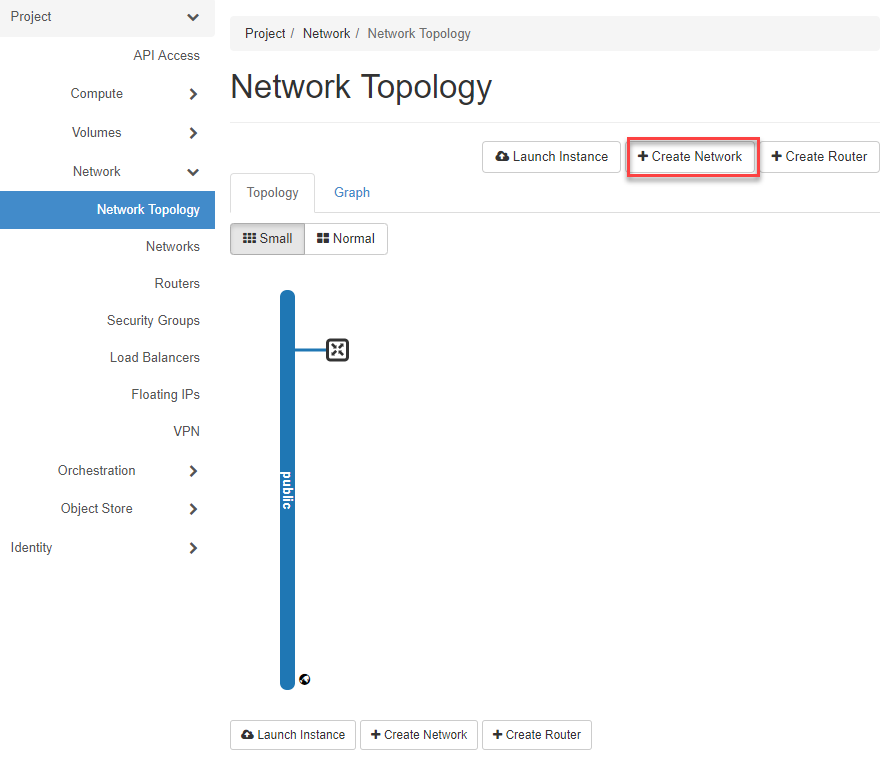
- Click on Network in the navigation bar on the left
- Then click on the button +Create Network in the upper right corner
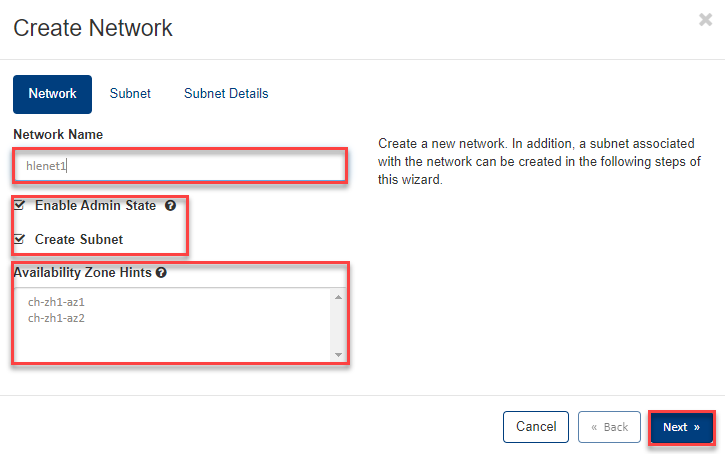
- Now enter the following in the first input mask Network:
- enter the desired Network Name
- Leave the two boxes “Enable Admin State” and “Create Subnet” checked.
- select no Availability Zone
- then click on Next
Tip
If you do NOT select an Availability ZONE, the network services such as DHCP and metadata are deployed in all Availability ZONES of a region by default. If required, you can also select only one specific AZ in which these services are then deployed.
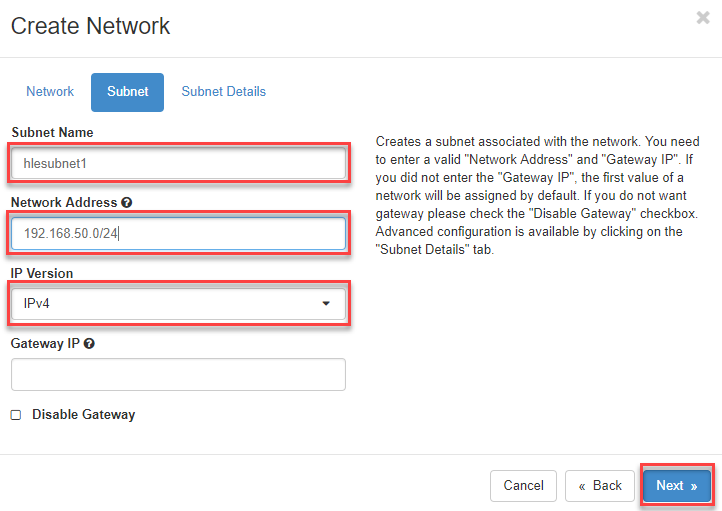
- Now enter the following in the Subnet input mask:
- enter the desired “Subnet Name”
- Valid Private network address enter for subnet
- select the IP version (IPv4 in our example)
- If you leave the “Gateway IP” field empty, the default GW of the subnet will be used (in our example 192.168.50.1). Click Next to continue.
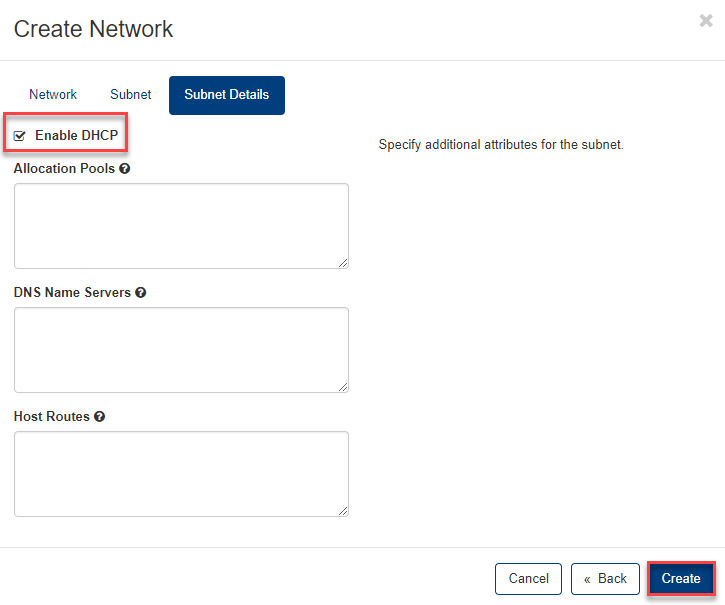
- Enter the following last in the Subnet Details input mask:
- Activate the checkbox “Enable DHCP”, so that your servers will automatically receive an IP address from the address range of the private network.
- In the field “Allocation Pools” you can optionally define or restrict the IP range used by DHCP. For further explanations please click on the question mark of the respective input field.
- In the field “DNS Name Servers” you enter the IP addresses of the preferred DNS servers. One entry per line.
- Optionally you could enter specific routes in the last field “Host Routes”, but for our example we leave it empty.
- Now click on Create to finish the process.
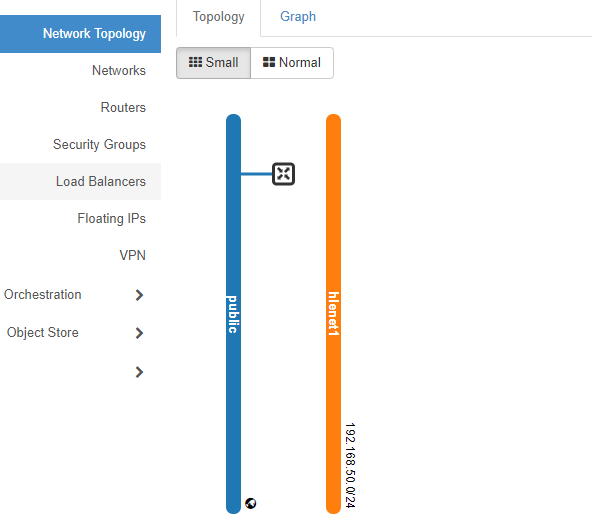
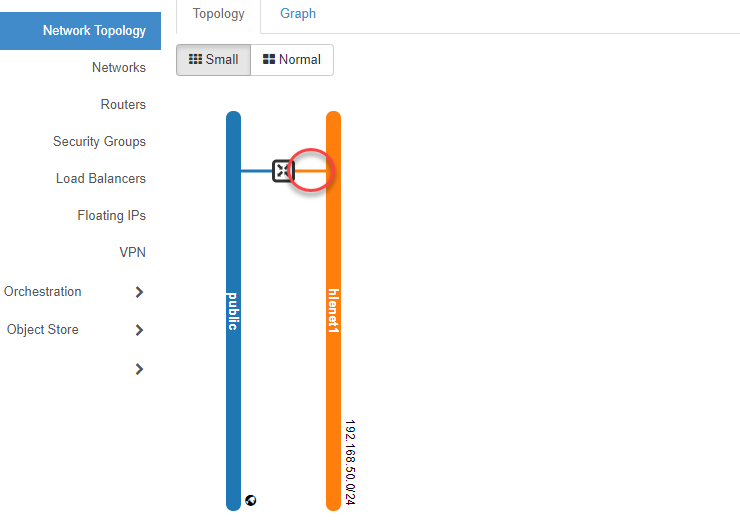
Now the Network is created and the Network Topology looks like this:
Connect Router to Network (Add Interface)
To establish the connection between the network and the router, move the mouse over the router symbol and click on +Add Interface.

- Then select your network (Subnet) and confirm with Submit.
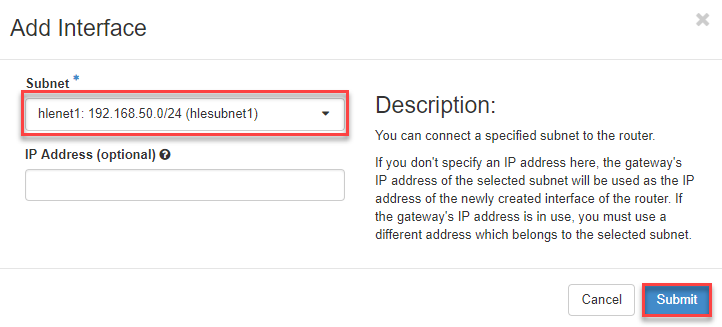
Now the network is connected to the router.
Now create a ssh-rsa key for later access to the VM if not already available in the next chapter, or click on this link Launch Instance to install (deploy) a VM.
Create ssh Key Pair
There are many ways to generate an “ssh-rsa key”. An easy way is to use the OpenStack portal, via the menu item “Compute > Key Pairs “. You can also import an existing key via this menu. When deploying a VM, you can then select this key in the “Launch Instance Wizard “ and use it to access your Linux VM.
Tip
We recommend that you import or create an “ssh-rsa key “ before deploying a VM.
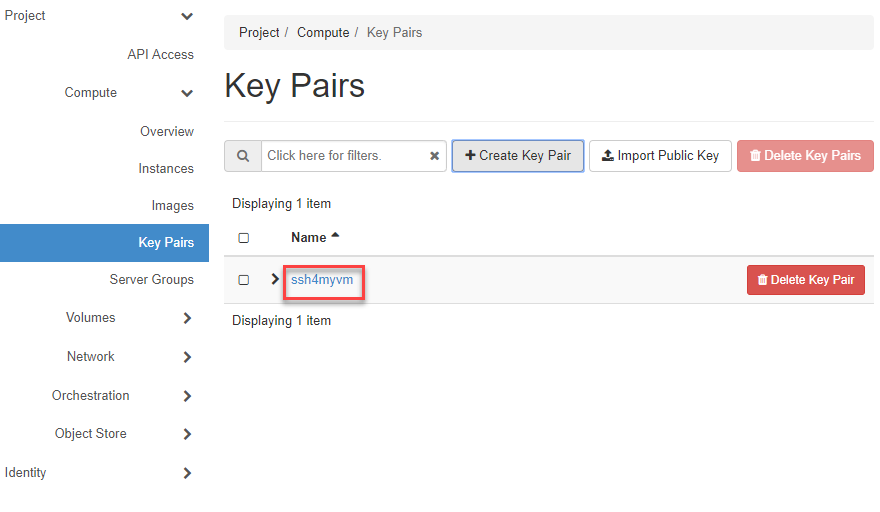
Change in the navigation to Compute => Key Pairs and click on +Create Key Pair.
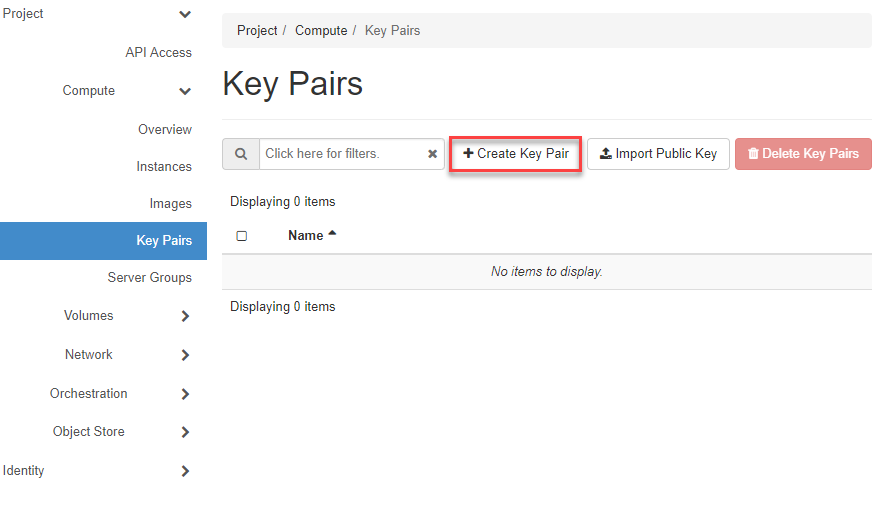
- Now enter a “name “ for the key pair.
- Then click on the button +Create Key Pair in the upper right corner
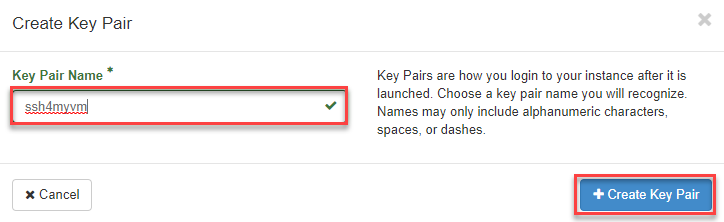
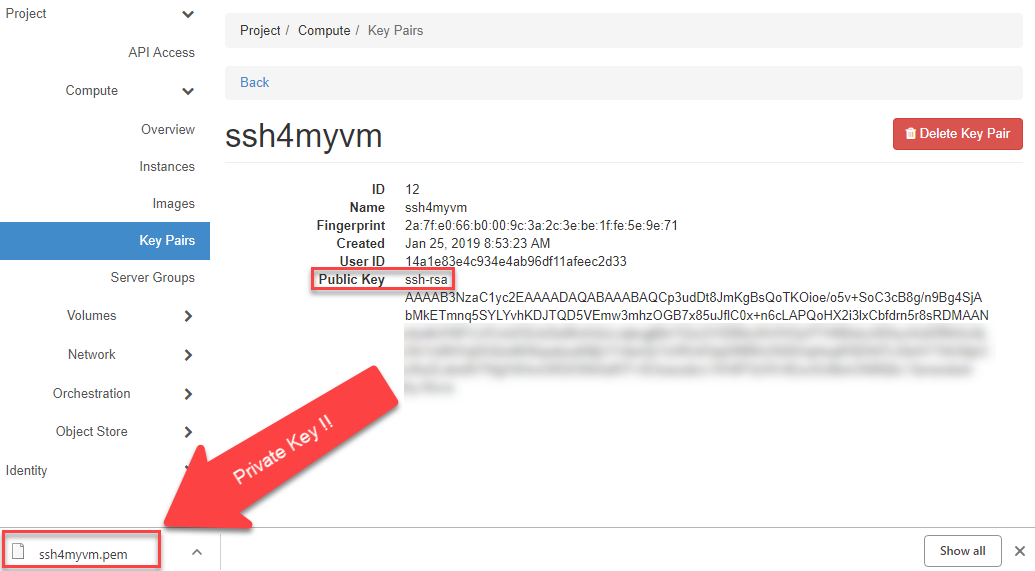
Now the Key Pair (Public & Private Key) is created, where you can view the Public Key by clicking on the Key Name.
Caution
The created Private Key is automatically downloaded in the browser. You should keep this secure, because it allows access to your VM without a password!
Note
The generated Private Key must be converted before it can be used in “Putty “ (see How to convert a PEM to a PPK file format).
Server Groups
Depending on the solution you want to build, it may be necessary to deploy certain VMs on the same or different HOSTs.
If you want to build a cluster with VMs, for example, it is crucial for high availability that the VMs are not all located on the same physical HOST. Otherwise, if this HOST fails, all VMs in the cluster would be affected! To control this, you can deploy instances (VM’s) using OpenStack Server Groups with an affinity or anti-affinity policy.
Important
A VM can only be assigned to a Server Group during deployment! This means that the server group must be created before deploying the VMs and selected when deploying the VM!
- guilabel:Affinity means that all instances in the group are installed on the same physical host
- Anti-Affinity means that all instances in the group will be installed on another physical host.
Note
Please use the Soft Affinity and Soft Anti Affinity policy, as this option still allows room for temporary migration and startup of a failed VM on the same HOSTS in case of a failure or maintenance, if no other free HOST is available at that time.
To create a Soft Anti Affinity Group, go to Compute => Server Groups and click on +Create Server Group.
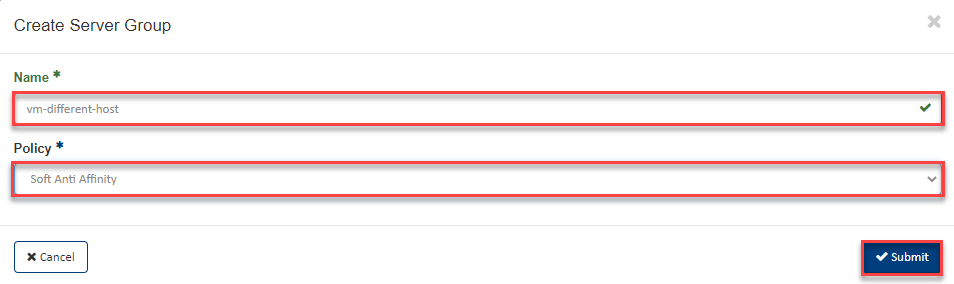
- Now enter a “name “ for the Server Group.
- then select the appropriate policy, for example Soft Anti Affinity
- then click on Submit.
You can now select this server group in the “Launch Instance Wizard “ in the Server Groups section (see Server Groups) during VM deployment.
Launch Instance
Requirements
In this section you will learn how to deploy one or more VM instances. You will be supported by the “Launch Instance Wizard “, in which you will be asked for the required information. You can also create the necessary prerequisites here and, for example, create a network or an SSH key for later access to the VM.
Tip
We recommend that you create a router with network (see Setup virtual Datacenter) and SSH Keys (see Create SSH Key Pair) in advance.
Important
Please note, a VM can only be assigned to a Server Group during deployment! This means that the server group must be created before deploying the VM’s and must be selected when deploying the VM!
Start Wizard
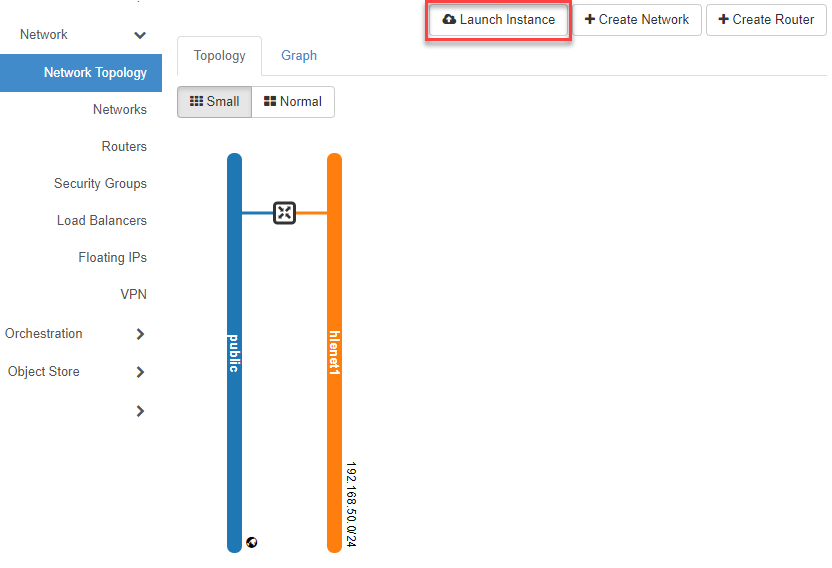
Now switch in the navigation to Network => Network Topology, click the Launch Instance button and enter the required information. With Next you get to the next input mask. As soon as all “mandatory information” has been entered, the Launch Instance button is activated (blue) and you can “launch” (deploy) the VM(s).
Details
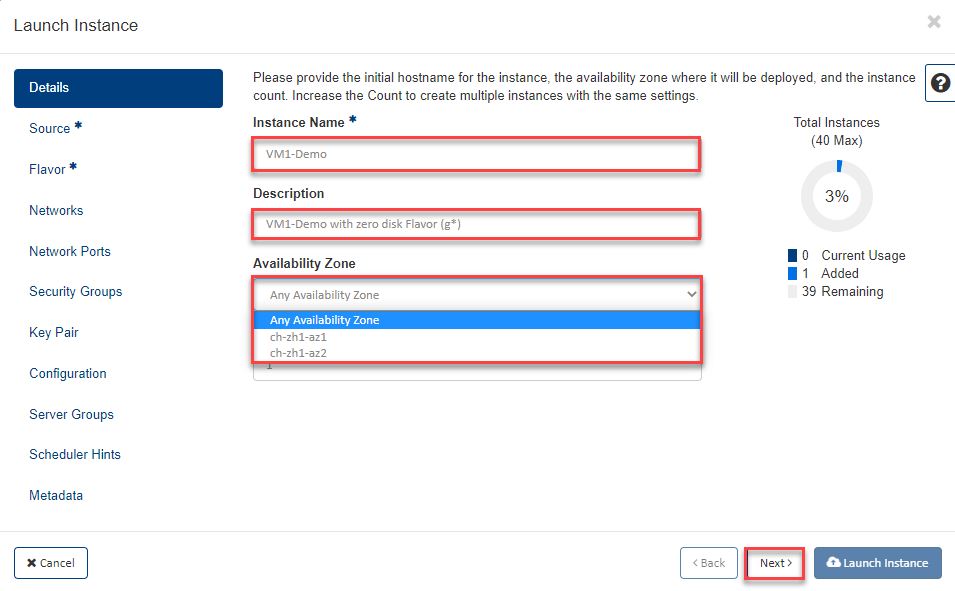
- Now enter the following in the first input mask “Details”:
- “Instance Name” - the name of the instance and, if applicable, a description in the “Description” field
- “Availability Zone” - select where the instance is to be deployed
- “Count “ - number of instances which should be deployed with the same settings
- now click on Next
Tip
By default, the VMs are deployed in any AZ of this region. If you want to deploy the VM in a specific AZ, then please select the corresponding Availibility ZONE. The VM cannot be moved to another AZ later!
Note
OpenStack offers several options for the choice of Boot Source, which must be taken into account in the Flavor step when selecting the Flavor Type.
The most common options are:
| Boot Source | Create New Volume | compatible flavor types | Comment |
| image | Yes | All “Zero-Disk” Flavor’s (g*) e.g. g1.2c4m, Total Disk = 0 | A new Boot Volume will be created, where you can specify the Size (GB) of it. |
| image | No | All “Standard” Flavors (e* & m*) e.g. e1.micro, Total Disk = 20GB | Flavor must have a Root Disk included see Flavor List Column “Root Disk” >0 GB |
See also
Differences between flavor types in table
Source
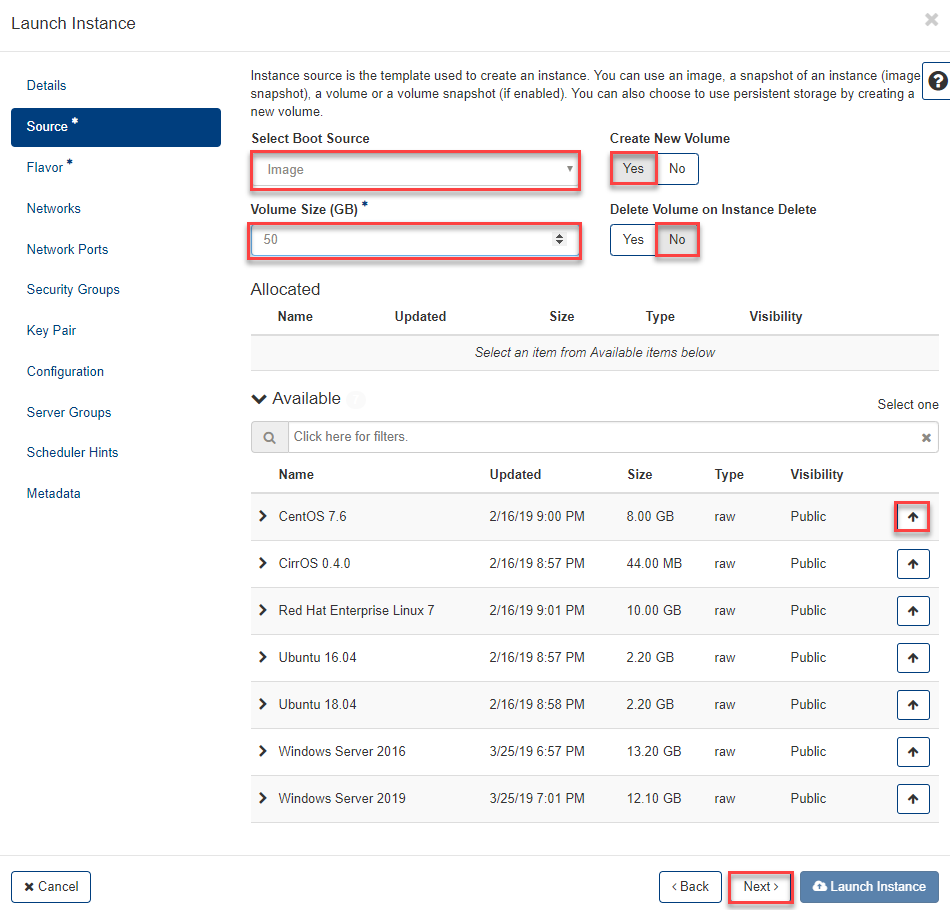
In the following example, a “zero-disk” flavor is used, creating a volume.
Now please select the image with the corresponding operating system.
- Now enter the following in the first input mask “Network”:
- “Select Boot Source”: “Image”
- “Create New Volume”: “Yes”
- “Volume Size GB”: please enter the desired size for your root volume
- “Delete Volume on Instance Delete “: “No “ Important [1]
- Select the desired “Image “ from the list with the arrow
- now click on Next
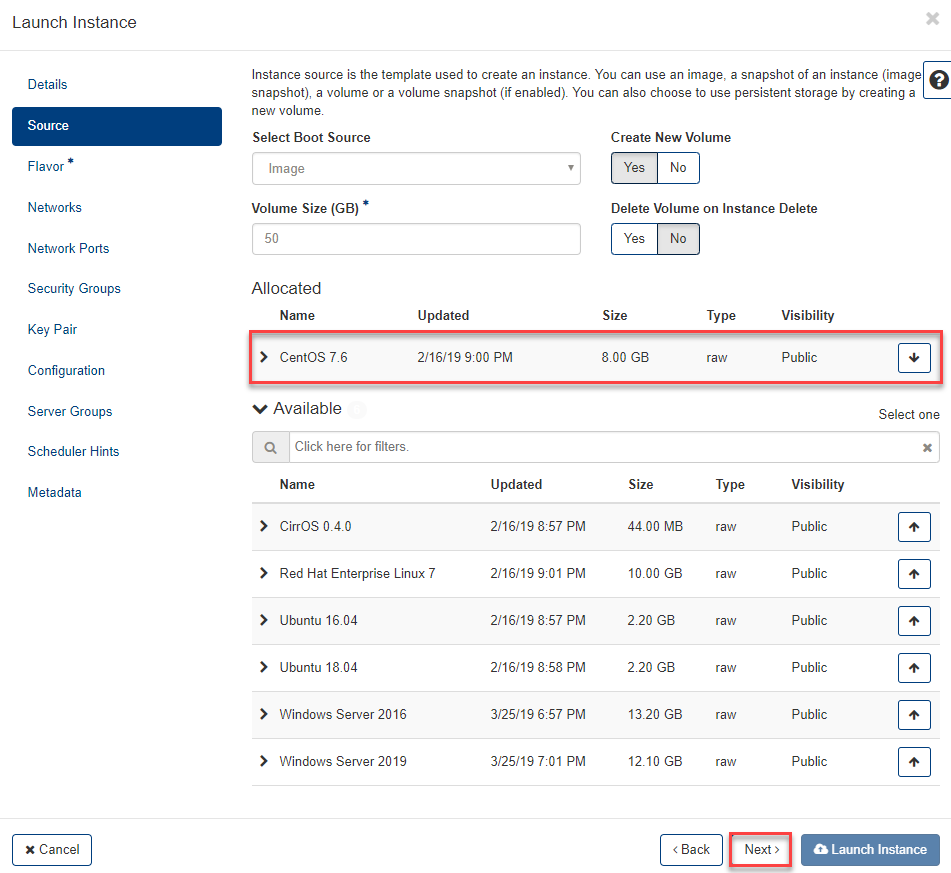
The selected image is displayed.
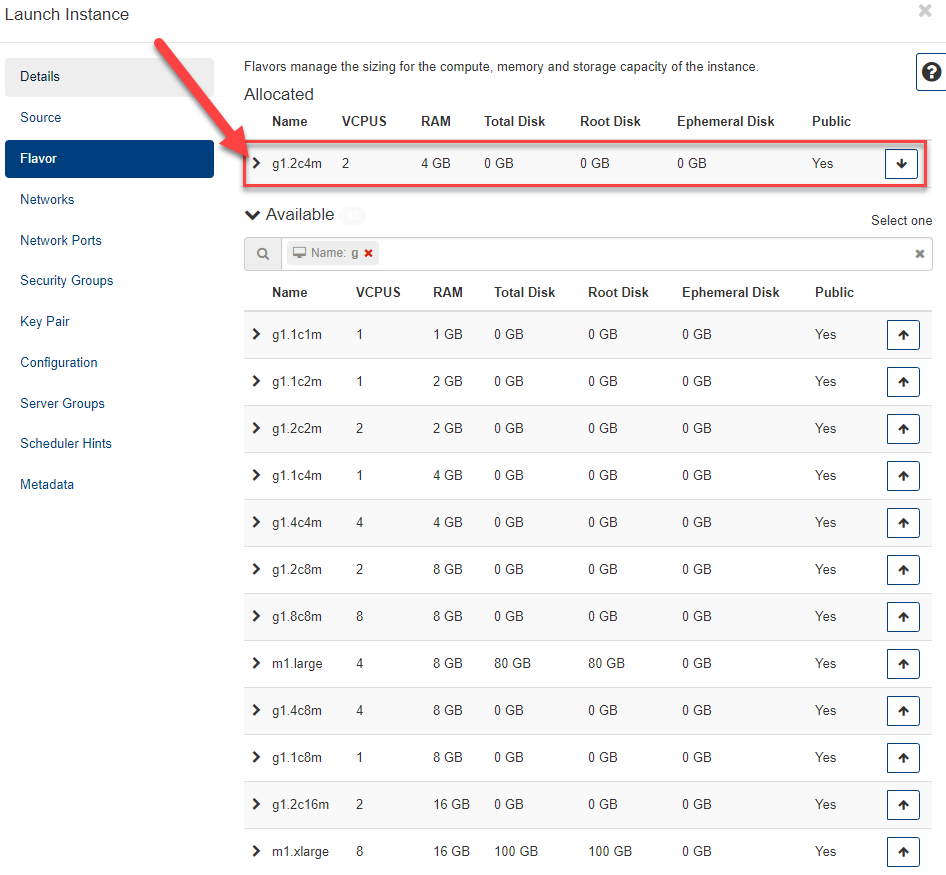
Flavor
- Next, select the appropriate (zero-disk) configuration (vCPU, RAM) for your VM in the Flavor input mask by selecting a Flavor:
- To display the list a little more clearly, you can use the filter
- to select click e.g. on the line g1.2c4m right the arrow upwards
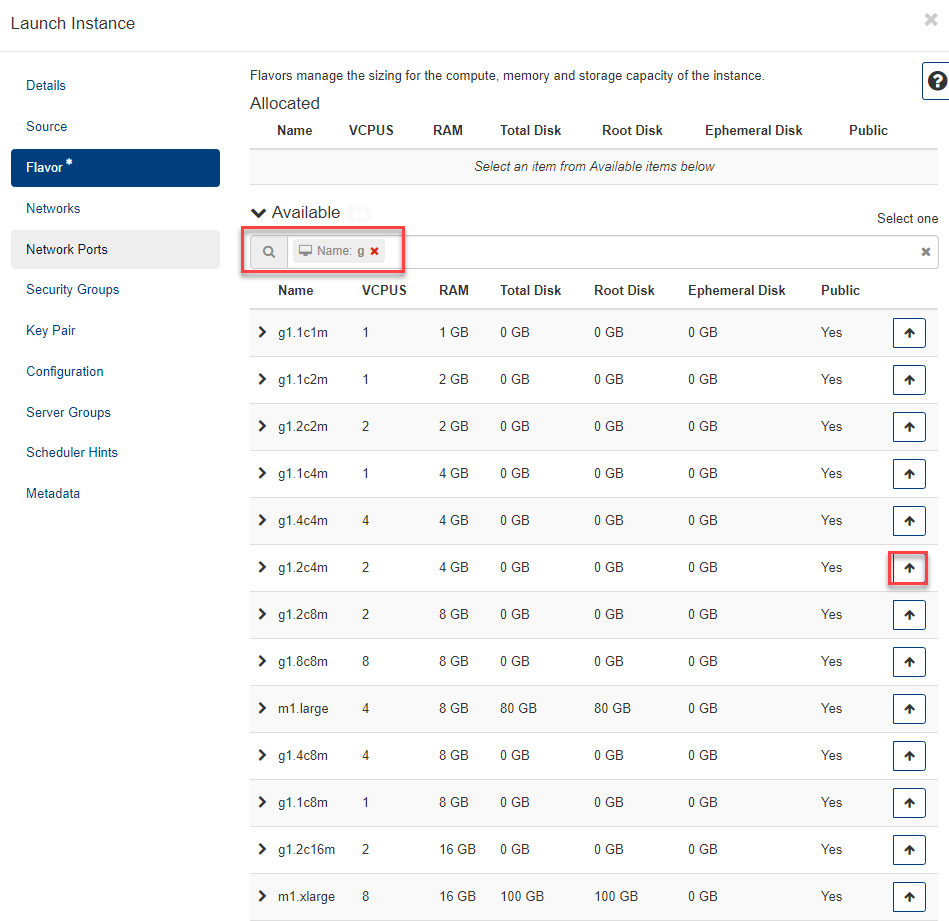
- now the selected flavor appears at the top of the Allocated section. With the down arrow you can undo the selection and choose another flavor.
- With the Flavor selected, all the necessary information for deploying the VM is already given and you can click Lauch Instance at the bottom of the window to complete the process.
- If you want to make additional settings, e.g. create or select a SSH Key Pair then click directly on this point in the navigation, or with Next to the desired input mask.
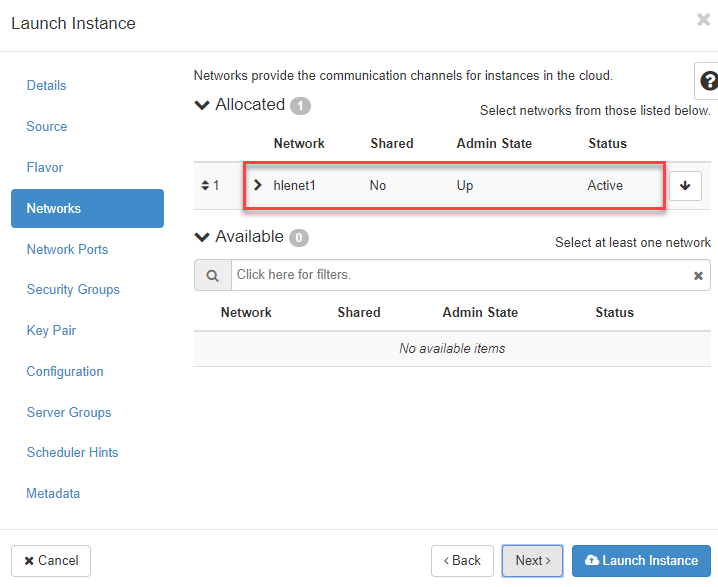
Networks
- If you had already created a network as recommended, it will be automatically selected here (Allocated). If you have multiple networks, please select the network to which your VM should be deployed.
- now click on Next
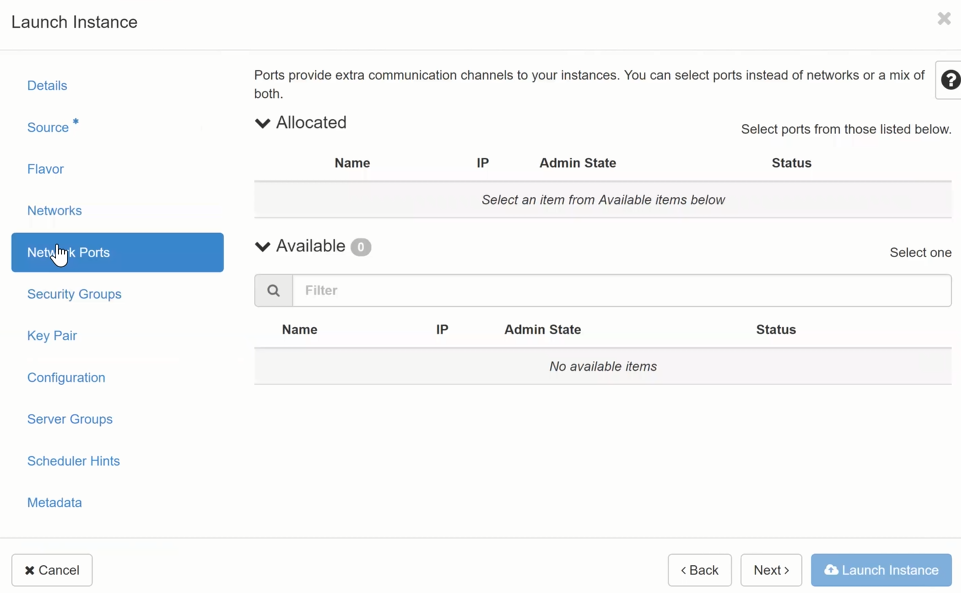
Network Ports
- Optionally, if previously created, you can connect your VM to ports here.
- now click on Next
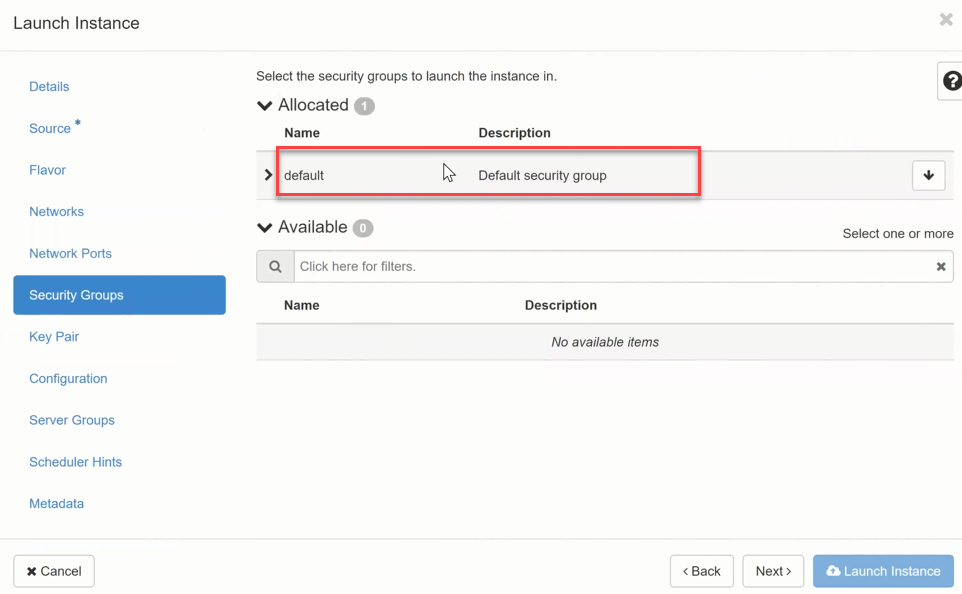
Security Groups
- By default, your VM is assigned to the “Default Security Group “. Optionally, you can assign your VM to a different security group here, if previously created. You can also change the Security Group later.
- now click on Next
Warning
Windows License KMS activation Ports - in the OpenStack Standard Secutity Group Default Security Group, the egress port to the KMS licensing server is open for Windows license activation to work! If you use your own Security Groups and use Windows Server, make sure that the egress to the domain oskms.ewcs.ch 217.20.195.145/32 port 1688 is allowed.
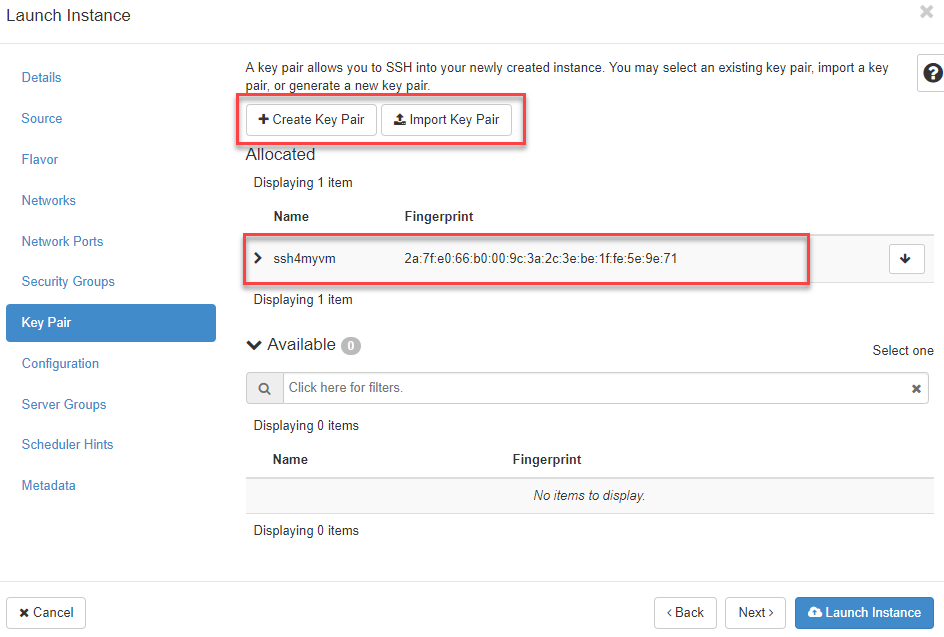
Key Pair
- If you had previously created an “ssh key pair”, you can select it here, import an existing key pair or create a new one. (see Create SSH Key Pair)
- now click on Next
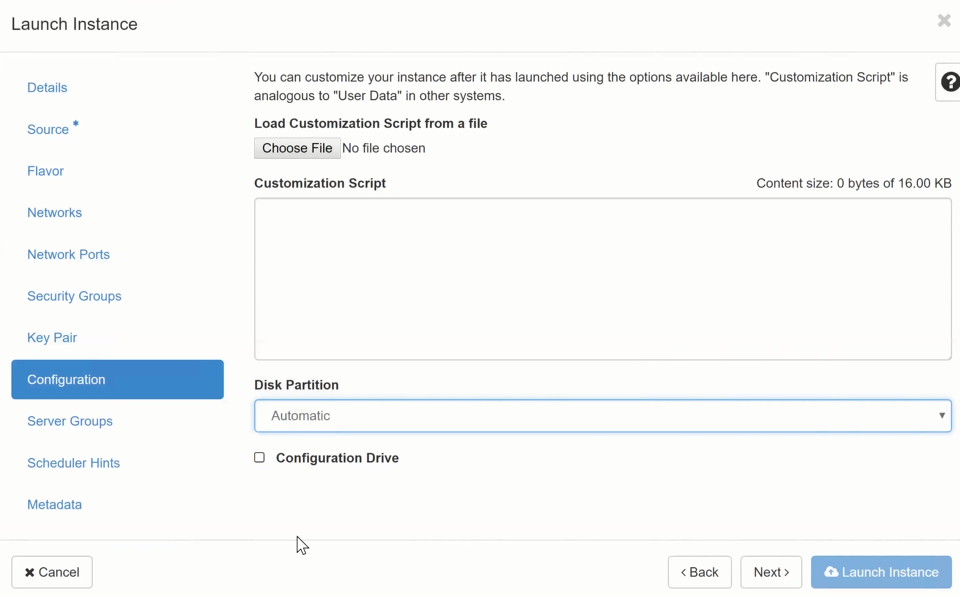
Configuration
- Optionally, they could store configurations here, which should be executed after the start of their VM. This requires a deep understanding of the system, which is not covered here.
- now click on Next
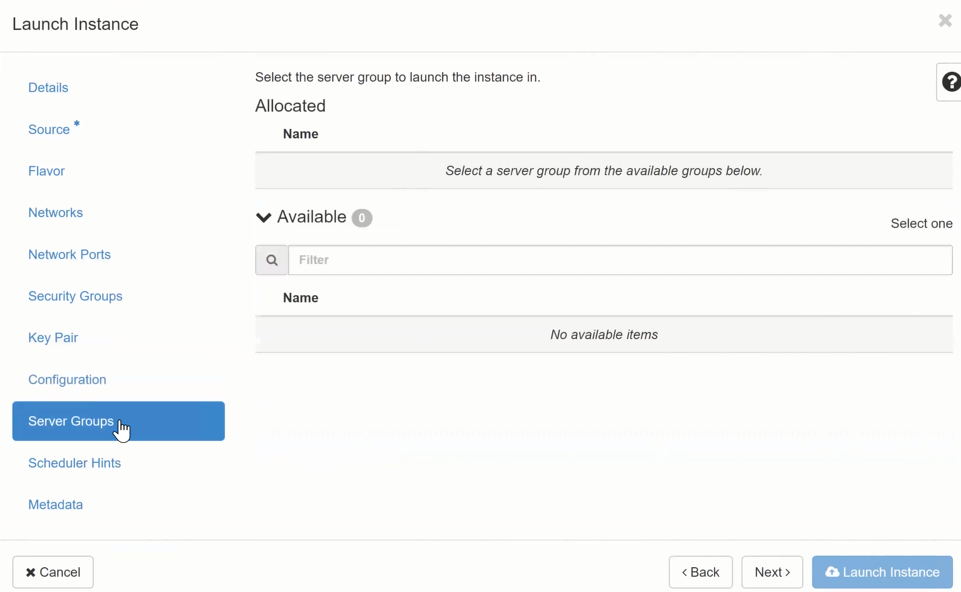
Server Groups
Optionally, you could assign your VM to a previously created “Server Group “ here, which can be helpful for larger installations. (see Server Groups).
- now click on Next
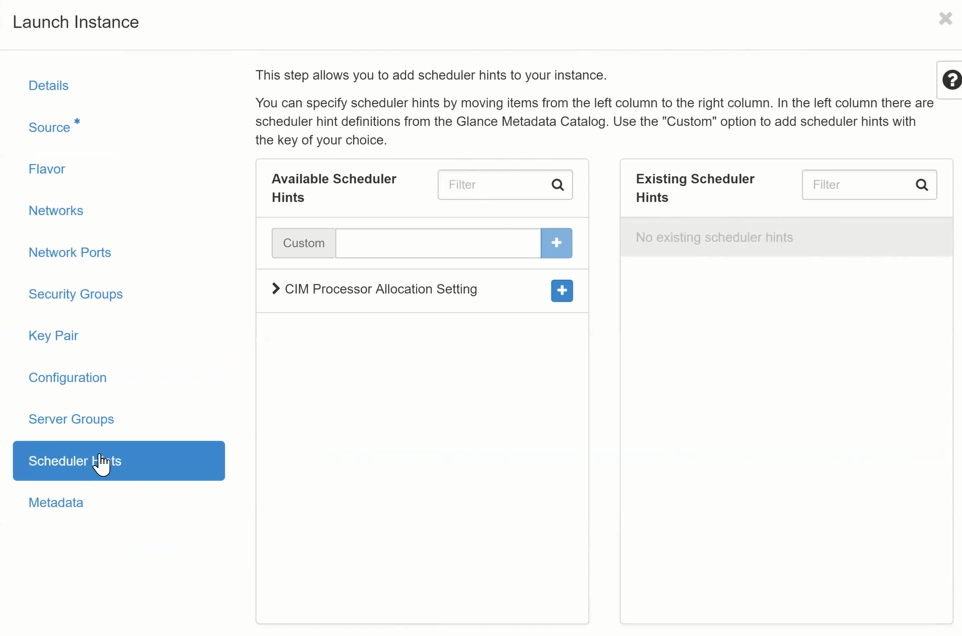
Scheduler Hints
- With this option the “scheduler process” which deploys the VM could be given additional “hints” (e.g. CPU type) which are taken into account if possible. This requires a deep understanding of the system, which is not covered here.
- now click on Next
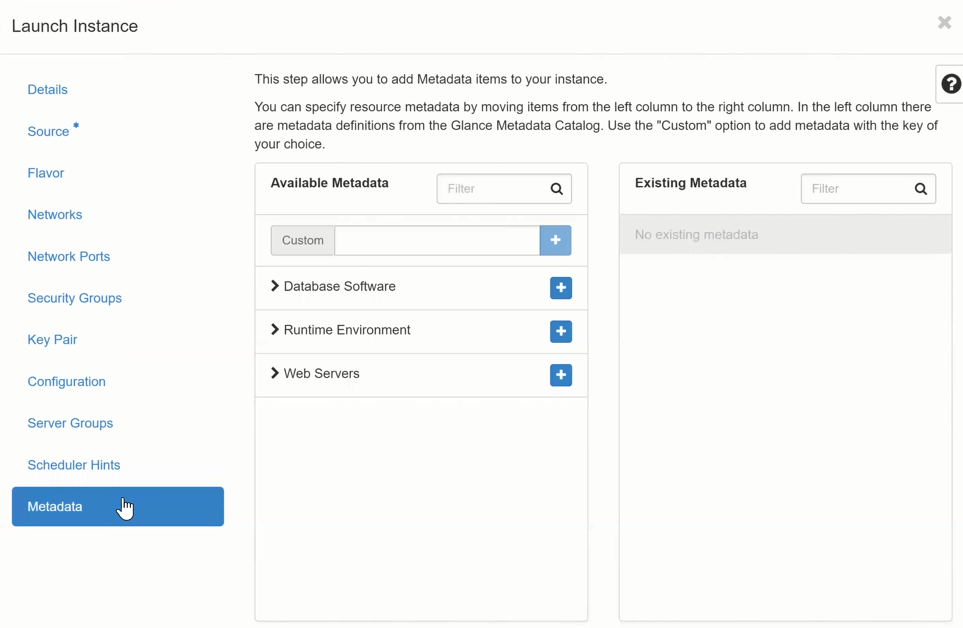
Metadata
- This option could be used to add “meta data” to the VM instance. This requires a deep understanding of the system, which is not covered here.
- now click on Next
If you have entered all the required information, the “Lauch Instance “ button should now also be activated and you can now click this to deploy the VM. If information is still missing, this is indicated by a *(star) on the left in the corresponding section.
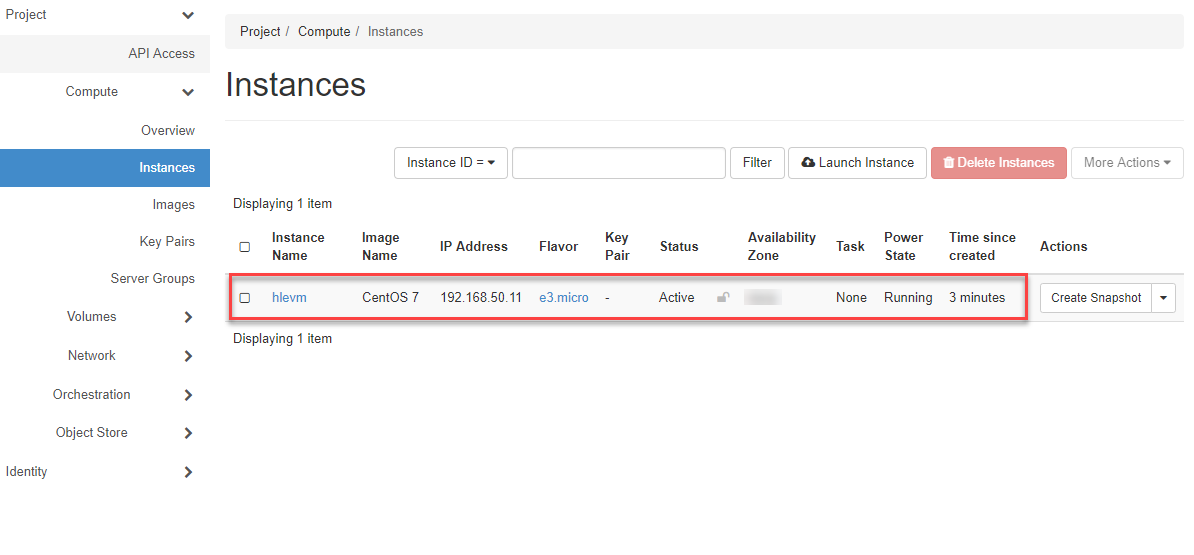
You can now see the status of your VM in the navigation under “Compute > Instances “.
Footnotes
| [1] | If, for example, you have to temporarily delete the associated instance for a re-sizing of the root volume, the volume remains and you can use it again after the volume re-size for spawning a new instance (VM). Otherwise, when the instance is deleted, the associated root volume is also deleted without warning! |
Setup Security Group
In this section you will learn how to create a security group and create a firewall rule so that you can access your VM (Linux) over the Internet via ssh. A security group is a software firewall that allows you to create rules for incoming (ingress) and outgoing (egress) connections and thus restrict them. All VM’s that are members of this “Security Group” apply the rules of the Security Group.
Tip
We recommend that you create a security group with the appropriate rules before deploying a VM, so that you can then simply select it in the “Launch Instance Wizard “.
Create Security Groups
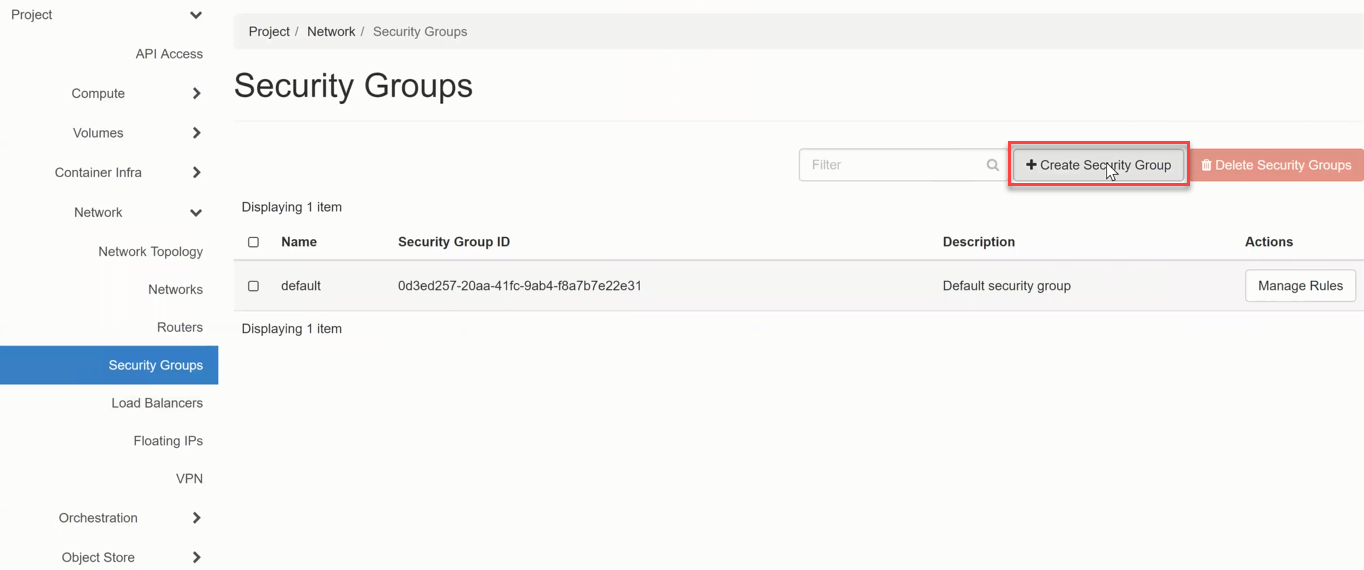
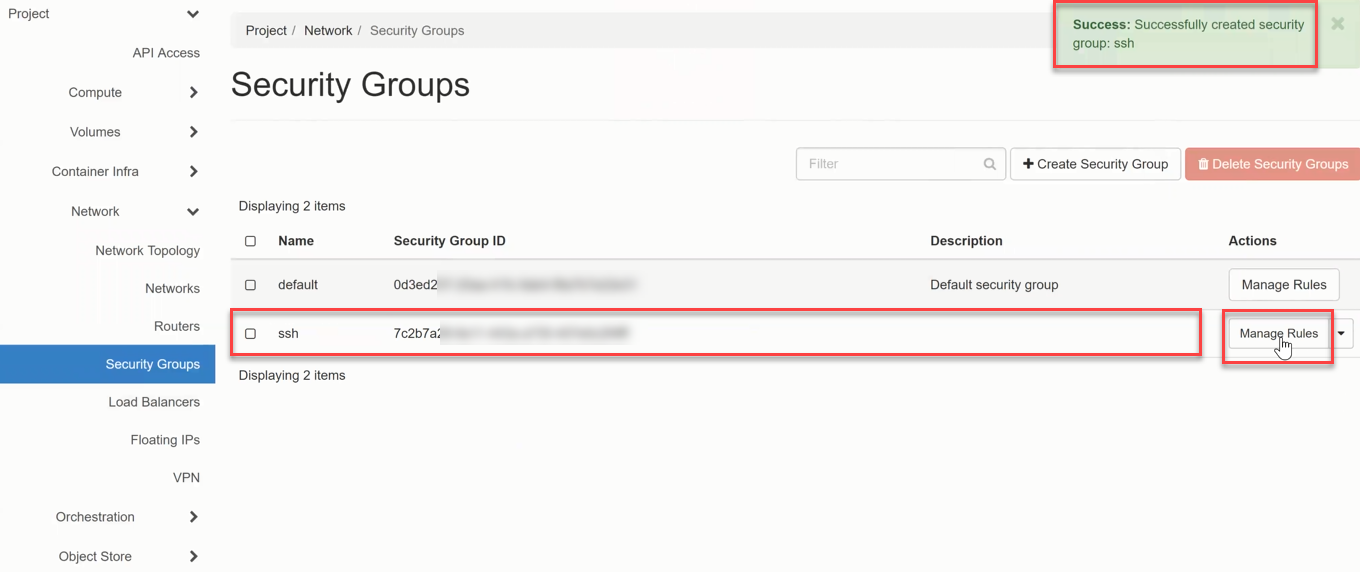
Change in the navigation to Network => Security Groups. and enter the information.
Warning
Windows License KMS activation Ports - in the OpenStack Standard Secutity Group Default Security Group, the egress port to the KMS licensing server is open for Windows license activation to work! If you use your own Security Groups and use Windows Server, make sure that the egress to the domain oskms.ewcs.ch 217.20.195.145/32 port 1688 is allowed.
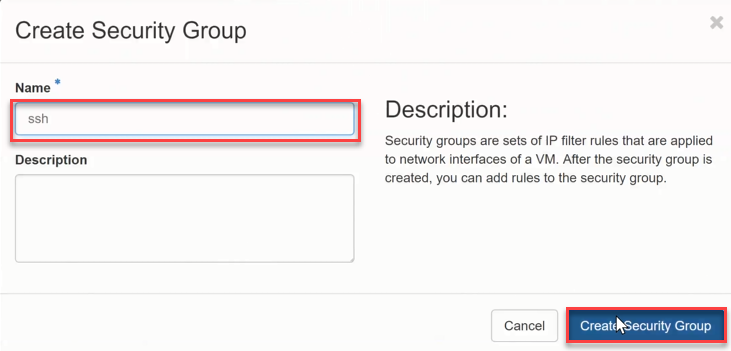
- Now enter a “Name “ for the Security Group and, if necessary, a description in the “Description” field.
- then click on +Create Security Group.
Now the Security Group will be created and you will get a message on the top right of the screen and see the created group in the list. * now click on Manage Rule of this Security Group.
Create Security Groups Rule
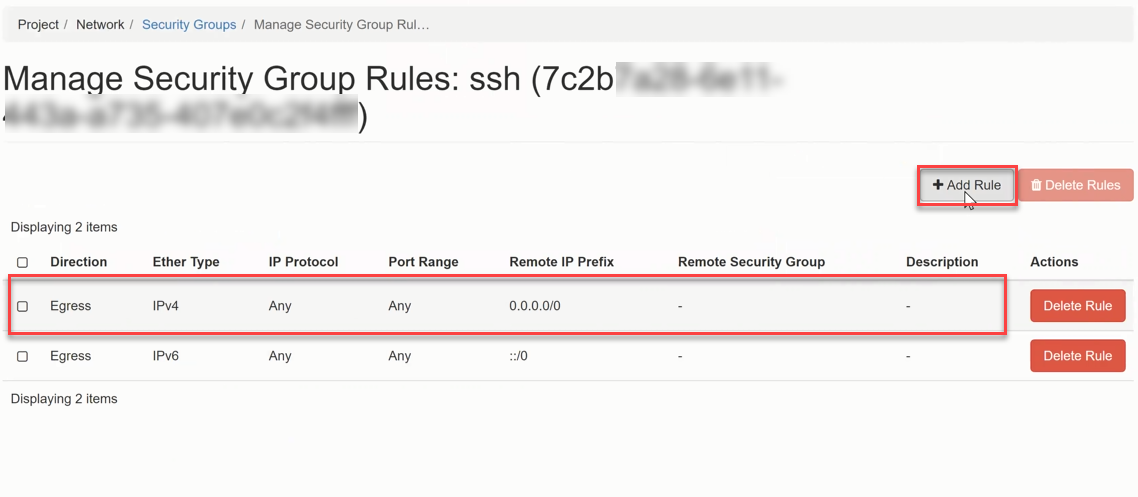
By default, an Egress rule (any/any) is already automatically created to allow outgoing connections. Now click +Add Rule to create the desired ssh rule.
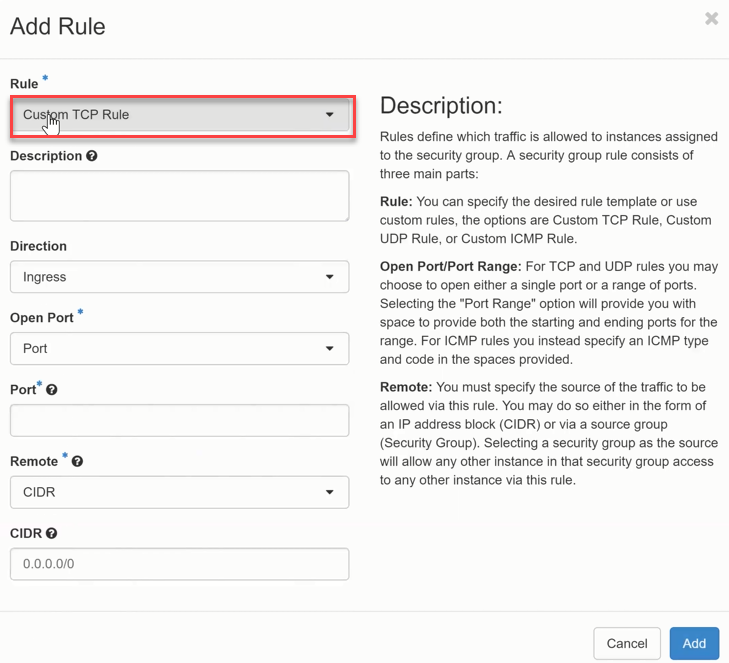
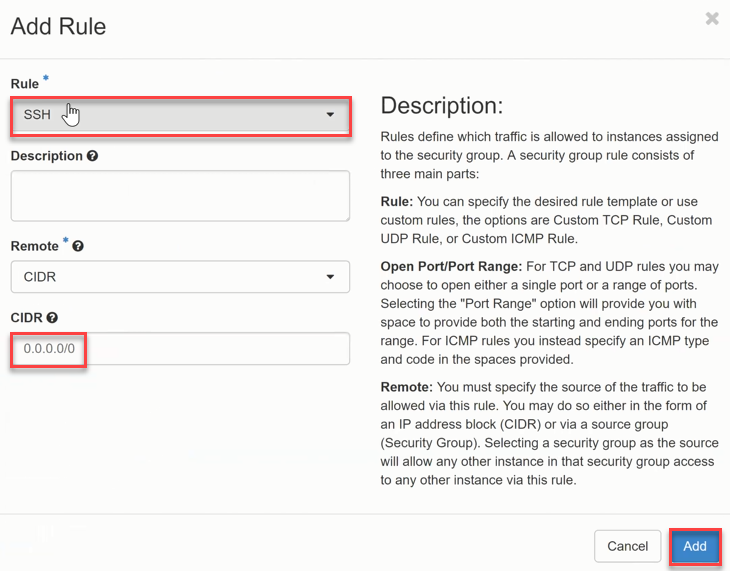
Now enter the information or select the template SSH from the Rule list. To do this, click on “Custom TCP Rule “
- now click on SSH and confirm the selection with the Add button.
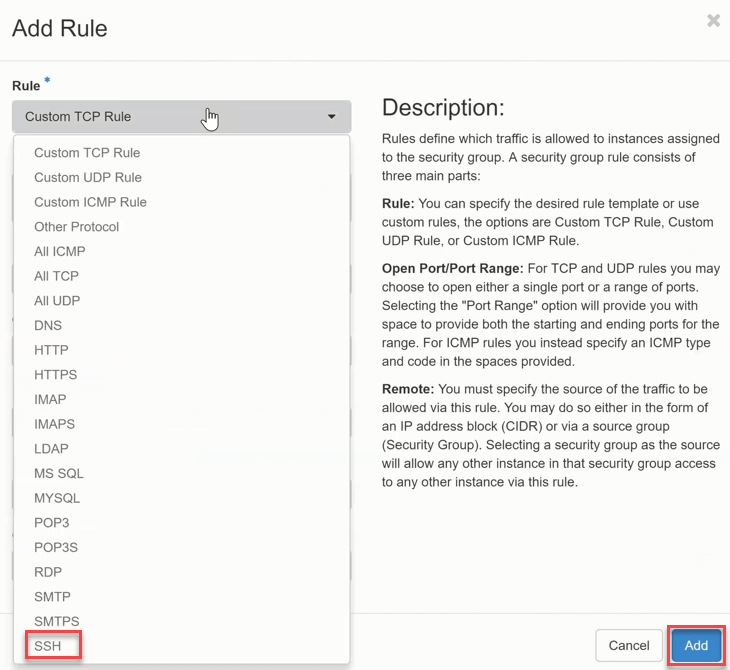
By selecting the template “SSH “, the input for the rule is reduced to the field Remote Network Address (CIDR), which defines from where access is allowed. It is also possible to specify a different Security Group as the Remote network, which enables an extensive set of rules.
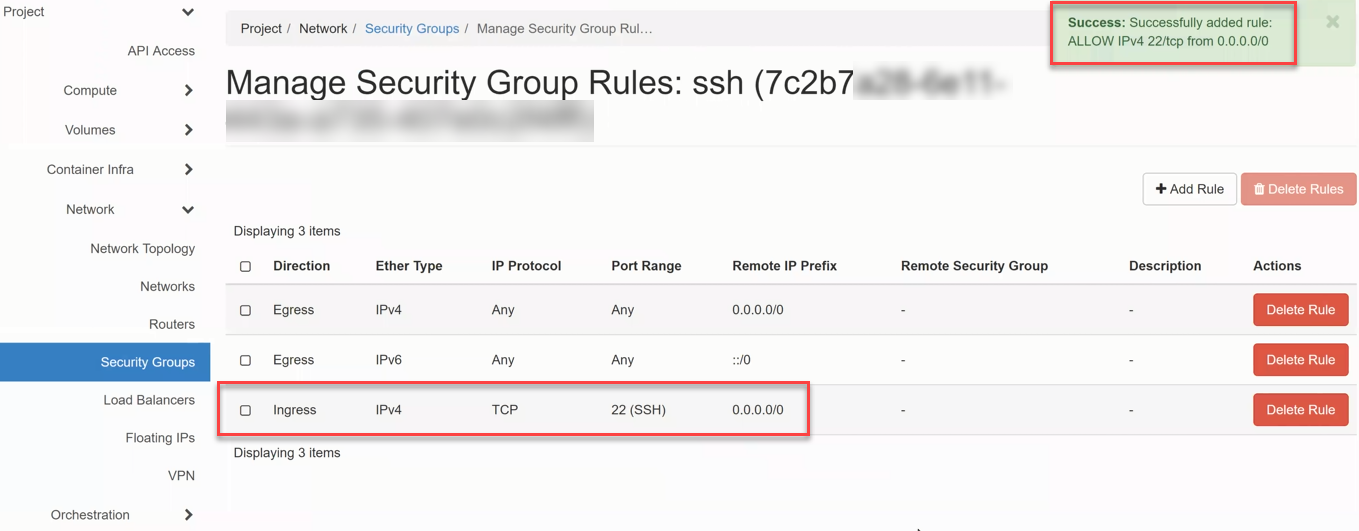
Now the SSH Ingress Rule (tcp / PORT 22) is created and appears in the list, which is acknowledged by a message at the top right of the screen.
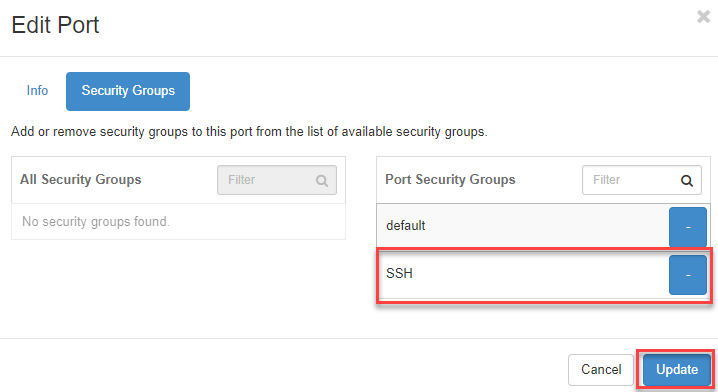
Assign Security Group
For a Security Group to be applied by a VM, it must be assigned to the network port or interface.
- To do this, click on Compute => Instances in the Interfaces tab
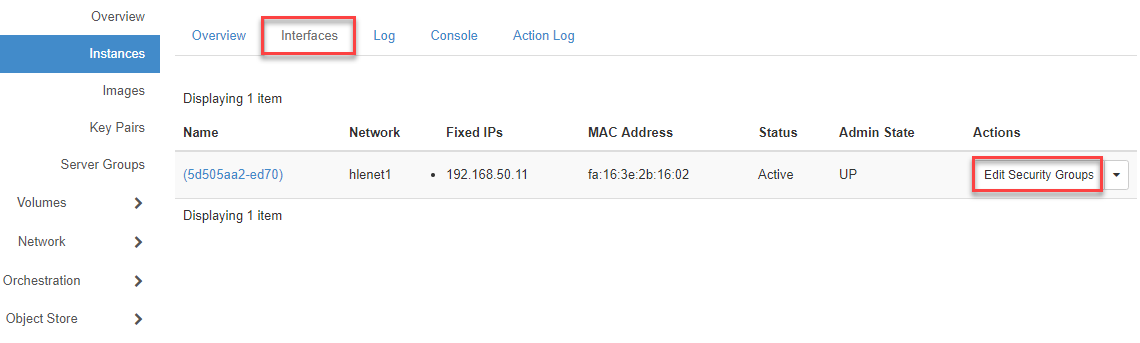
- Then click on the plus sign in the left half of the screen to add this security group to the VM’s port.
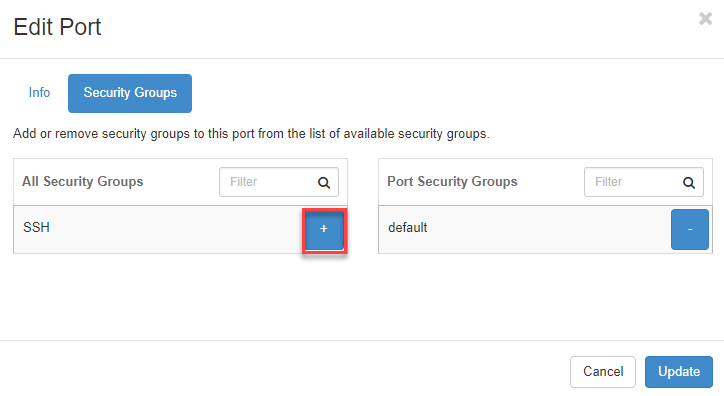
Now confirm by clicking on the Update button.
Assign Public / Floating IP
In this section you will learn how to assign a fixed public IP address to your VM. In order for the VM to be reachable from the outside, a public IP (see Floating IP) must first be assigned.
Tip
We recommend that you restrict access to your VM from the public. You can achieve this in the settings of the Security Groups with appropriate rules.
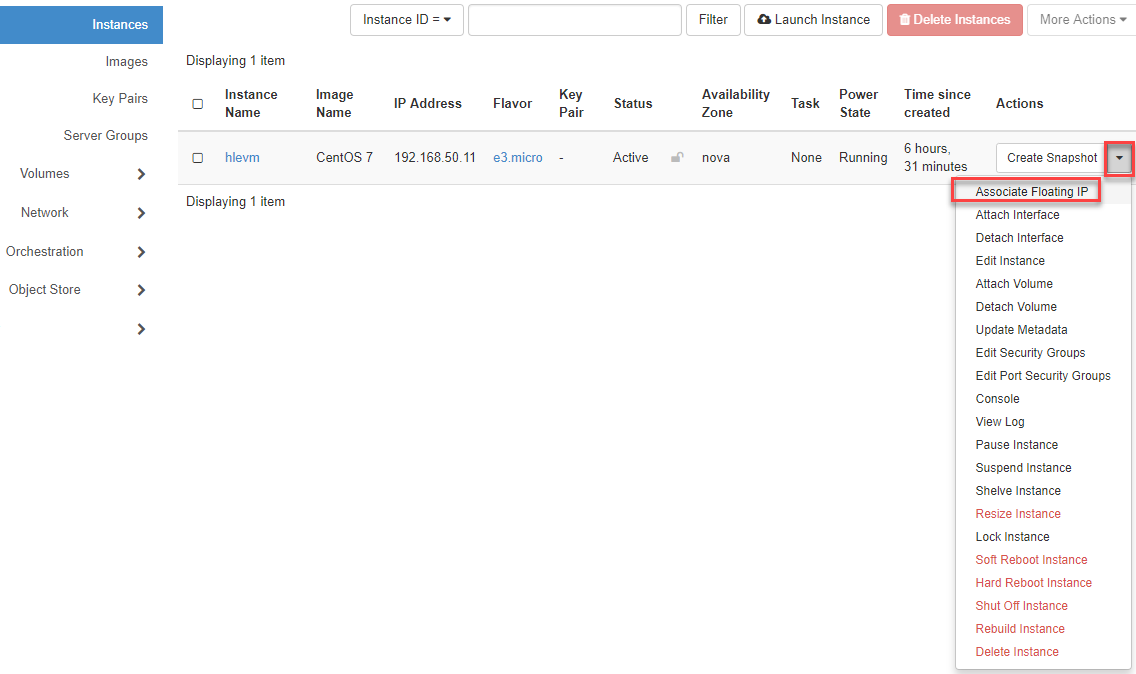
Associate Floating IP
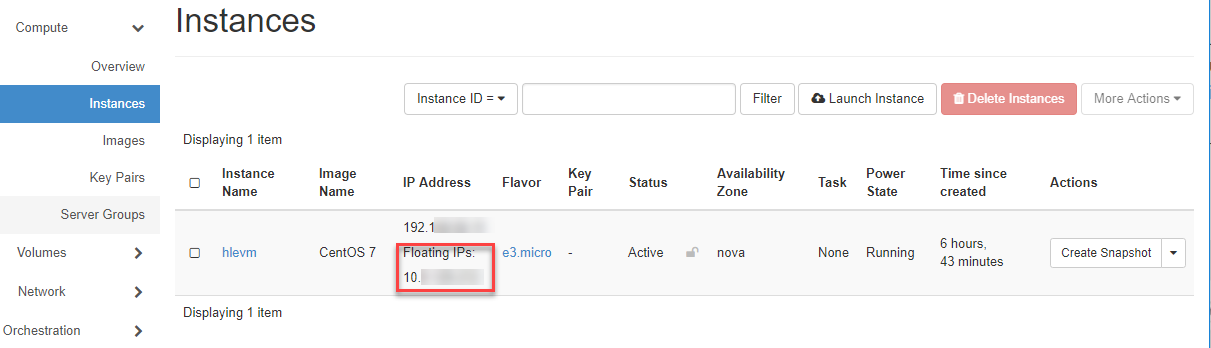
Go to Instances in the navigation, click on the “Arrow “ and select Associate Floating IP
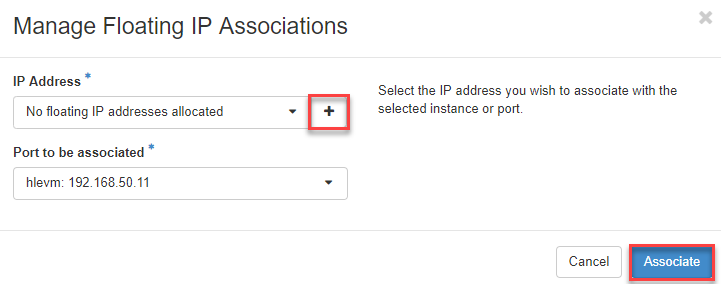
- Now click on the “Plus sign “ and then on Associate
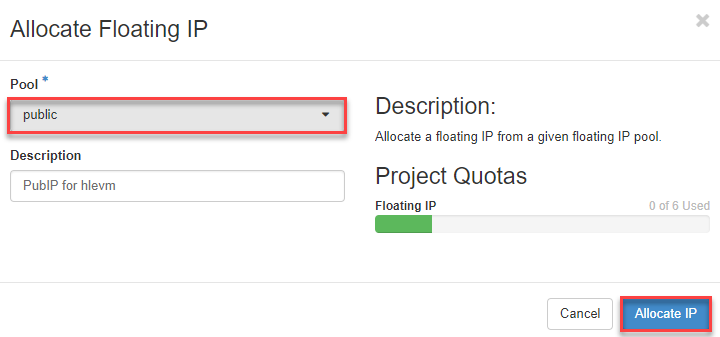
- Now select “public “ and click on Allocate IP
- Now select the public IP address and click on Associate
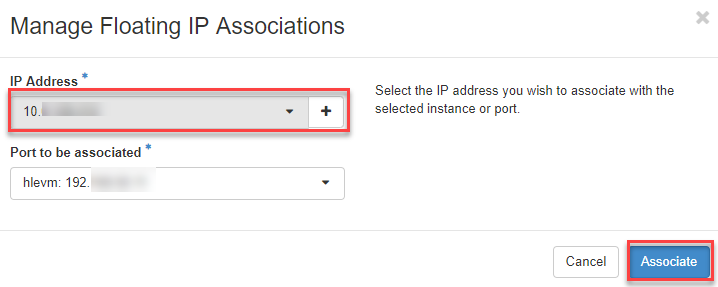
- The assigned public IP address is now displayed and you can use it to access your VM via ssh.