4. Dashboard Management
Table of Contents
In this menu item you can create new permission profiles for the Cloud Service Portal©, remove them or assign them to users. The standard permission profiles can also be viewed.
4.1. List profiles
There are two standard profiles to choose from
- User-Adm - Can manage all users of this client and has access to all panels
- User has access to the S3 panel and cannot manage users.
To list the details of the profiles, go to Dashboard Management => Profiles.
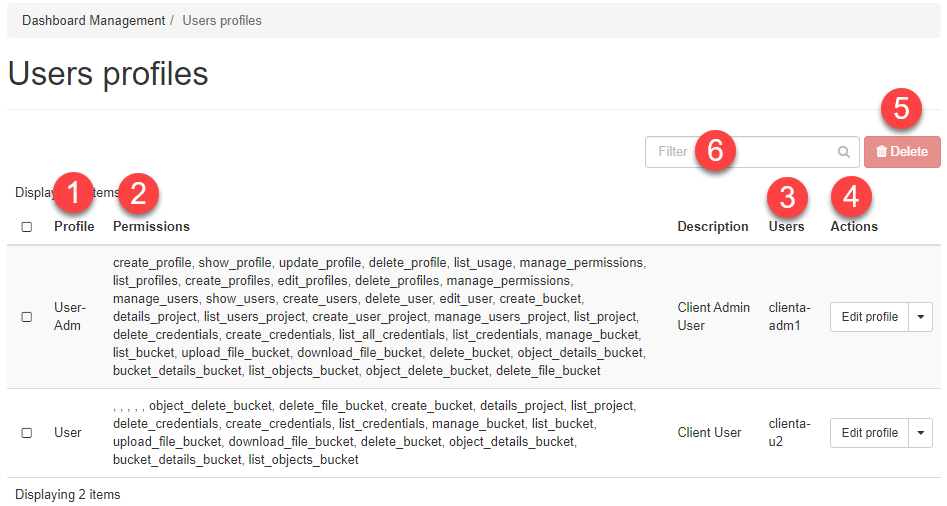
- Profile - Name of the profile
- Permissions - Lists all permissions of this profile, including a description
- Users - Shows which users are using this profile
- Actions - Here you can add a description to a profile or delete the profile.
- Delete - This button allows you to delete a profile you have created
- Filter - Here you can filter for any information you want
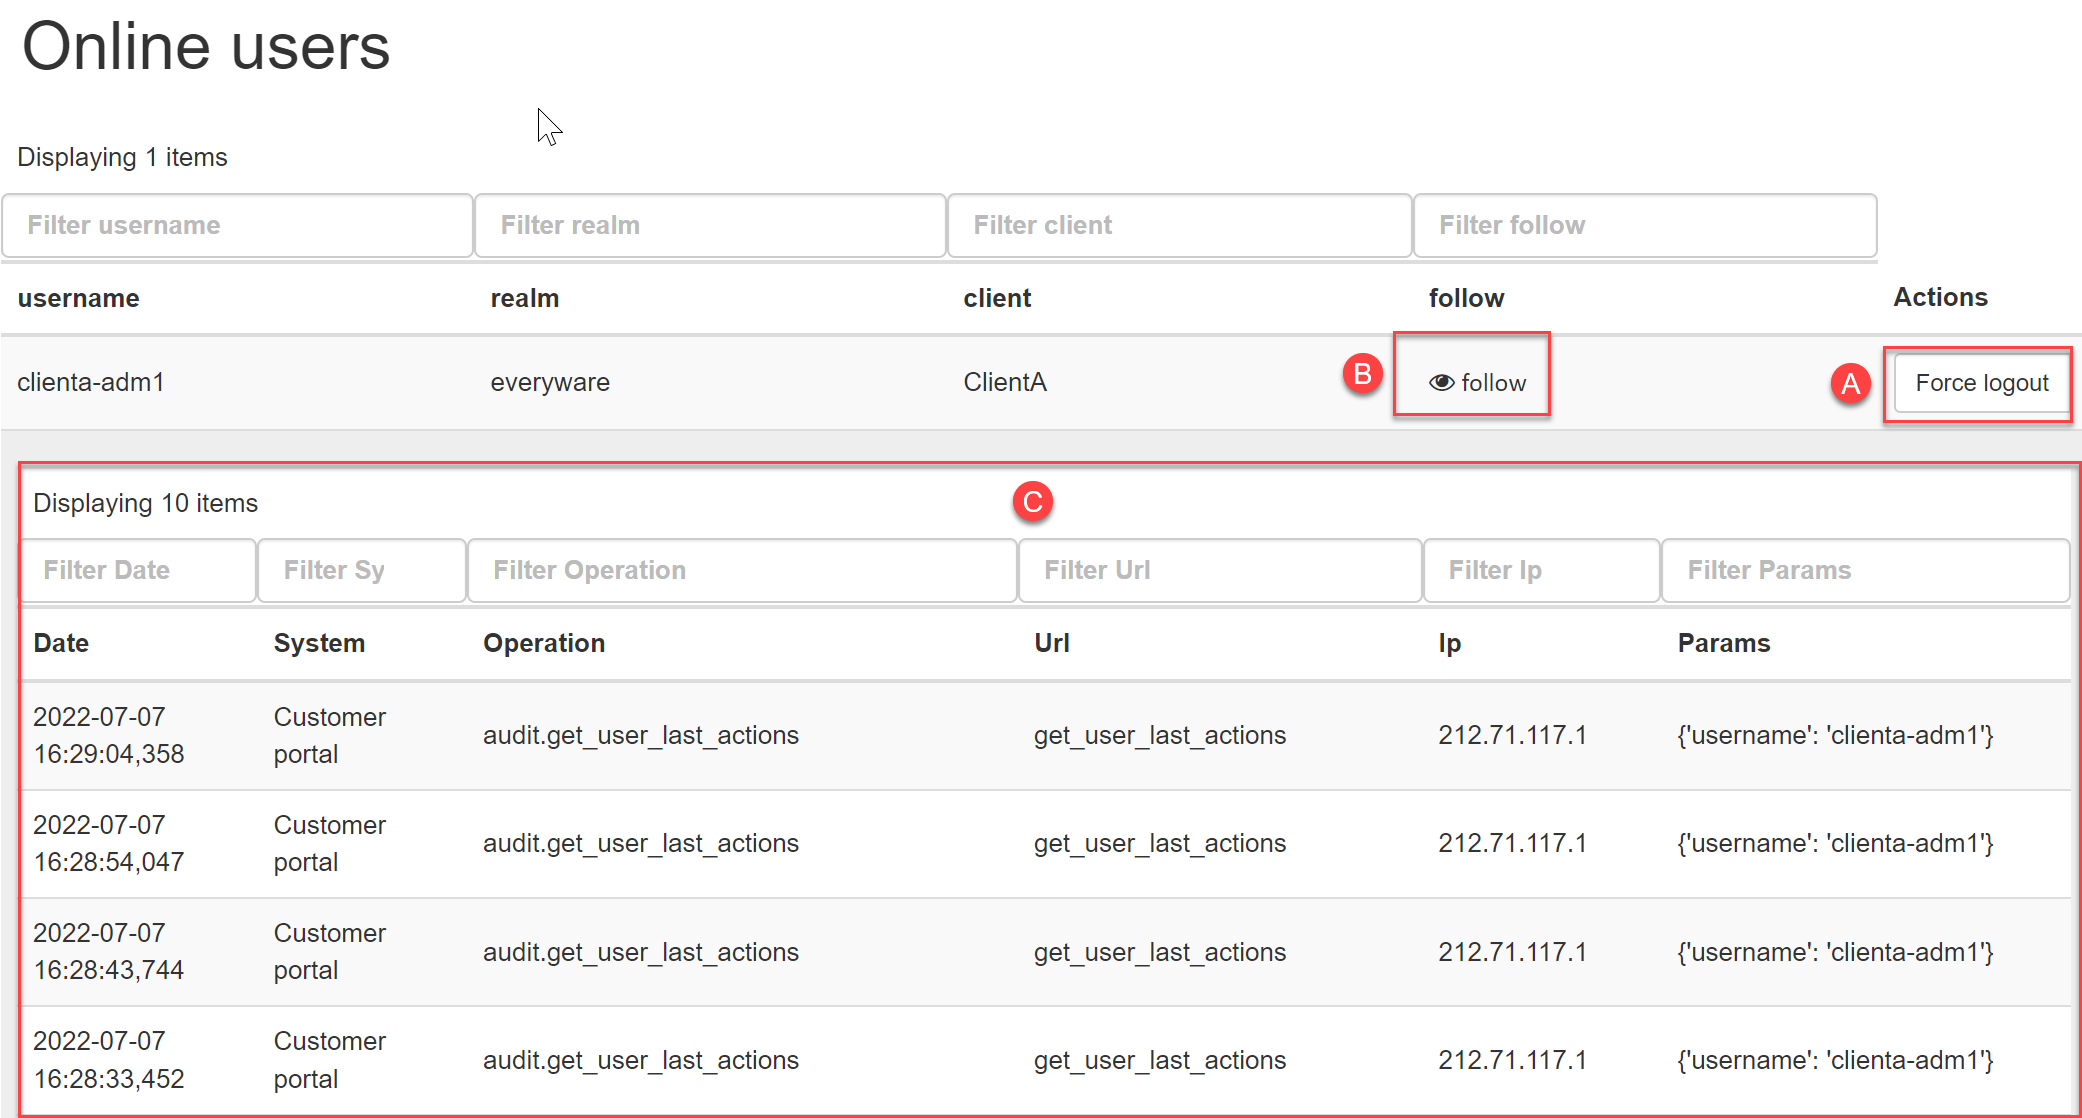
4.2. Online users
In this area the logged in users of the client are listed.
- The Force logout button can be used to force a user logout.
- When you click on the follow icon, a detailed list (C) of the user’s API calls is displayed.
4.3. Manage Conditional Access
In this section, you can additionally restrict user access to the Cloud Service Portal to increase security. This is achieved by enabling one or more access filter rules. The following Conditional Access Types are available:
- Access times - Allows you to restrict access based on days and times.
- SourceIP - Allows you to restrict access based on the source IP address or subnet.
Note
By default, access (without Conditional Access Rules) is not restricted.
4.3.1. Creating a Conditional Access Rule
For example, to restrict a user’s access time to Monday - Friday, 08:00 to 18:00 please create the following Conditional Access Rule:
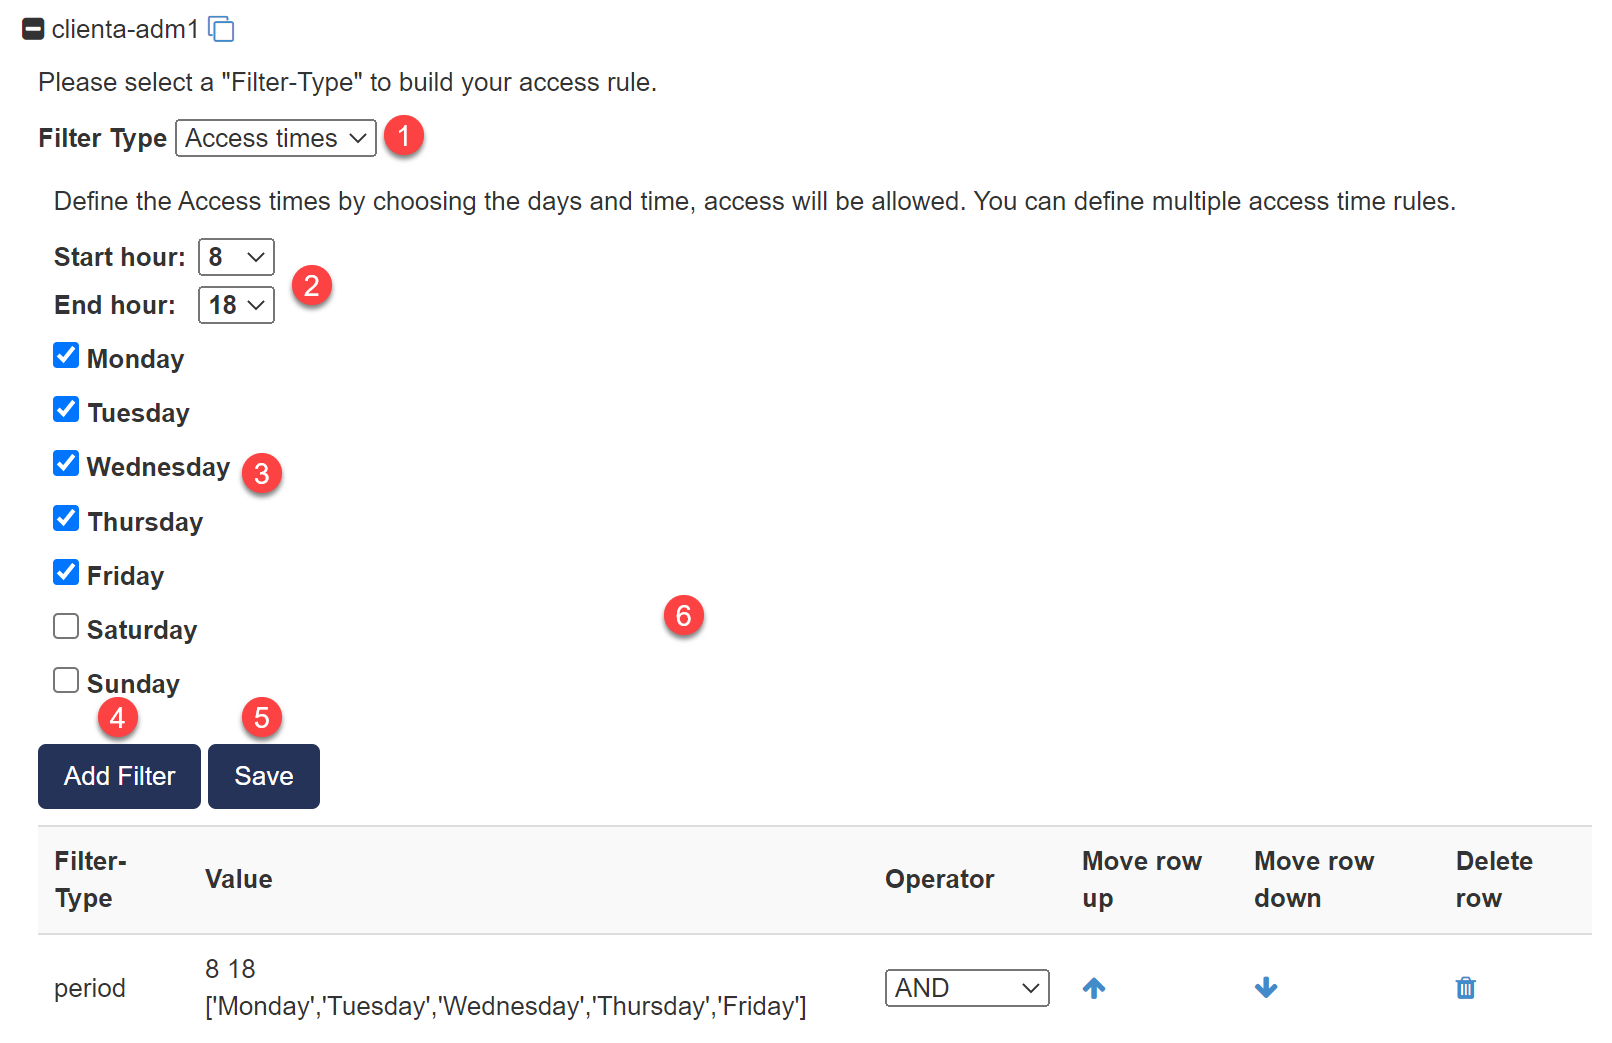
- First, click the plus sign (+) next to the user for whom you want to create Conditional Access Rules.
- To create a Conditional Access Rules for this user, first select the filter type Access times (1).
- Now enter the desired Access time parameters for the Access Rule (2) and (3).
- Now add this Access Rule to the user by clicking on the Add Filter button (4).
- Repeat the previous two steps if you want to create more Access Rules.
- Finally, click on the Save button (5) to save the Access Rules!
Warning
The rules become immediately active after you click the “Save” button! Therefore, check the rules before you apply them, because you can lock yourself out.
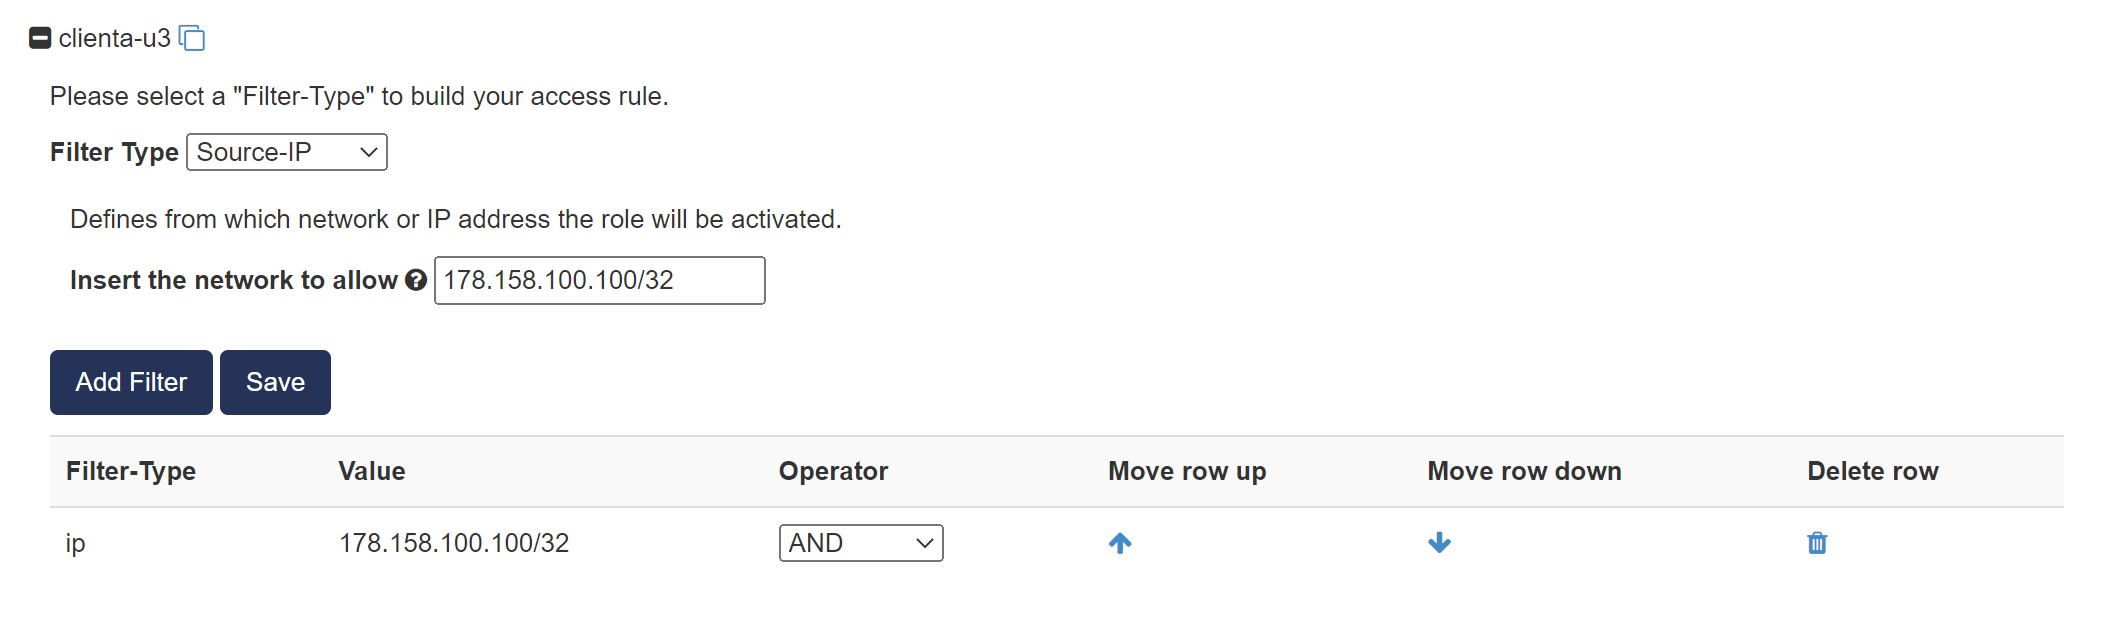
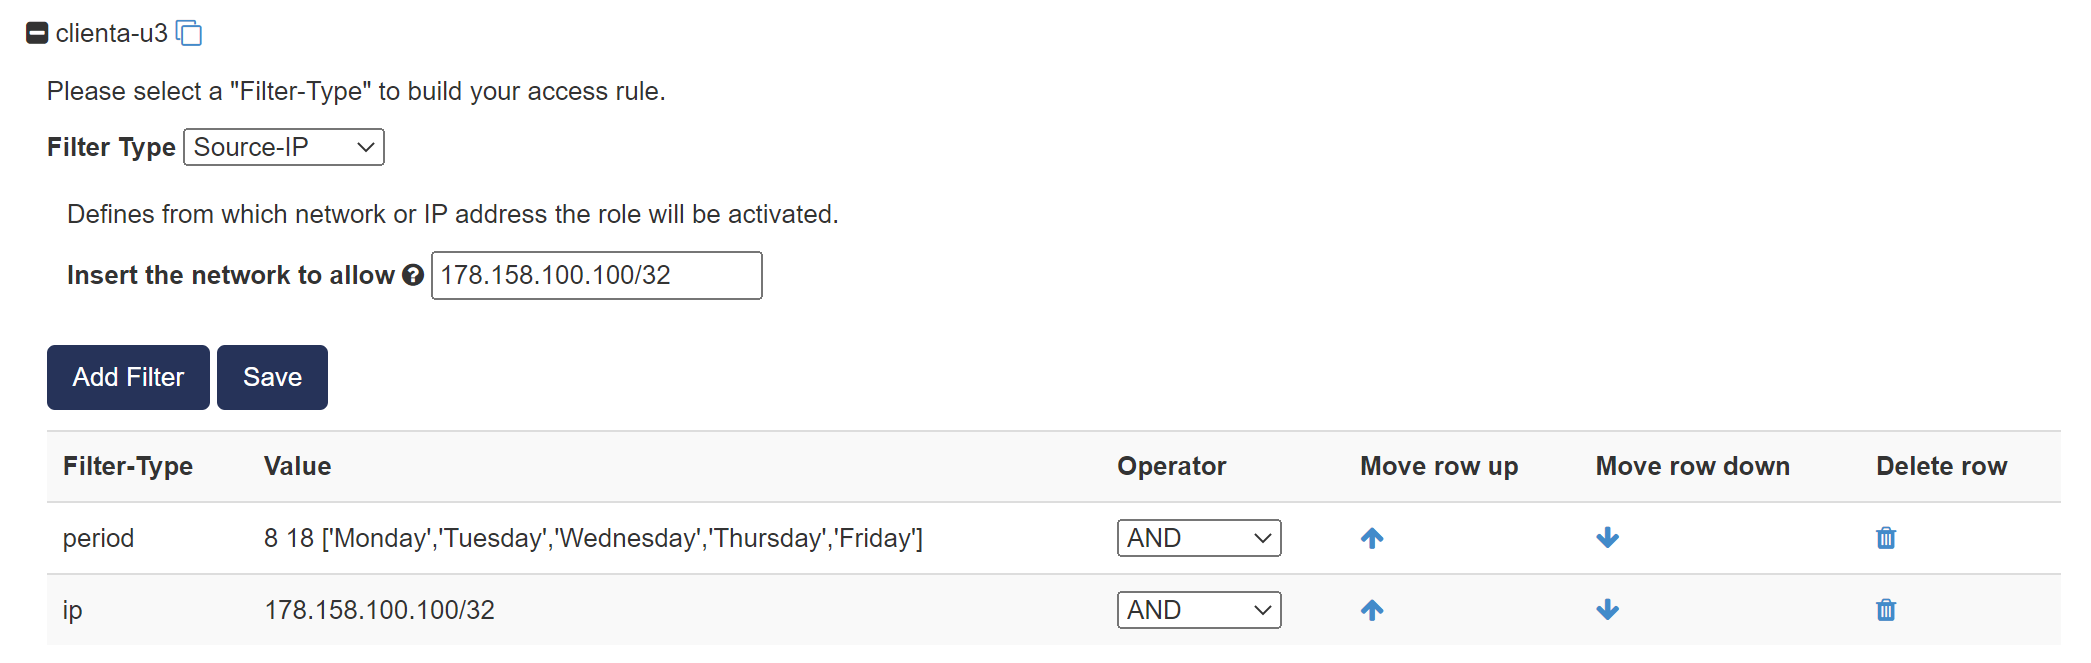
4.3.2. Example - Restricting the source IP
For example, to restrict a user’s access to PublicIP address 178.158.100.100/32, please create the following Conditional Access Rule:
4.3.3. Example - Restricting access time and source IP
You can also combine multiple conditional access rules as you wish. In this example, a time and sourceIP constraint is combined. Please pay attention to the correct linking logic (AND/OR) in the Operator column.
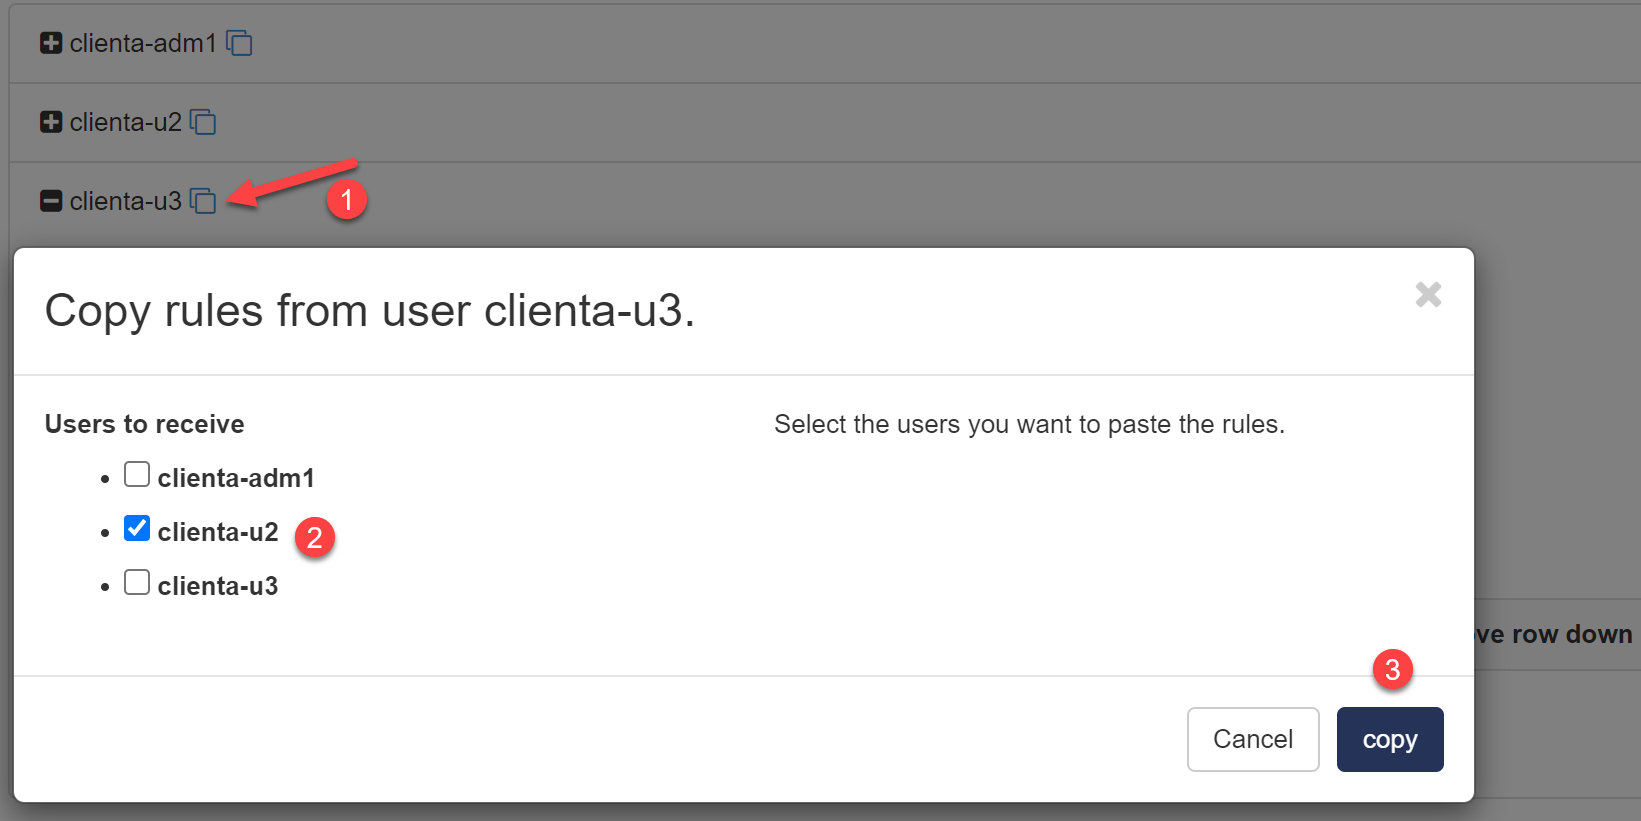
4.3.4. Copying the conditional access rules of a user
Once you have created a set of Access Rules for a user, you can easily transfer that rule set to another user.
- To do this, click on the copy icon (1) next to the User
- Now tick the target users who should receive these access rules (2)
- Complete the process by clicking on the copy button (3).
Warning
Existing access rules of the target users are overwritten or deleted by the copy process.
4.4. Change Profile
If you want to assign a different authorization profile to a user, please proceed as follows:
Navigate to Dashboard Management => Manage permissions.
- Click on permissions (1) for the corresponding user
- The permission sections (3) for this user are displayed. In our example, the user has the profile User (2).
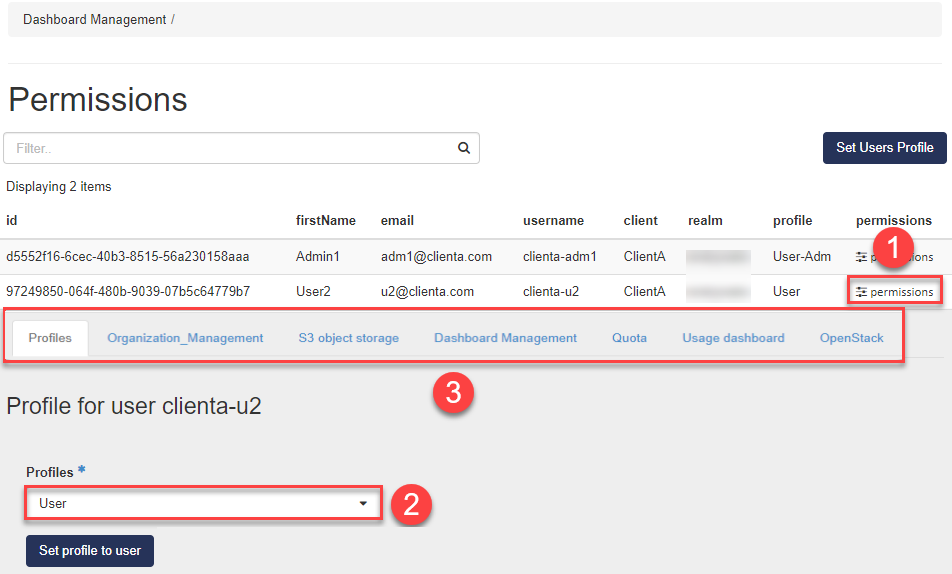
- Now select the desired profile (2) and confirm your choice with the button Set profile to User
Warning
Falls Sie ihren eigenen User (Client-Adm) ein Profile zuweisen, welches keine User Verwaltngs-Berechtigungen hat, sperren Sie sich möglicherweise von dieser Berechtigung selbst aus. Wenden Sie sich in diesem Fall an ihren Enterprise Partner.
Note
If you want to assign a profile to multiple users, please click the Set Users Profile button
4.5. Custom Permissions
You can customize the permissions of a user profile. This gives the user the profile Custom Permissions. To do this, proceed as follows:
- Navigate to Dashboard Management => Manage permissions.
- Click on permissions for the corresponding user
- The permission sections for this user are displayed.
- Now switch to the corresponding Permission section which you want to customize. In our example Usage dashboard (1)
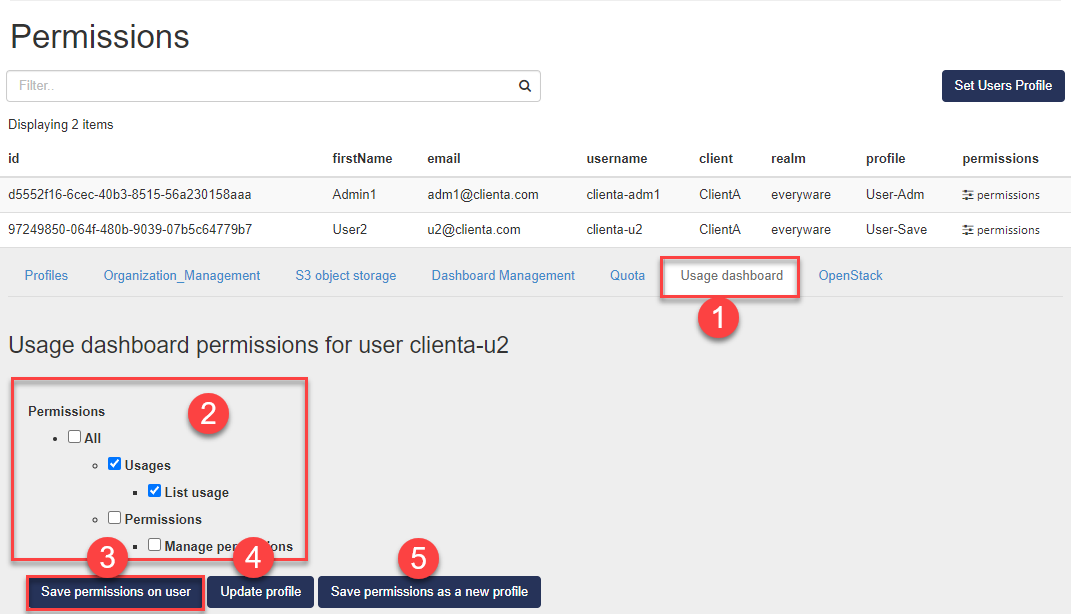
- Now grant the desired authorizations (2)
- If you now confirm the customized permissions with the Save permissions on users button (3), the changes will only be saved for this user and he will get a Custom Permissions Profile.
4.6. Update profiles
If you want to save the customized permissions (see Custom Permissions) in the user profile used by the user, confirm this with the Update profile button (4). In this case, all users using this profile will receive the new permissions!
4.7. Create Profile
To create a new profile, please proceed as follows:
Navigate to Dashboard Management => Manage permissions.
- Click on permissions for a user with a profile that serves as a template
- The permission sections for this user are displayed.
- Now switch to the corresponding Permission section, which you want to adjust for the new profile. In our example Usage dashboard (1)
- Now grant the desired authorizations (2)
- To save the profile with the adjusted permissions as a new profile, click on the Save permissions as a new profile button (5).

- Now enter a Profile Name and a Description for the new profile in the input mask and confirm the entry with the create profile button.
Note
The user’s profile remains unchanged by the creation of the new profile.