OpenStack© Quickstart
Table of Contents
Introductory remarks
This Quickstart manual will help you get started with the OpenStack Management Portal Horizon and provides you with useful tips and information. You will also learn step-by-step how to create a network, switch on your first server VM and access it.
Note
To navigate through the individual chapters, you can use the linked references at the bottom of each section, or click “next” at the top of each navigation bar. In addition, you will find a page navigation in each topic.
OpenStack© Management Portal
In the OpenStack Management Portal you manage all your cloud resources from one central location. Cloud resources are Projects (Accounts), Virtual Servers, Storage Volumes and Networks.
The functions and authorizations are based on the following roles.
So you can have either a domain administrator or a user role.
The functions available to you here are very extensive and range from deploying a server to configuring extensive multi-tier network architectures.
Login to OpenStack© Management Portal (Horizon)
For the registration you need an activated account, which contains the following information:
- Domain - Under which you manage your projects in the OpenStack. The realm is called the domain.
- Project - Under which you manage your resources in the OpenStack. Every project is located in a domain
- User name / email address - with which you authenticate yourself
- Password - your initial user password
Please perform the following steps:
- Open your browser and enter the OpenStack portal address you received with your documents, or click the link below.
OpenStack portal address:
https://open.safeswisscloud.ch
- You will now be automatically forwarded to the “Log In” mask of the Federated Identity and Access Management (Keycloak).
- Please enter your registered email address, which corresponds to your username, and your password.
- Then click on Log in
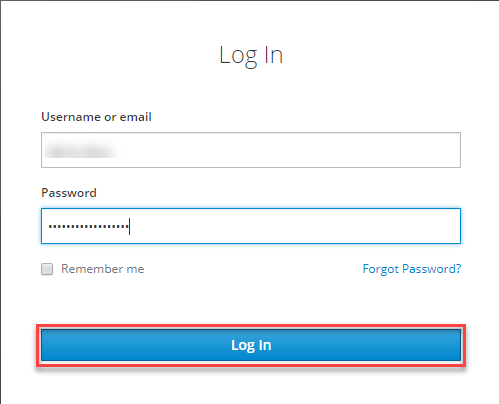
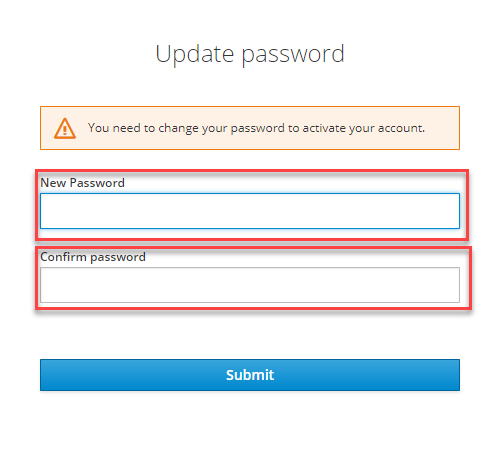
If you are logging in for the first time, you will be prompted to change your initial password, otherwise you will be prompted for the One-Time Code that you receive from your Mobile Authenticator application. You will then be on the overview page in the OpenStack Portal.
Note
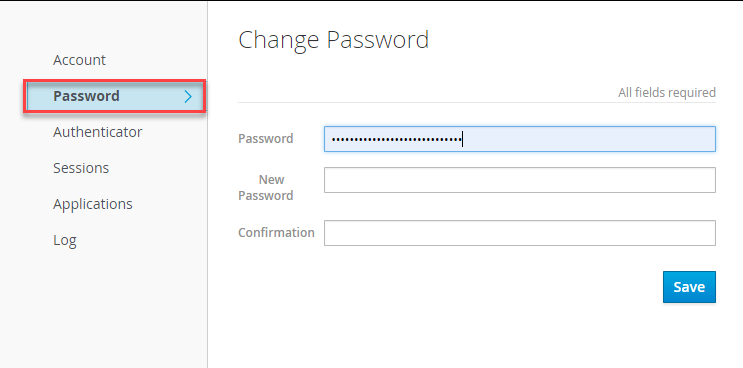
Here you can change your password. Please note the Password policy .
The next step is to configure the 2 factor authentication, which requires an Authenticator application on your smart phone (see “Install Authenticator” below). If you need to install the app first, you can get here more information and help.
Follow the instructions on the screen.
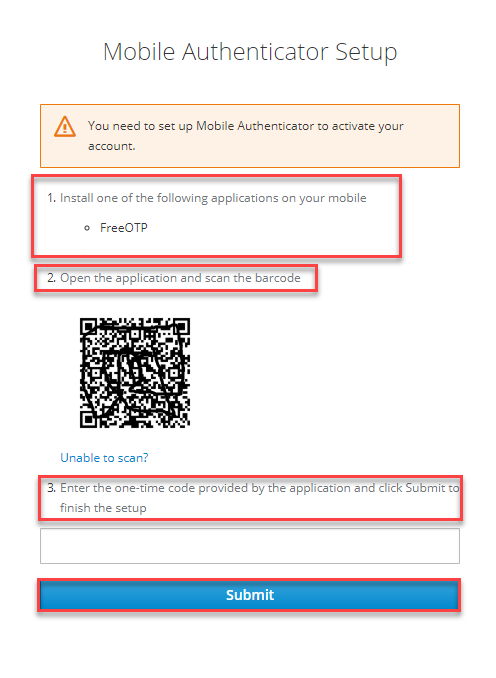
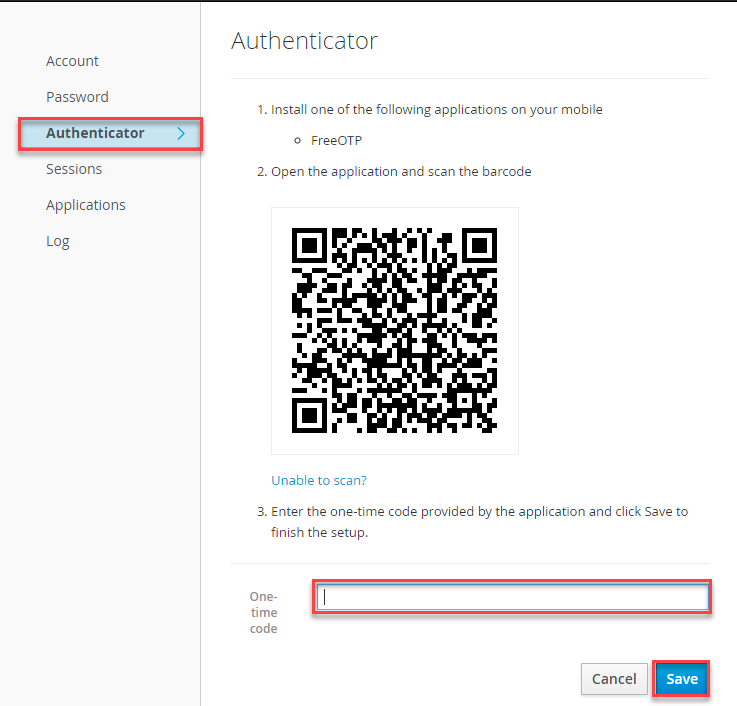
Use the Mobile Authenticator app to scan the QR-Code and enter the generated code.
After successful login you will be on the overview page in the OpenStack Portal.
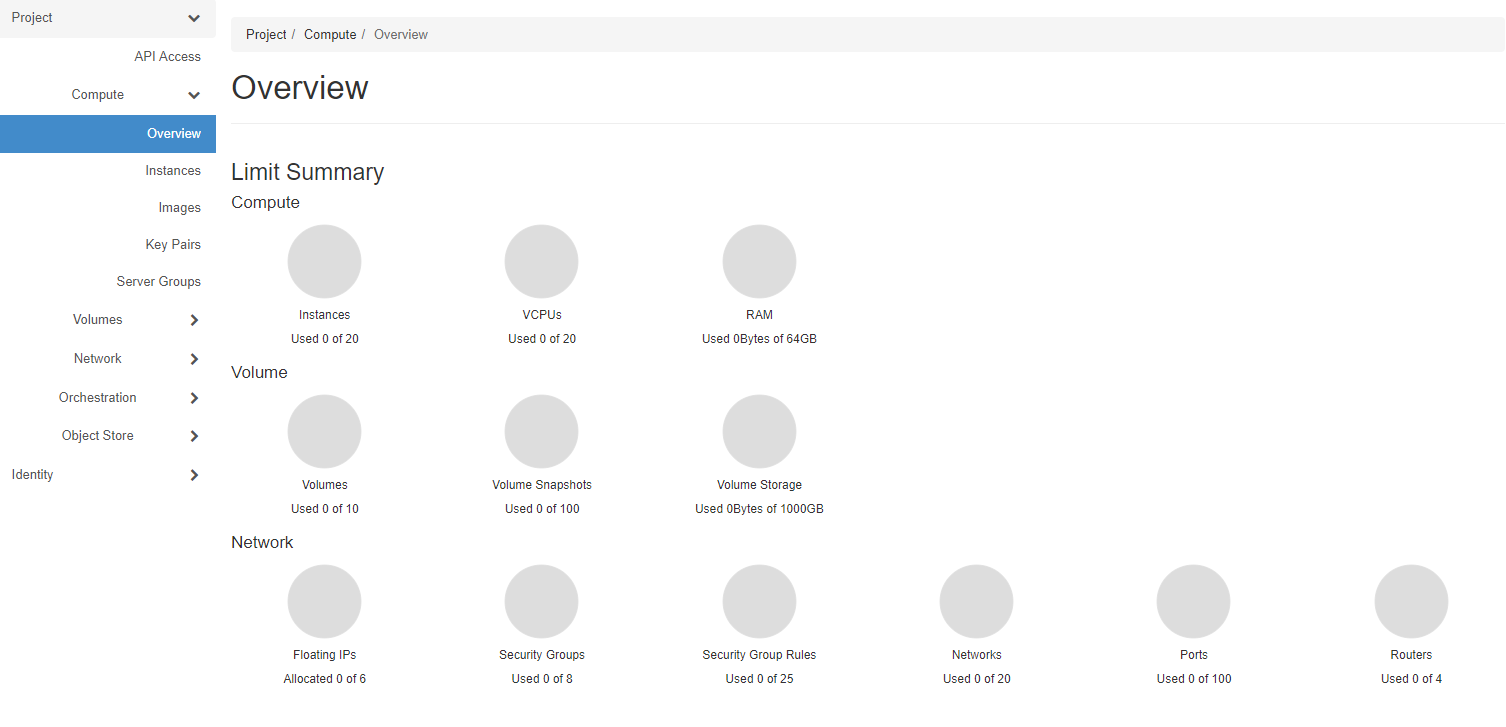
Federated Identity and Access Management
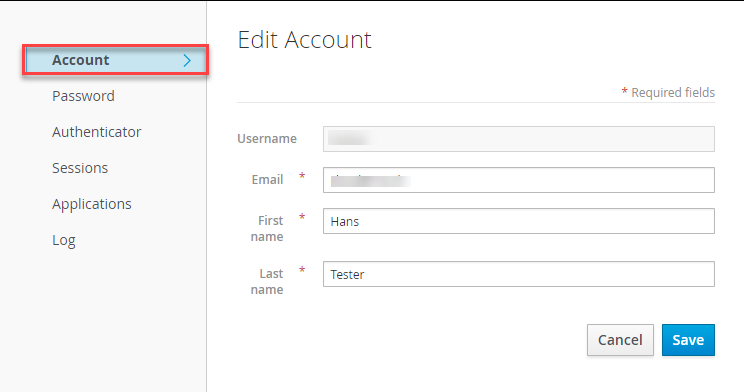
The identity and access management is provided via a modern “Federated Identity and Access Management” solution. Here you centrally manage the identity attributes of your user profile and the configuration of the user authentication (e.g. 2-factor authentication).
Note
In addition to OpenStack, further cloud services are planned which will be authenticated via this platform. This means that in the future you will be able to authenticate to other cloud services offered by us with the same user via this solution.
Manage Federated Identity
Switch from the OpenStack Management Portal to the Federated Identity Manager by clicking in the navigation Identity => Manage federated identity.
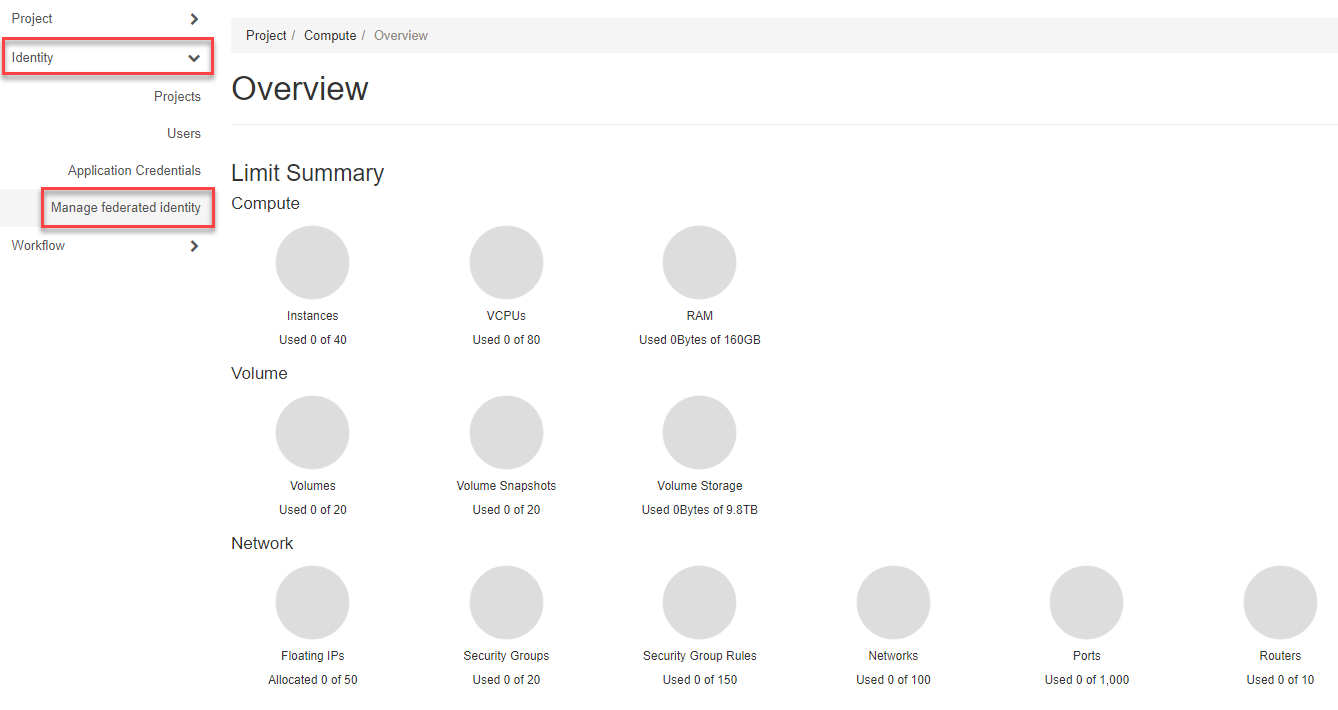
Note
With the browser button <- BACK you return to the OpenStack portal
Authenticator
In this menu you can enable 2 Factor Authentication (2FA). If you are not yet familiar with 2FA, please read the chapter 2FA. To enable 2-factor authentication with the FreeOTP Authenticator application enable, please scan the QRCode in the application, enter the generated code and click Save.
Password policies that apply to cloud user accounts
The password for the cloud user accounts must meet at least the following conditions:
| Condition | Anz |
| Password Length (min) | 12 |
| Special characters | 1 |
| Digits | 1 |
Note
In order to meet these criteria, the password does not necessarily have to consist of a cryptic string. Tip: Think of a few words, which you can combine with hyphens and add a few numbers. Example: Up-in-the-Cloud-2019 would meet the criteria.
The following table describes the password policy characters that can be applied to user accounts:
| Property | Requirement |
| Allowed characters |
|
| Forbidden characters |
|
2-factor authentication (2FA)
More security for your cloud account. With the two-step confirmation, you protect your account with a password also via your smartphone with an additionally generated Personal confirmation code. This is done with the following supported “Mobile Authenticator App”:
- FreeOTP
which are available for Android, iPhone or BlackBerry.
Note
The Mobile Authenticator app also works without data connection!
How it works
FreeOTP adds a second layer of security to your cloud account and other online accounts for which you enable 2-factor authentication in the app by generating Personal Confirmation Codes, so-called “one-time passwords” on your mobile devices, which are used in conjunction with the normal password. These passwords can also be generated when the phone is in airplane mode.
Installing the Mobile Authenticator App
Install the supported Application on your Smart Phone:
Download URL’s: GitHub.
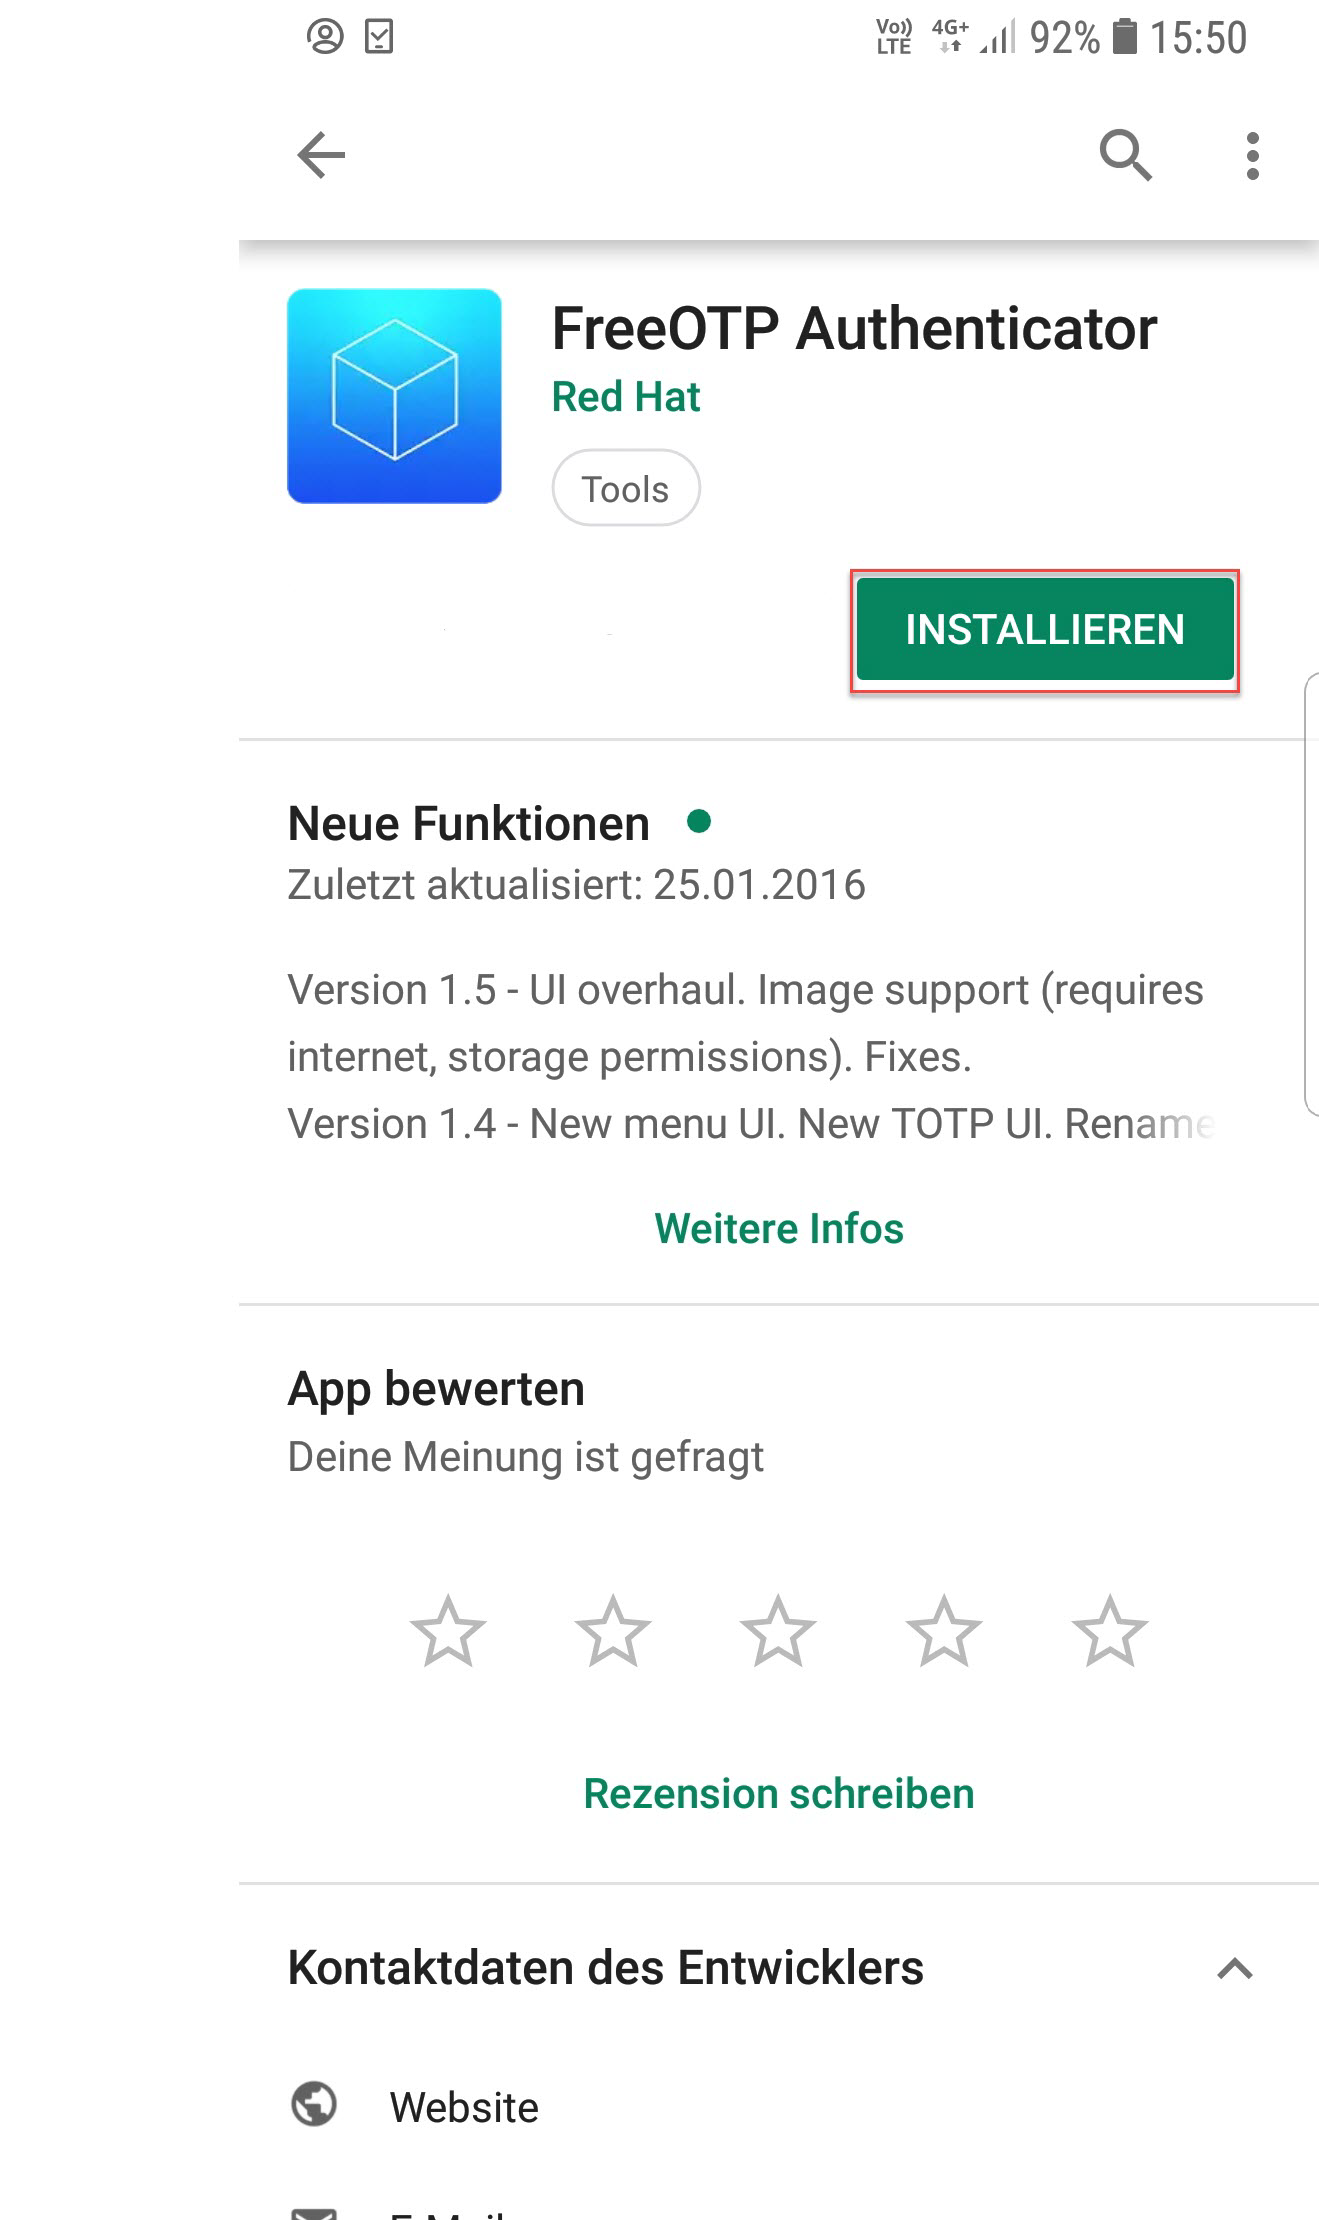
Example Installation FreeOPT App on Android Smart Phone: Call up the PlayStore on your Smart Phone and enter “FreeOPT” in the search. The following search result will appear:
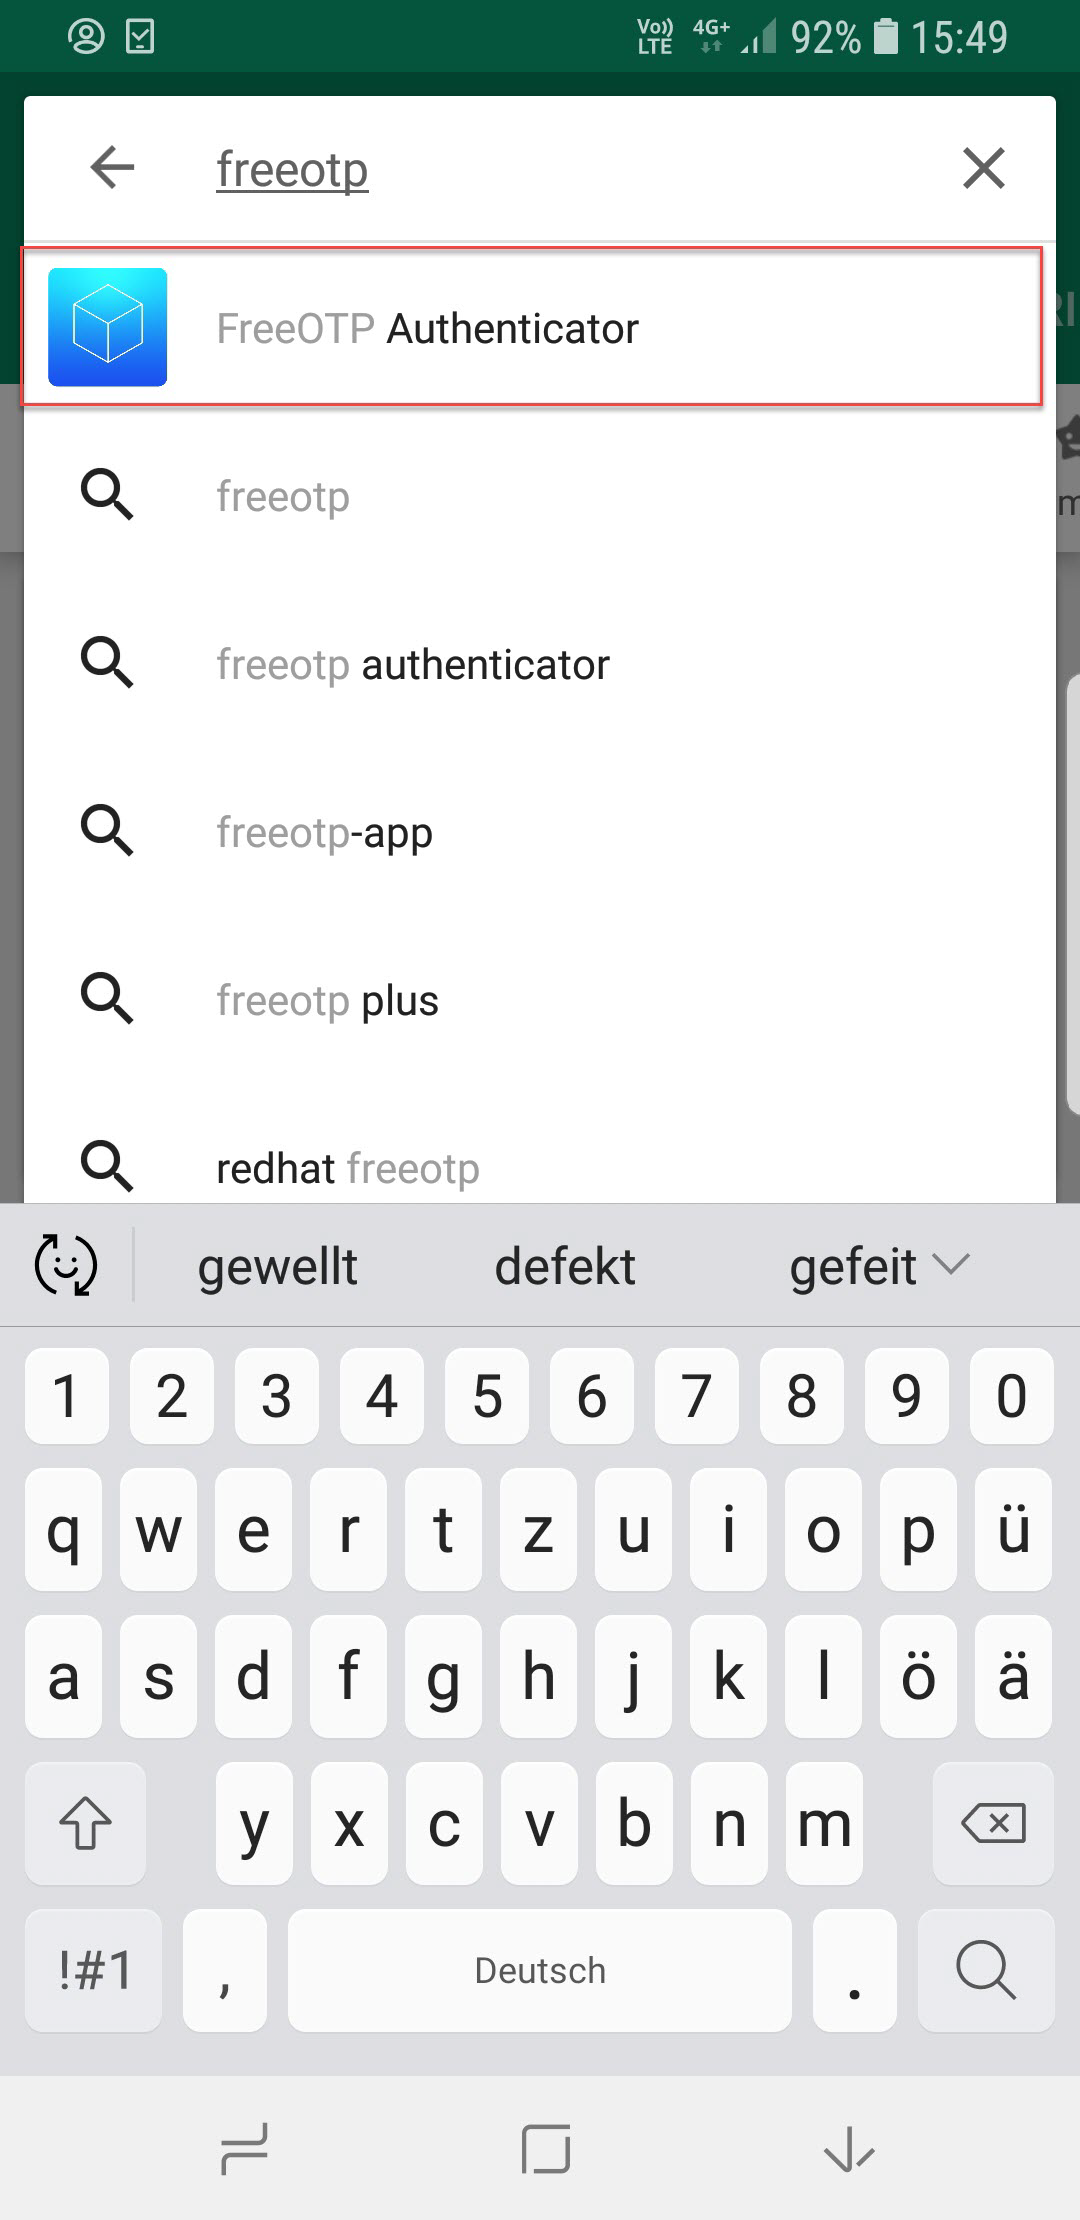
Select the “FreeOPT App” as shown and click Install.
If you are in the registration process, return here.
Reactivating 2-factor authentication
If you intend to replace your smart phone or activate 2-factor authentication on another device, please proceed as follows:
- Install on your Smart Phone one of the two supported Authenticator applications FreeOPT App or Google Authenticator
- Switch from the OpenStack Management Portal to the Federated Identity Manager (Keycloak) by clicking in the navigation Identity => Manage federated identity.

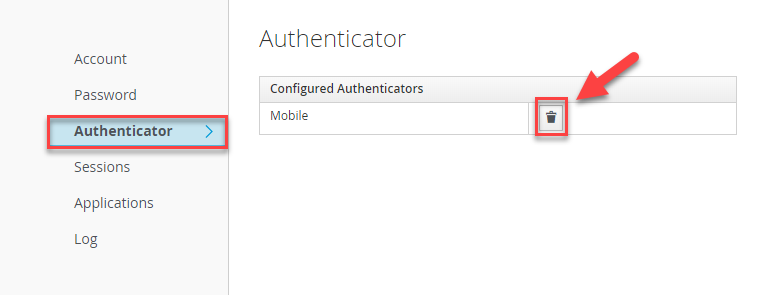
- Now switch to the navigation menu Authenticator and delete the current Mobile Authentication by clicking on the trash icon.
Note
The browser button BACK takes you back to the OpenStack portal
Now refresh your browser with the F5 key, or switch to another menu and back to the Authenticator menu. Now follow the instructions on the screen to activate 2-factor authentication on your new smart phone.
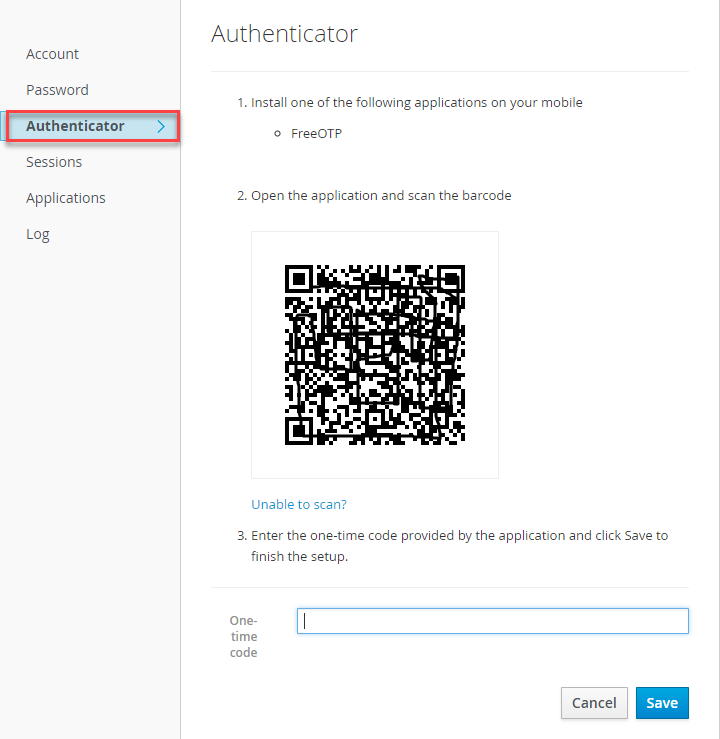
Using the supported Mobile Authenticator app, scan the QRCode and enter the generated code.
Note
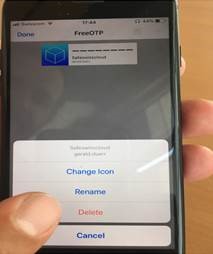
FreeOTP: After an unsuccessful attempt please delete the complete element in the free FreeOTP application - see picture. Then continue with a new attempt, it is an 8-digit number that you get in the Free OTP App.
