1. Client User Quickstart
Table of Contents
This Client User Manual helps you to get started with the Cloud Service Portal© and is intended for client users. It provides you with useful tips and information. In addition, you will learn step by step how to create a new user, use the integrated S3 Service Panel or create additional OpenStack projects.
Important
Die angezeigten Menüpunkte hängen stark von ihrer Bestellung und Berechtigung ab und können deshalb abweichen. Die Berechtigungen zum Cloud Service Portal© der User befinden sich in Organisation Management. Alle anderen Berechtigungen befinden sich in den jeweiligen Panel Sektionen, wie z.B. Quota, Usage dashboard, OpenStack oder S3 Storage Management. Bei Fragen nehmen Sie bitte Kontakt mit ihrem Enterprise Partner auf.
1.1. User interface overview
In the Cloud Service Portal© you manage your cloud services from a central location. Cloud services here means OpenStack projects (accounts) and user management (IAM).
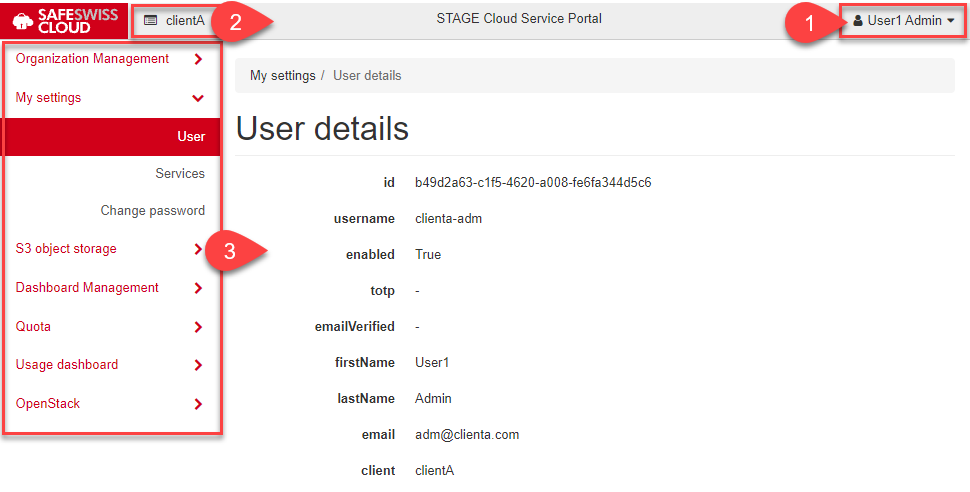
- In this area you will find the name of the currently logged in user and the currently used version of the Cloud Service Portal©. The user can change the settings of his user account and set a new password. The Sign-Out menu is also located here, which you can use to log out correctly.
- This area displays the name of the Client you are currently managing.
- This section contains the navigation pane with various items that structure the Cloud Service Portal© user interface. The main items are grouped by function. The management of the user permissions of the Cloud Service Portal© is located on the Dashboard Management page. The following pages are located in the navigation menu:
- Organization Management. In this menu item, you can add or remove new user accounts for users and manage the Cloud Service Portal© permissions of the users. You can also reset the password of a user here. User accounts allow other users to log in to the Cloud Service Portal© as well.
- Services. Here you can see the list and status of your cloud services (e.g. OpenStack) under Manage services. In order for a service to be used, it must have the status ACTIV.
- My Settings. Here you will find your user and organization data. You can also reset your password here.
- S3 Storage Management. With the help of this panel you can manage your S3 storage and objects. You can add or remove new buckets, upload or download objects. You can also manage your EC2 credentials for accessing the buckets.
- Dashboard Management Here you centrally manage all permissions of the Cloud Service Portal© with the help of user profiles.
- Quota. In this main menu you have an overview of the set quotas of your available OpenStack resources, like number of allowed OpenStack projects, compute, volumes and network. To easily manage your quotas, you can create profiles that give you full control of your project resources.
- Usage dashboard. Here you have access to your USAGE data. Two predefined reports Previous month and Current month list all USAGE data of the corresponding period. With the function Custom Usage Query you can create any individual query. An integrated export function allows you to save the report data locally.
- User error If, contrary to expectations, an error should occur in the Cloud Service Portal©, the Error detection function automatically saves the error under this point. With this entry important information about the cause of the error is stored for analysis. The status of the error shows you when it was fixed.
- OpenStack. With the functions under this panel, you can autonomously add or remove OpenStack projects and manage the permissions for them.
Note
Im Verlauf dieses Dokuments werden Anleitungen dazu gegeben, wie die häufigsten Alltagsaufgaben vorgenommen werden. Dabei werden Benutzer zumeist angewiesen, einen der Abschnitte in der Navigation zu öffnen und auf eines der dort vorhandenen Steuerelemente zu klicken. Sollte der jeweilige Navigationspunkt oder das betreffende Steuerelement nicht im Panel zu finden sein, ist das Feature sehr wahrscheinlich für den betreffenden User deaktiviert. Zudem können Enterprise Partner einige erweiterte Features ausschalten, um so Ihr Kunden-Panel einfacher und benutzerfreundlicher zu gestalten. Wenn Sie eine dieser erweiterten Optionen benötigen, sollten Sie sich an Ihren Enterprise Partner wenden.
1.1.1. Filter functions
Most of the Cloud Service Portal© pages that display a list have a filter function at the top of the screen that searches all columns when you enter a search text and filters accordingly.
1.2. Log in to the Cloud Service Portal©
For the registration you need an activated account, which includes the following information:
- Identity Provider - Das ist der Enterprise Partner Name (Realm)
- User Name / Email Address - With which you authenticate yourself
- Password - your initial user password, which you must change at the first login
The login process differs between a new user and an existing user. Please follow the appropriate steps:
1.2.1. Login New User
When a newly created user logs in for the first time, the following steps are usually necessary, depending on the policy:
- Please click the following link in your browser: `Cloud Service Portal© URL address`_ to log in.
SSC Cloud Service Portal© URL Address
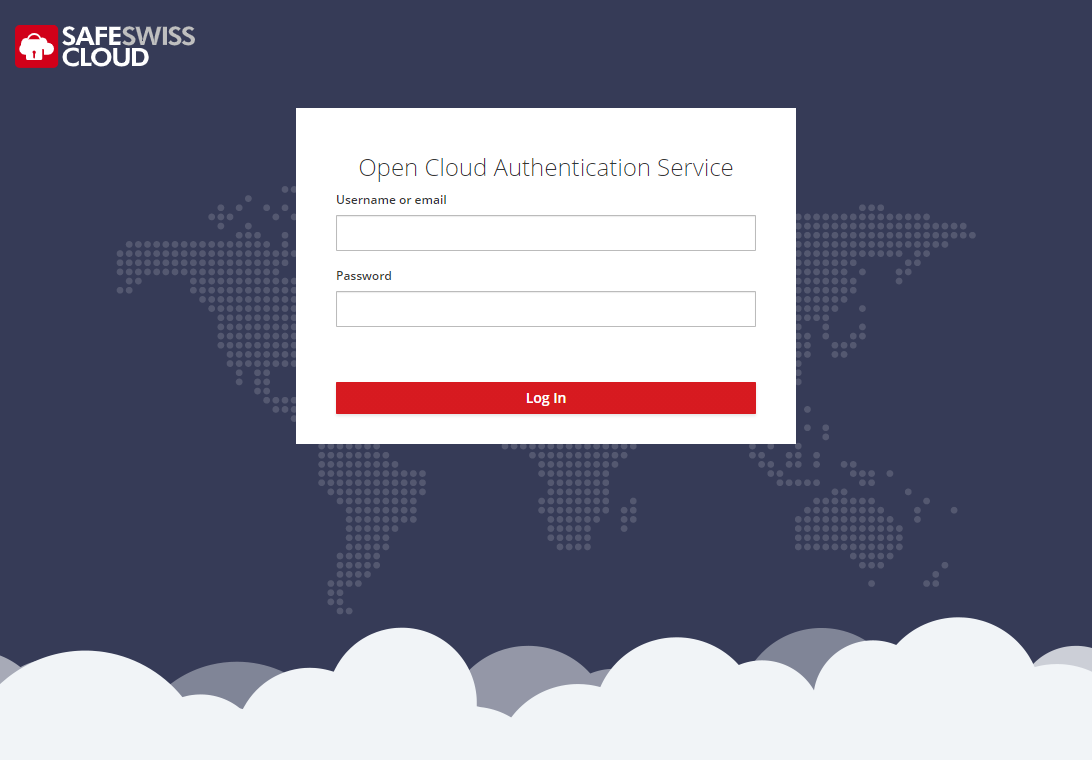
- Next, enter your username and password and click Log in
- You will then be prompted to change the password
- Finally, please configure the 2-factor authentication - For this you need an Authenticator application on your smart phone. Please follow the instructions on the screen.
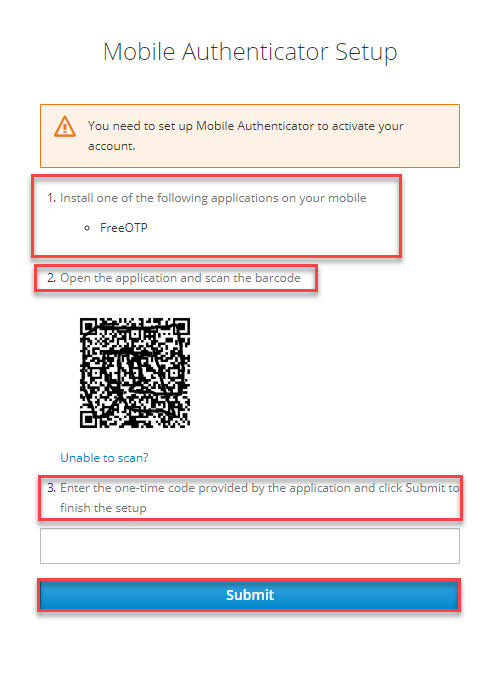
Scan the QR code with the Mobile Authenticator app, then enter the generated code.
If your login is successful, you will then be on the overview page in the Cloud Service Portal©.
1.2.2. Login existing user
To login to the Cloud Service Portal© please proceed as follows:
- Open your browser and enter the Cloud Service Portal© address you received with your documents or click on the link below.
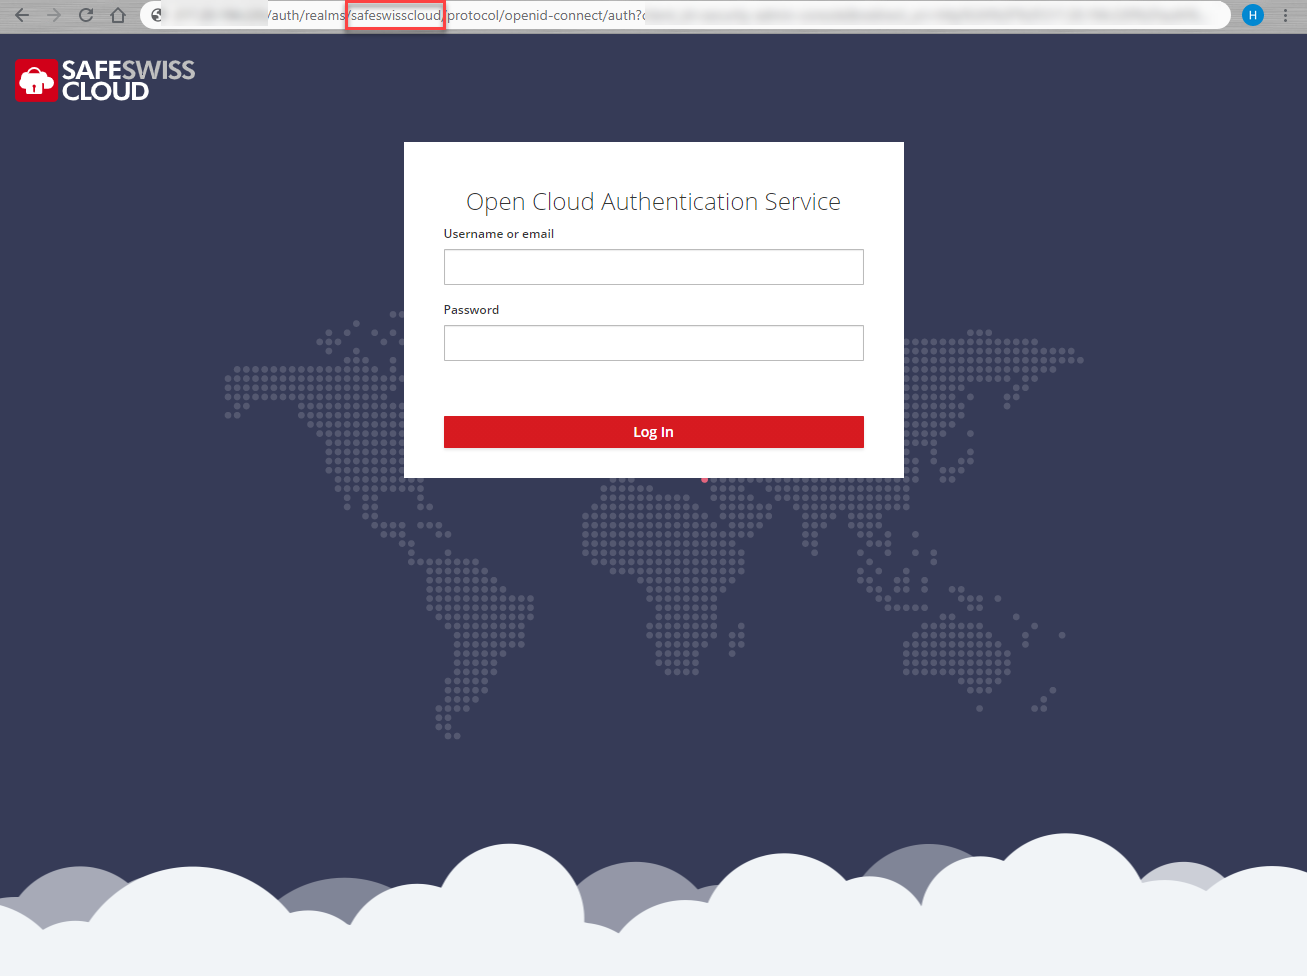
- You will now be automatically redirected to the Authentication-LogIn Mask of the Identity- and Access Management System.
- Please enter your user name or the registered email address and your password here.
- Then click on Log in
Cloud Service Portal© Address: SSC-Cloud Service Portal© URL-Adresse
Attention
To prevent pishing attempts, please check the URL of the login window. If the URL is correct, you will see the name of your Identity Provider and the DOMAIN .ewcs.ch after realms/.
Note
Please refer to the Keyword policy.
- You will then find yourself in the main menu of the Cloud Service Portal©
1.3. Logout from the Cloud Service Portal©
Caution
As you are automatically authenticated for all your registered cloud services (SSO) by successfully logging in to the Cloud Service Portal©, it is important to log out again correctly.
To do this, please proceed as follows:
- Click on the small arrow in the upper right corner next to your user name
- Click there on Sign Out

1.4. Change Password
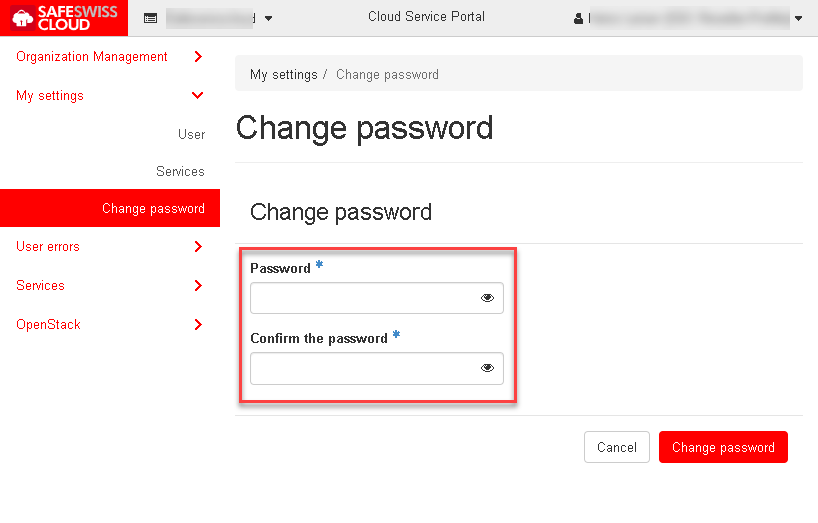
To reset the password for your user, please proceed as follows:
- Navigate to My Settings >> Change password on the left and enter the new password in the two fields.
- Confirm your entry with the Change password button.
Note
Please refer to the Keyword policy.
- A confirmation message appears.
1.5. Password Policies Cloud User Accounts
The password for the cloud user accounts must at least meet the following conditions:
| Condition | Anz |
|---|---|
| Password length (min.) | 12 |
| Special characters | 1 |
| Numbers | 1 |
Note
To meet these criteria, the password does not necessarily have to consist of a cryptic string of characters. Tip: Think of a few words, which you can combine with hyphens and add a few numbers. Example: Ab-in-die-Cloud-2019 would meet the criteria.
The following table describes the password policy characters that can be applied to user accounts:
| Property | Requirements |
|---|---|
| Permitted characters |
|
| Prohibited characters |
|
1.6. Several sessions of the Cloud Service Portal©
If you want to log in to the Cloud Service Portal multiple times, you can do this either in different browsers (e.g. 1st session Chrome, 2nd session Firefox), or in a “new incognito Windows”.
Note
Multiple logins in the same browser are NOT supported and will result in an error message (e.g. Forbidden (403) CSRF verification failed. Request aborted)