5. Quota Management
Table of Contents
With the Quota Management feature you have the USAGE of your OpenStack Cloud resources fully under your control. The principle is simple! With your client account you receive a defined maximum number of OpenStack resources (e.g. number of projects, vCPU, RAM, number of VM’s, number and size of storage volumes etc.) depending on your order and contract. You can now distribute these resources to your OpenStack projects and thus have full control over which of your projects uses how many resources. If you need a higher limit for certain resource types, e.g. vCPU, you can request this directly in the Cloud Service Portal©.
5.1. Example Quota Management vCPU
The following graphic illustrates the principle of quota management using the example of the vCPU resource type.
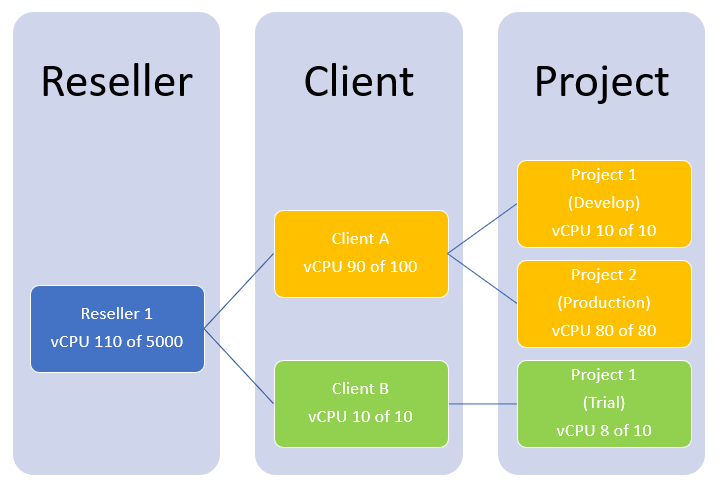
- Enterprise Partner 1: Hat 110 von 5000 vCPU’s an den Client A (100 vCPU)& Client B (10 vCPU) alloziert.
- Client A: (Production Customer)
- Allocated 10 of 100 vCPU’s to Project 1 (Develop).
- Allocated 80 of 100 vCPU’s to Project 2 (Production).
- Both projects have all their allocated resources already in use
- Client B: (Trial Customer)
- Allocated all 10 of 10 vCPU’s to Project 1 (Trial).
- Project Trial is already using 8 of the 10 vCPU’s.
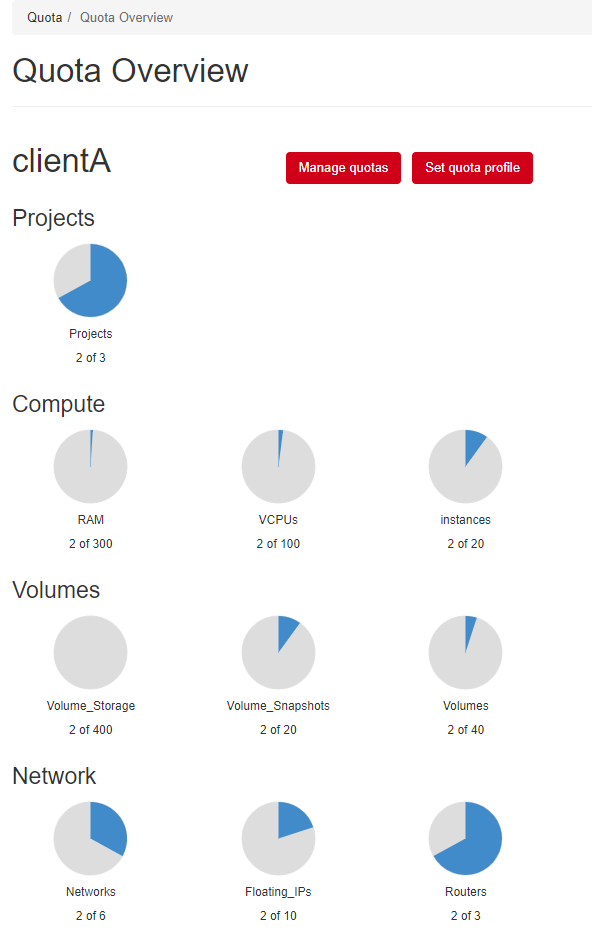
5.2. Quota Overview
To get an overview of your quotas, please navigate to Quota on the left and then click on Quota Overview.
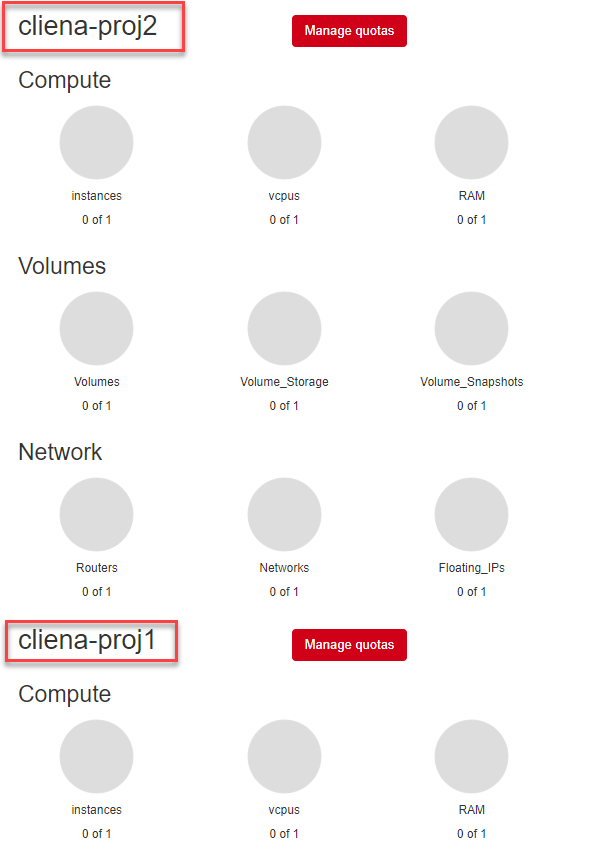
5.2.2. Project Quota
In the lower part of the screen you can see the quotas of your OpenStack projects.
5.3. Create Quota Profiles
For easier management of your resources, you can create your own quotas, which you can select and use later when creating OpenStack projects. Please proceed as follows:
- Navigate to Quota on the left and then click on Profiles.
- Now click on the Create profile button.
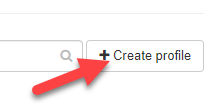
- Then fill in the form and confirm with create.
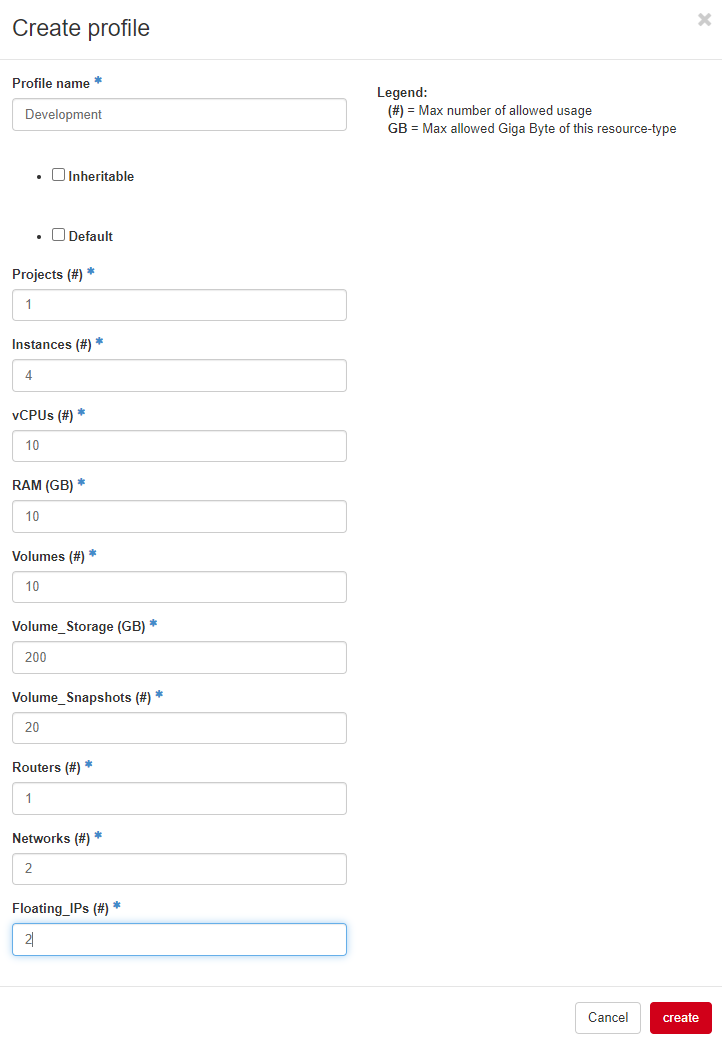
| Input field | Description |
|---|---|
| Profile name | Please enter a profile name |
| Inheritable | Option nur für Enterprise Partner, welche ein Profile für Clients sichbar machen wollen. |
| Default | Click this option if you want to make this profile the default. |
| Projects | Maximum number of OpenStack projects allowed |
| Instances | Maximum number of allowed instances (VM’s) |
| vCPUs | Total number of vCPUs allowed for all instances |
| RAM (GB) | Maximum allowed memory (GB) for all instances |
| Volumes | Maximum number of OpenStack volumes allowed for all instances |
| Volume_Storage (GB) | Maximum allowed storage A (GB) for all volumes |
| Volume_Snapshots | Total number of allowed volume_snapshots for all volumes |
| Routers | Maximum number of virtual routers allowed |
| Networks | Total number of private subnets allowed |
| Floating_IPs | Maximum number of floating IPs (Public IPs) allowed |
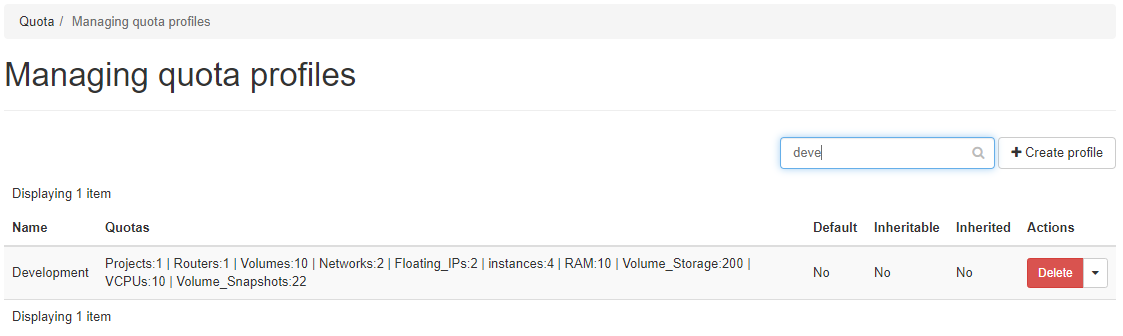
- The created Quota Profile is now displayed in the list
5.4. Update Quota Profiles
You can customize your created Quota Profiles on .
- To do this, navigate to Quota on the left and then click on Profiles.
- Now click on the small arrow next to the desired profile in the list and then on Update Profile.
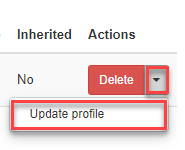
- Now make your changes and then confirm by clicking on the update button.
Important
- The quota changes made have NONE direct influence on the quotas of the existing projects, which originally used the previous quota when they were created.
- Only newly created OpenStack projects use the modified quota profile.
- To apply the quotas of a changed profile to one or more projects, please see Set quota profile.
5.5. Set quota profile
To assign a quota profile to one or more projects, please navigate to Quota on the left and then click on Quota Overview.
- Now click on the Set quota profile button in the middle of the screen

- First, select the quota profile that you want to assign to one or more projects.
- Then select the projects to which the profile is to be applied.
- Finally, confirm your selection with the apply profile button

Important
- If the available quota of the client is not sufficient for a resource type, an error message appears.
- Beispiel: Error: Insufficient Volume_Snapshots Quota.
- In this case, this resource type is not adjusted, all others are.
- Solution: Adjust your quota profile or request a higher quota for this resource type.
5.6. Request more quota
Ein User kann für seinen Client Account bei seinem Enterprise Partner eine höhere Quota für einen oder mehrere Ressource-Typen anfordern.
5.6.1. Client quota request
Example: The Volume_Snapshots quota of 20 has been used up and you now want to increase this to 30 for your client. To do this, proceed as follows:
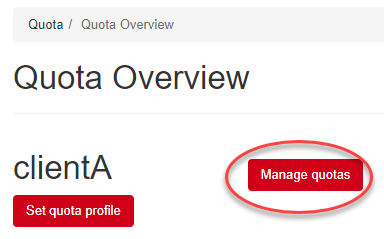
- Please navigate to Quota on the left and then click on Quota Overview.
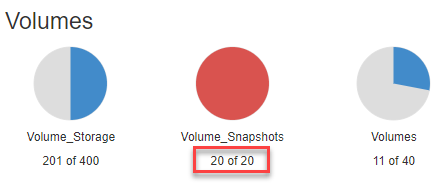
- You will now see the quota Volume_Snapshots in the client overview, which is exhausted.
- Now click on the Manage quota button to request a higher quota.
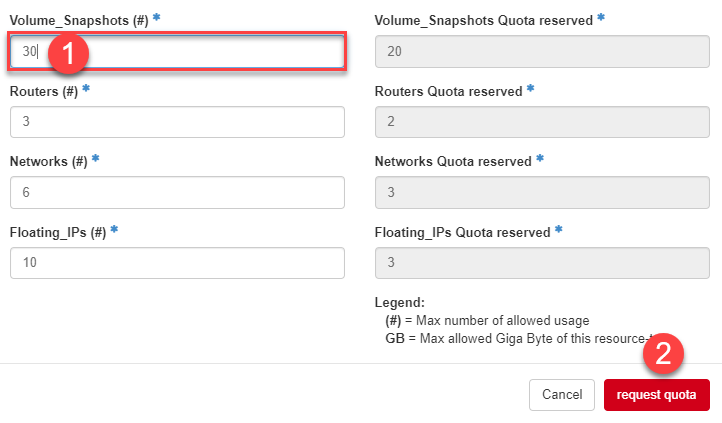
- Now enter (1) the desired Volume_Snapshots quota of 30 in the corresponding field.
- Then confirm (2) your entry with the request quota button
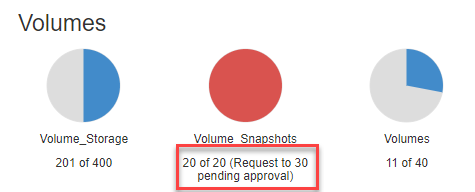
- The display in the quota overview now changes as follows.
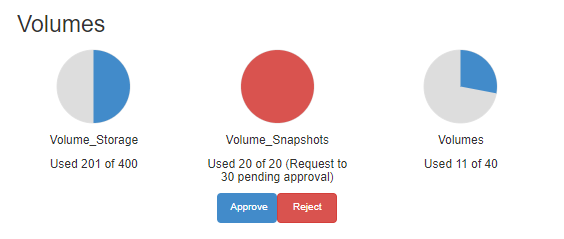
Note
Ihr Enterprise Partner erhält nun eine Benachrichtigung und sieht auf seinem Bildschirm den folgenden Request, welchen er mit Approve oder Reject beantworten kann.
5.6.2. Project quota update
To increase a quota of a resource type for a project, proceed as follows: Example: You want to increase the quota Volume_Snapshots for the project “clienta-proj1” from 10 to 20.
..note: Prerequisite is that your client account has enough free quota for this resource type.
- Please navigate to Quota on the left and then click on Quota Overview.
- Now scroll down to the project for which you want to adjust the quota.
- Now click on the Manage quotas button
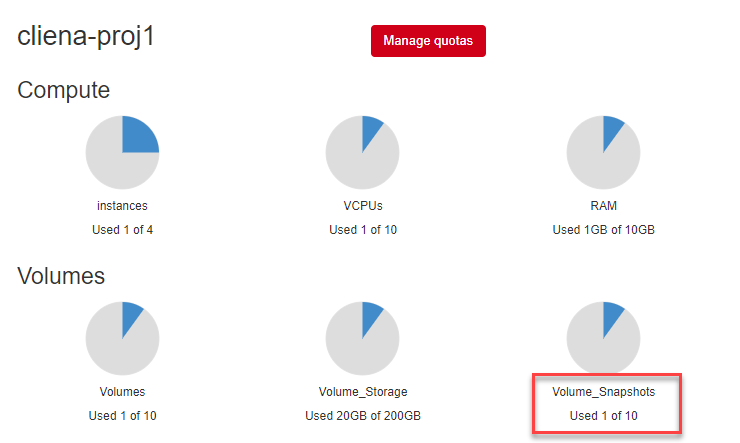
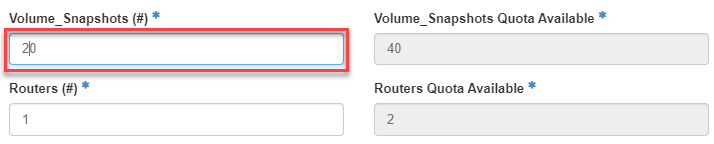
- Now enter the desired Volume_Snapshots quota of 20 in the corresponding field.
- Then confirm your entry with the button update quota
5.7. Manage permissions
Here you can assign the quota panel permissions for your users under Quota in Manage permissions. To do this, click on the Manage permissions button on the right of the line of the user concerned.
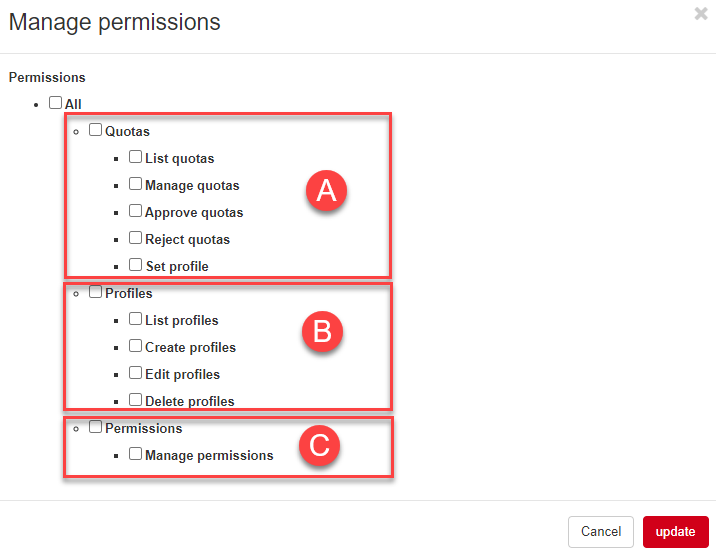
- In section (A) you define which permissions a user has at Quotas.
- In section (B) you allow a user to manage the quota profiles.
- In section (C) you assign the rights for the administration of the quota authorization of the users.