IPv6 in Horizon
OpenStack offers comprehensive support for IPv6, enabling the operation of pure IPv6 or dual-stack networks (IPv4 and IPv6). This guide walks you through creating an IPv6 network using the Horizon dashboard.
Info
IPv6 is currently limited to Region 2 (ch-ge1, Geneva).
Address Configuration
Instances in an IPv6-enabled network can obtain their addresses in various ways:
- SLAAC (Stateless Address Autoconfiguration) — VMs configure their own addresses based on Router Advertisements (RA).
- DHCPv6-stateless — address assignment via SLAAC, supplemented by DHCPv6 for additional config (e.g. DNS).
- DHCPv6-stateful — a DHCPv6 server assigns addresses and configuration parameters.
Warning
Our OpenStack currently supports only DHCPv6-stateless.
A /64 network from a predefined pool is assigned to you for IPv6 usage.
This guide walks through creating an IPv6 or dual-stack network in Horizon step by step.
1. Create a Network
- Navigate to Network > Networks.
- Click + Create Network.
- Enter a name (e.g.
my-ipv6-network) and click Next.
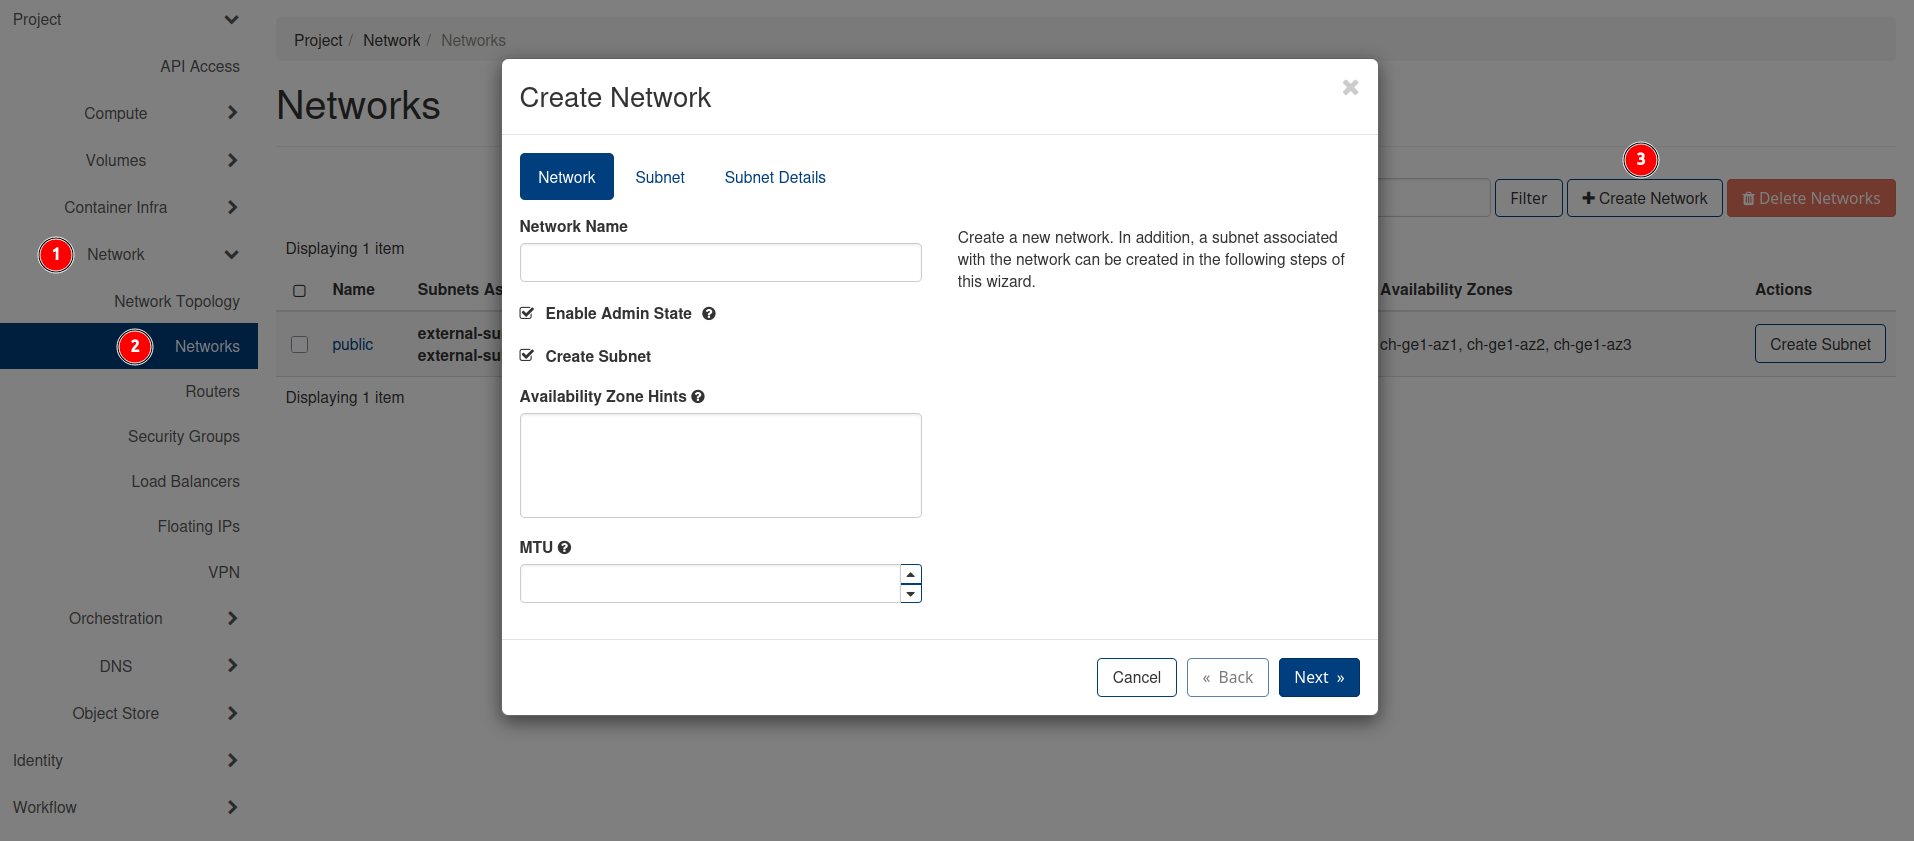
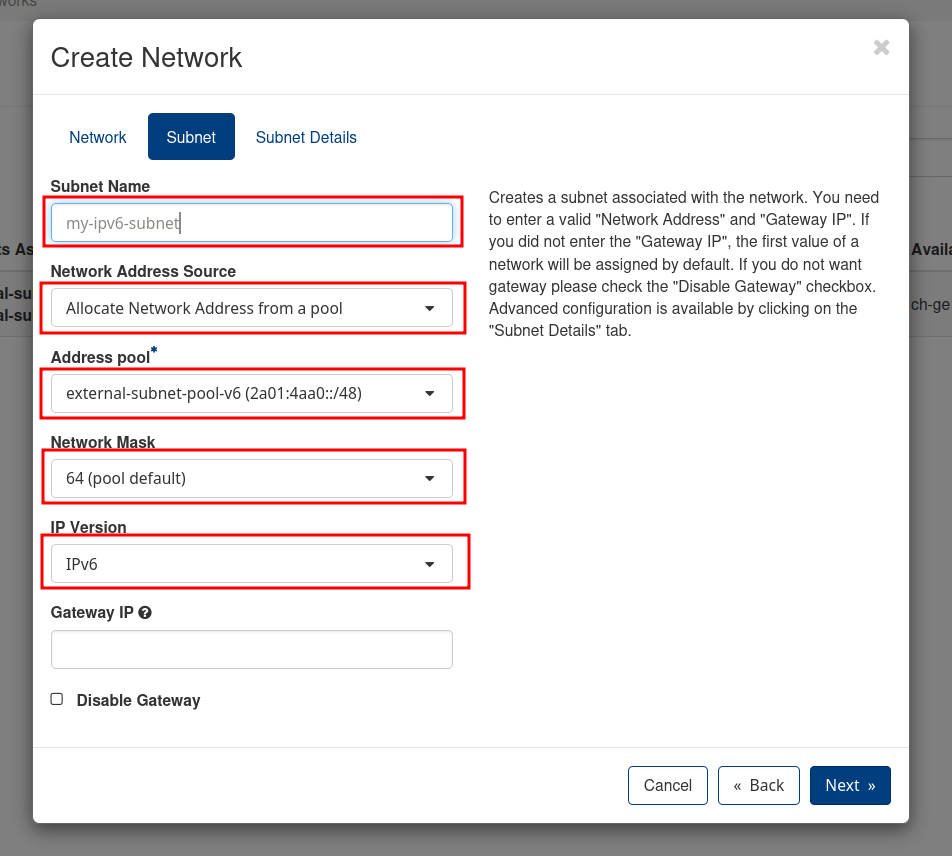
2. Create an IPv6 Subnet
- Subnet Name: Enter a name (e.g.
my-ipv6-subnet). - Network Address Source: Select Allocate Network Address from a Pool.
- IP Version: Select IPv6.
- Subnet Pool: Select the available
tenant-subnet-pool-v6. - Prefix Length: Keep the default
64. - Gateway IP: Leave empty for automatic assignment.
- Click the Subnet Details tab.
- IPv6 Address Configuration Mode: Select DHCPv6 stateless.
Warning
Address assignment currently only works with the DHCPv6 stateless setting.
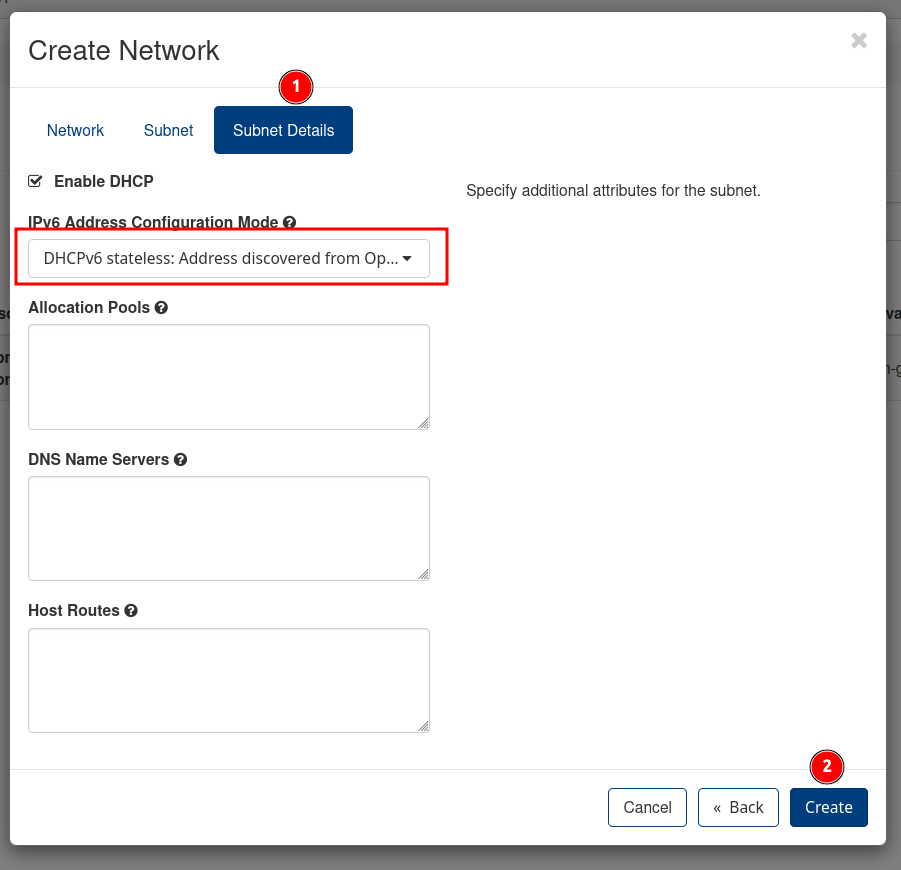
- Click Create.
Dual-Stack
To create a dual-stack network, add another subnet with IP Version IPv4 to the same network after this step.
3. Create a Router and Attach Subnet
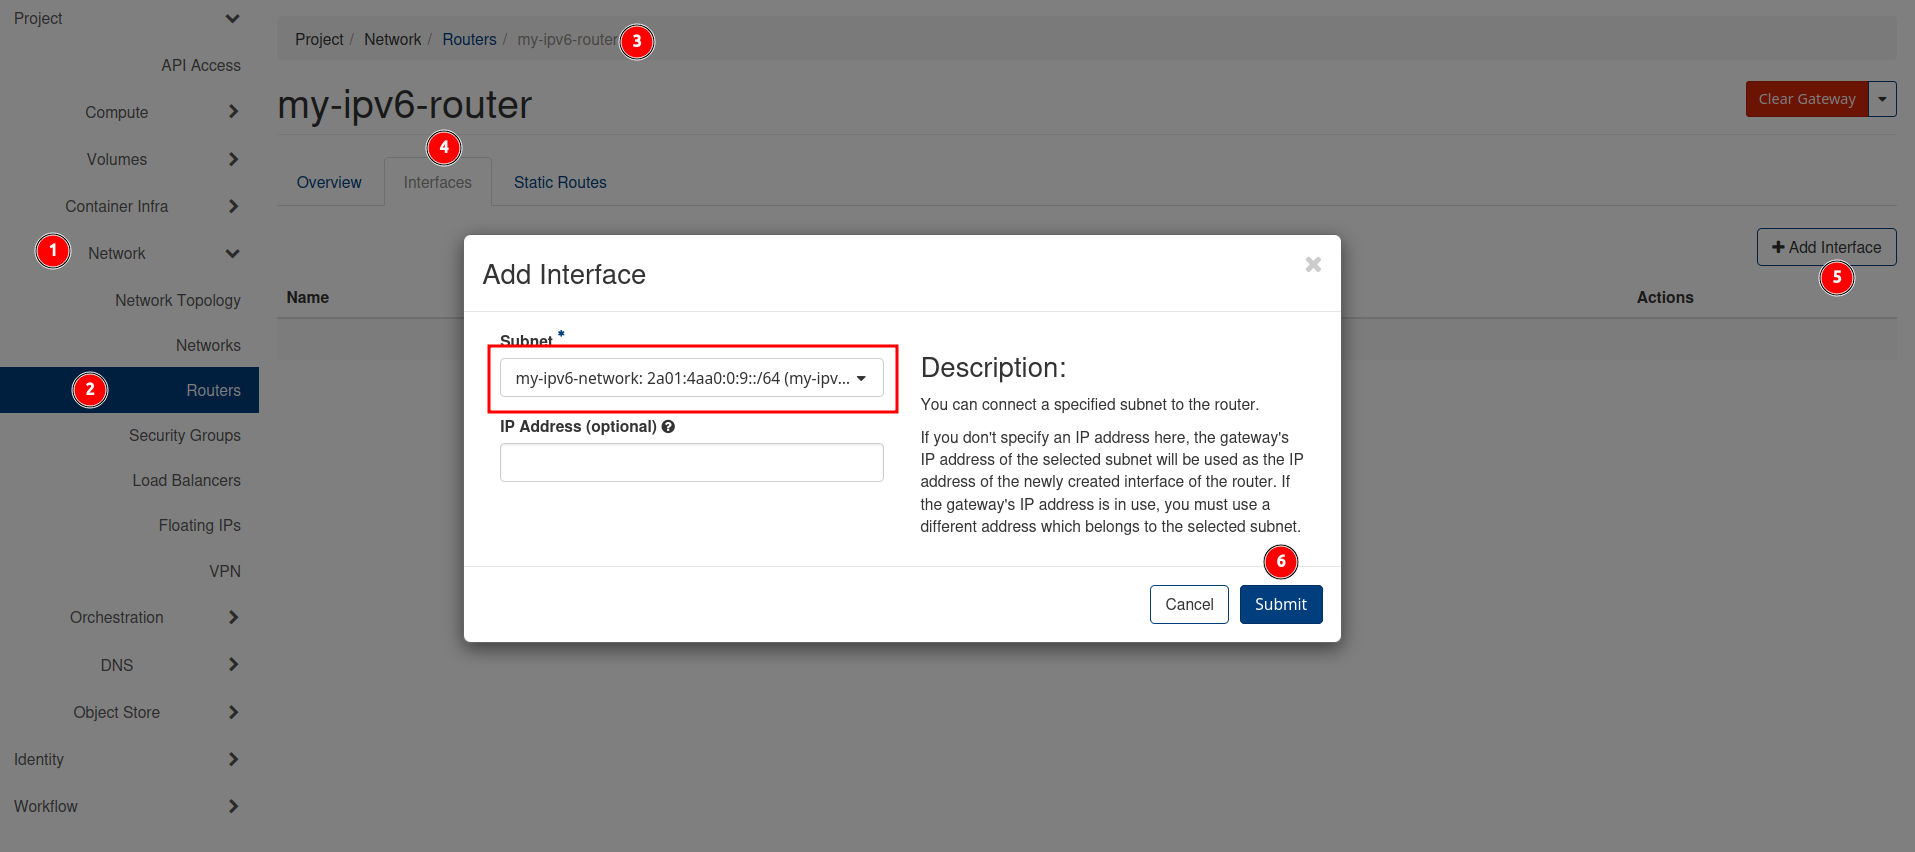
- Navigate to Network > Routers.
- Click + Create Router.
- Enter a name (e.g.
my-ipv6-router), selectpublicunder External Network, and click Create Router.
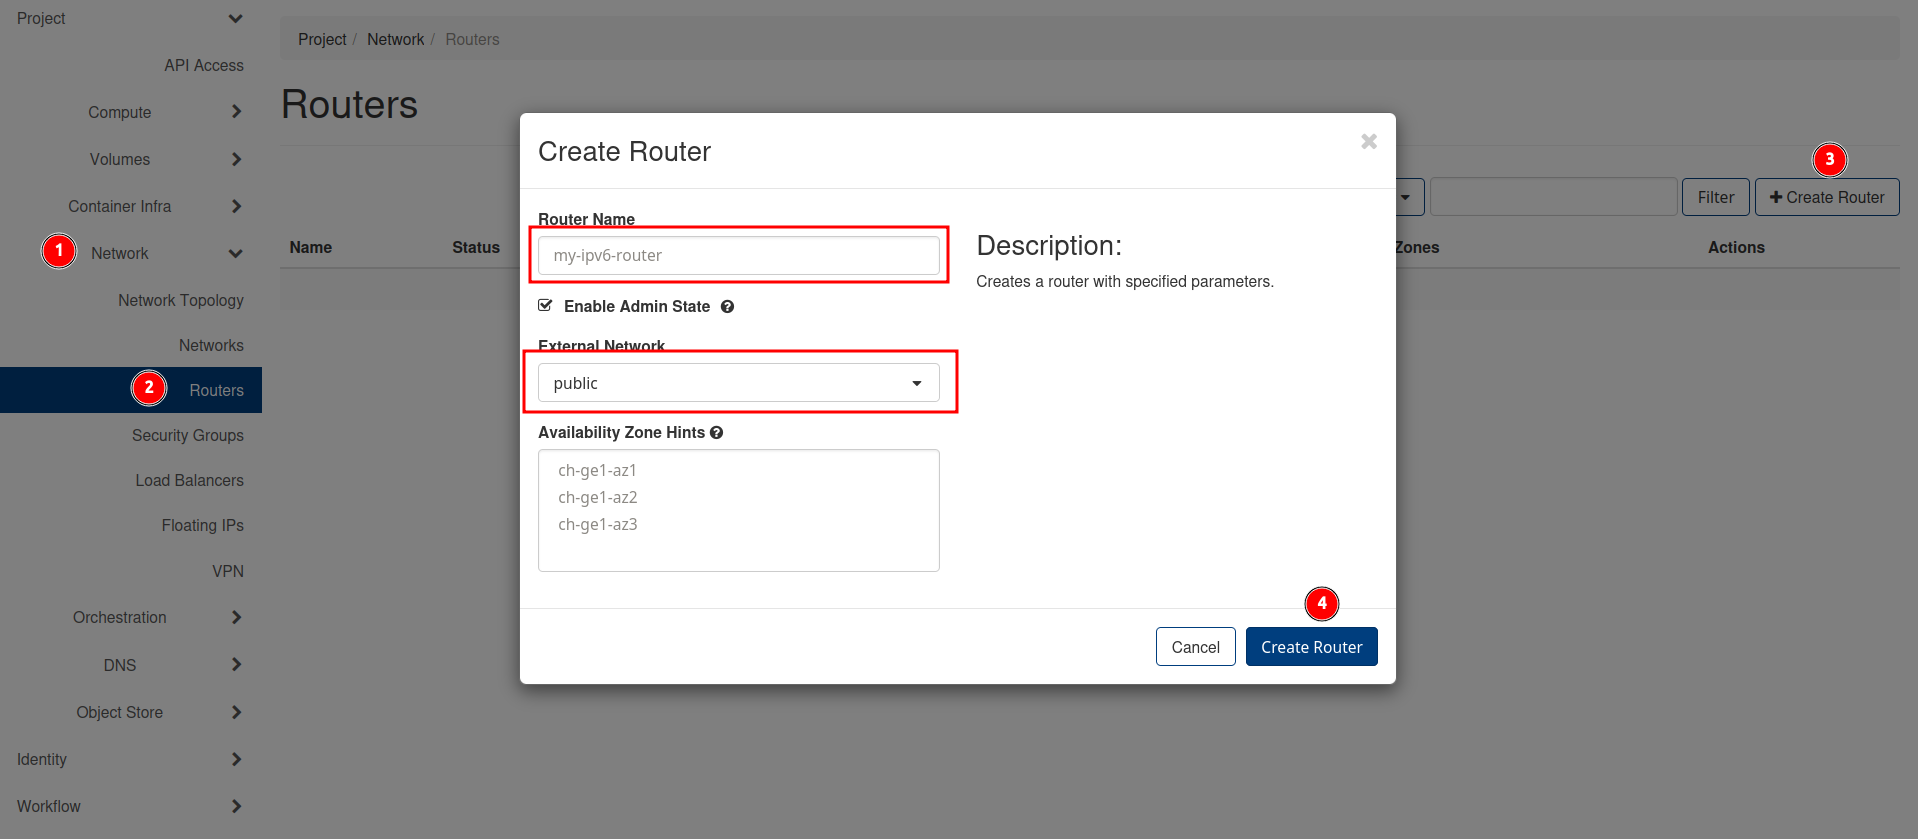
- Click the router name to open its detail view.
- Switch to the Interfaces tab.
- Click + Add Interface.
- Select the IPv6 subnet and click Submit.
4. Adjust Security Group
To access your VM (e.g. via SSH or ICMP/Ping), adjust the security group rules:
- Navigate to Network > Security Groups.
- Create a new security group or edit an existing one.
- Add the necessary Ingress rules:
- ICMP (Ping): Rule type
ALL ICMPorICMPv6, Remote::/0. - SSH: Rule type
SSH, Remote::/0.
- ICMP (Ping): Rule type
See Security Groups for details.
5. Launch a VM
- Navigate to Compute > Instances and click Launch Instance.
- Configure your VM as usual (Name, Flavor, Image, Key Pair).
- In the Networking tab, add your IPv6 network.
- In the Security Groups tab, assign the security group.
- Click Launch Instance.
Your VM should receive an IPv6 address and be accessible via the internet. For the CLI approach, see IPv6 — CLI.